Category: Wordpress Tooltip Plugin Document

Cómo crear y editar hermosos tooltips con el editor Gutenberg de WordPress en 3 minutos usando WordPress Tooltips Pro Plus 31.4.8

Hola, queridos usuarios del plugin de WordPress Tooltip, espero que este mensaje les encuentre bien y que estén teniendo un feliz día con su familia   “Recibimos una sugerencia de una usuaria del plugin de Tooltips de WordPress -> ‘Sería absolutamente fantástico si su plugin de Tooltips pudiera permitir a los usuarios crear tooltips directamente en la interfaz de Gutenberg,’ dijo ella:

### ¡Una Gran Idea para la Creación de Tooltips en Gutenberg!

Queridos desarrolladores del plugin de Tooltip,
Espero que este mensaje les encuentre bien y prosperando. Como usuario entusiasta de WordPress y del poderoso editor Gutenberg, quería compartir una pequeña sugerencia que creo podría marcar una gran diferencia para muchos usuarios.
Gutenberg ofrece una gran cantidad de funciones dinámicas que el editor clásico de WordPress simplemente no puede igualar, especialmente con su encantadora funcionalidad de arrastrar y soltar. ¡La capacidad de reorganizar bloques sin esfuerzo y personalizar diseños es un cambio radical! Sin mencionar que los bloques reutilizables nos permiten mantener la coherencia en nuestras publicaciones y ahorrar tiempo precioso, ¡una victoria si me preguntan!
Con todas estas fantásticas capacidades, sería absolutamente maravilloso si su plugin de Tooltips pudiera permitir a los usuarios crear tooltips directamente en la interfaz de Gutenberg. Imagine lo conveniente que sería para los usuarios incorporar tooltips en su contenido, todo mientras se aprovechan las fortalezas inherentes de Gutenberg. Esta integración podría empoderar aún más a la comunidad, haciendo más fácil enriquecer las publicaciones con información útil al alcance de la mano. No solo enriquecería la experiencia del usuario, sino que también elevaría el contenido que creamos.
¡Gracias por considerar esta sugerencia! Creo que realmente podría llevar su plugin al siguiente nivel y hacer la vida de muchos usuarios de WordPress mucho más brillante.
Saludos y los mejores deseos,

Nuestro desarrollador del plugin de Tooltip de WordPress revisó su ticket y creemos que es una gran sugerencia. Como resultado, desarrollamos la versión 31.4.8 de WordPress Tooltips Pro Plus para implementar la increíble solicitud de la usuaria

### Cómo Crear y Editar Hermosos Tooltips con el Editor Gutenberg de WordPress en 3 Minutos Usando WordPress Tooltips Pro Plus 31.4.8

1. Inicie sesión en WordPress como administrador.
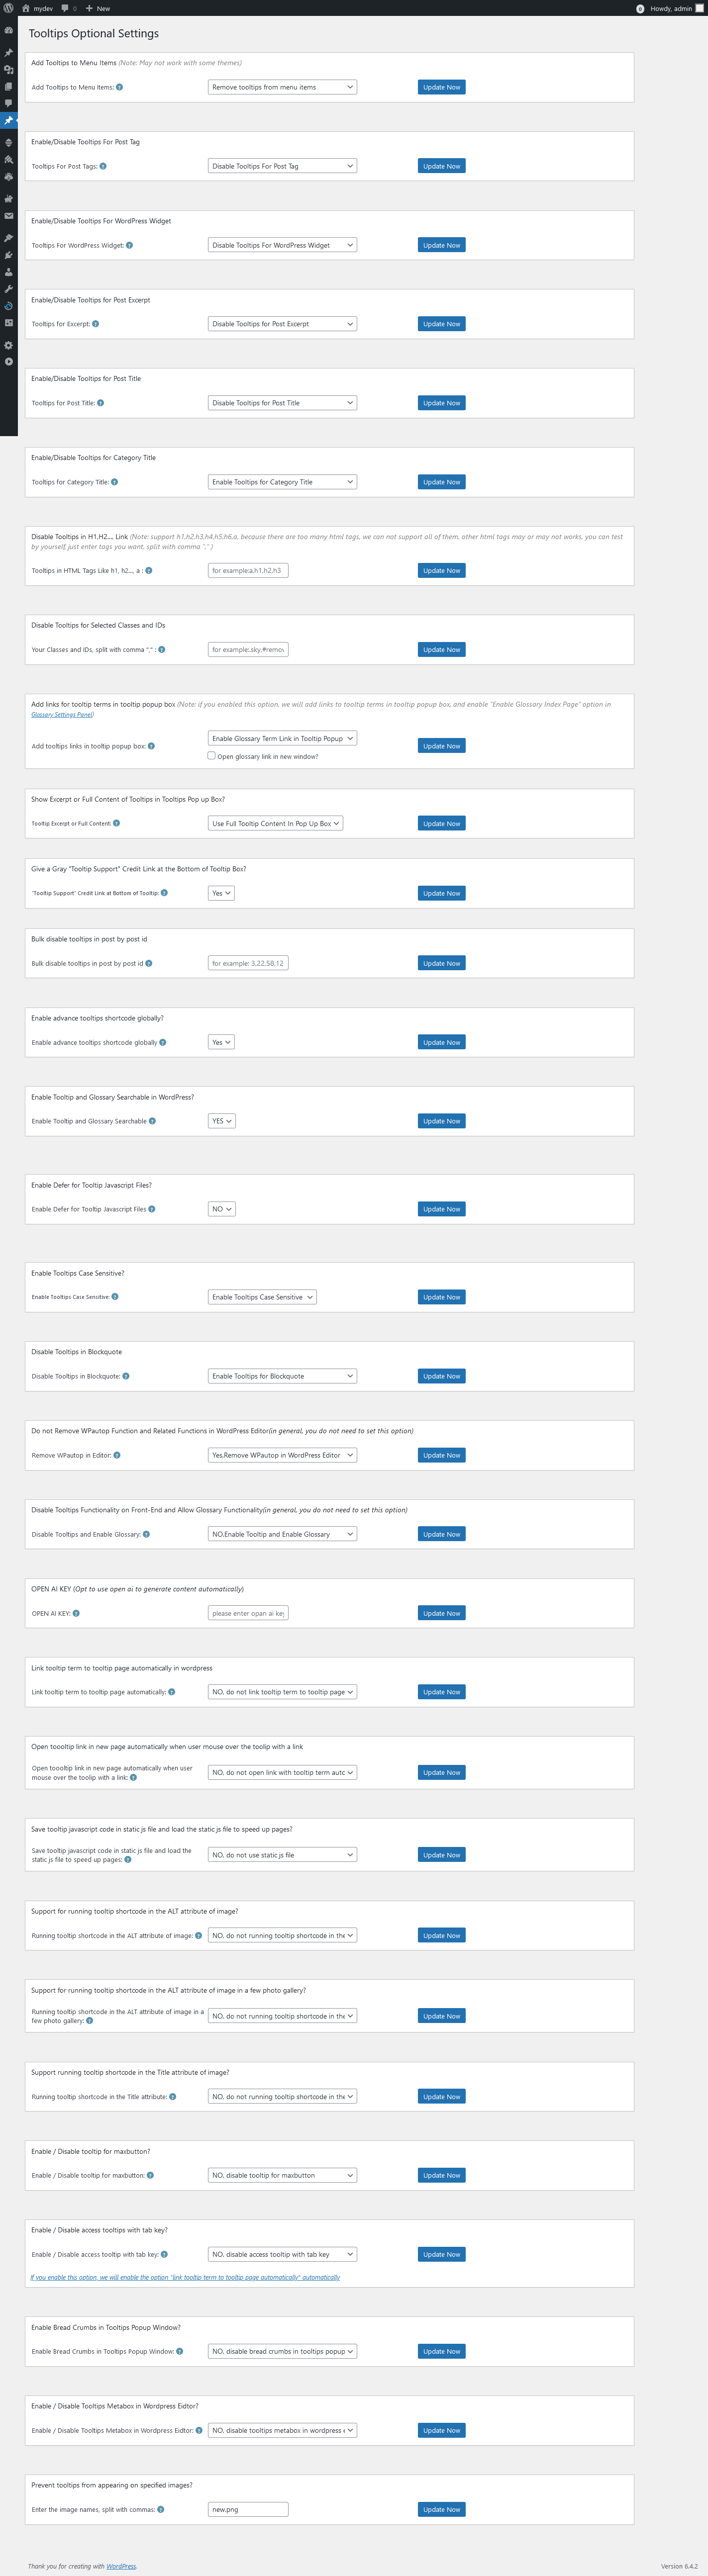
2. En el panel de WordPress, vaya al menú “Tooltips”. Luego, haga clic en el elemento de submenú “Configuraciones Opcionales”.
3. En ‘Configuraciones Opcionales’, encontrará una nueva opción: ‘Habilitar editor Gutenberg para Tooltips’ en la parte inferior del panel. Por favor, habilite esta opción.
4. Cuando cree o edite un término de tooltip de WordPress, notará que está utilizando el editor Gutenberg de WordPress, no el editor clásico.
Tenga en cuenta que esta función solo es compatible con la versión >= 31.4.8 del plugin WordPress Tooltip Pro Plus.

Gracias por la gran sugerencia; apoyar a Gutenberg para crear y editar tooltips de WordPress puede mejorar enormemente la experiencia del usuario y la funcionalidad:

### 1. Mejora de la Experiencia del Usuario
Interfaz Intuitiva: El editor basado en bloques de Gutenberg proporciona una interfaz más visual y amigable en comparación con el editor clásico. Los usuarios pueden ver fácilmente cómo se verá su contenido a medida que lo crean.
Funcionalidad de Arrastrar y Soltar: Los usuarios pueden reorganizar bloques fácilmente, lo que simplifica la personalización del diseño de sus publicaciones y páginas sin necesidad de conocer HTML o CSS.

### 2. Personalización Mejorada
Bloques para Contenido Personalizado: Con Gutenberg, los desarrolladores pueden crear bloques personalizados que permiten a los usuarios agregar características específicas u opciones de diseño adaptadas a sus necesidades. Esto puede mejorar significativamente lo que los usuarios pueden hacer con sus tooltips de WordPress.
Bloques Reutilizables: Los usuarios pueden crear bloques reutilizables para fragmentos de contenido que usan con frecuencia, lo que facilita mantener la coherencia entre las publicaciones y ahorrar tiempo.

### 3. Mejor Gestión del Contenido
Vista Previa de Cambios: Los usuarios pueden previsualizar sus cambios en tiempo real, lo que ayuda a asegurar que el resultado final cumpla con sus expectativas antes de publicar.
Control de Versiones: Gutenberg proporciona un mejor soporte para revisiones, permitiendo a los usuarios rastrear cambios a lo largo del tiempo y revertir a versiones anteriores si es necesario.
### 4. Futuro Asegurado
Alineación con las Tendencias de WordPress: El cambio hacia el editor de bloques es parte de la evolución de WordPress. Apoyar a Gutenberg ayuda a asegurar que el plugin siga siendo relevante y compatible con futuras actualizaciones del núcleo de WordPress.
Acceso a Nuevas Características: A medida que WordPress continúa desarrollando nuevas características para el editor de bloques, apoyar a Gutenberg permite que los usuarios aprovechen estas mejoras sin inconvenientes.
### 5. Mayor Flexibilidad
Soporta Características Adicionales: Al adoptar Gutenberg, los tooltips de WordPress pueden utilizar capacidades adicionales dentro del editor, como medios enriquecidos, opciones de diseño y contenido dinámico, lo que era más complicado de implementar en el editor clásico.
Integración más Fácil con Otros Plugins: Muchos plugins modernos de WordPress están diseñados para trabajar con Gutenberg. Apoyar a Gutenberg puede asegurar una mejor compatibilidad y funcionalidad con estas herramientas.
### Conclusión
En general, apoyar a Gutenberg para los tooltips de WordPress no solo cumple con las expectativas de los usuarios para una experiencia de edición moderna, sino que también les brinda herramientas para crear contenido más rico y atractivo. Esto se alinea con las tendencias más amplias en la gestión de contenido web y mejora la flexibilidad y el poder de WordPress como sistema de gestión de contenido.

Tagged with: , ,

How to Create and Edit Beautiful Tooltips with the WordPress Gutenberg Editor in 3 Minutes Using WordPress Tooltips Pro Plus 31.4.8

Hey, dear  WordPress Tooltip plugin users , I hope this message finds you are doing well and that you having a  happy day with your family 🙂   “We received a suggestion from a WordPress Tooltips plugin user -> ‘It would be absolutely fantastic if your Tooltip plugin could allow users to create tooltips directly within the Gutenberg interface,’ she said:

A Bright Idea for Tooltip Creation in Gutenberg!

Dear Tooltip Plugin Developers,

I hope this message finds you well and thriving! As an avid user of both WordPress and the powerful Gutenberg editor, I wanted to share a little suggestion that I believe could make a brilliant difference for many users.

Gutenberg offers such a wealth of dynamic features that the traditional WordPress editor simply can’t match, especially with its delightful drag-and-drop functionality. The ability to effortlessly rearrange blocks and customize layouts is a game changer! Not to mention, the reusable blocks allow us to keep our posts consistent and save precious time—a win-win if you ask me.

With all these fantastic capabilities, it would be absolutely fantastic if your Tooltip plugin could allow users to create tooltips directly within the Gutenberg interface. Imagine how convenient it would be for users to seamlessly incorporate tooltips into their content, all while utilizing the inherent strengths of Gutenberg.
This integration could empower the community even further, making it easier to enhance posts with helpful information at our fingertips. It would not only enrich the user experience but also elevate the content we create.

Thank you for considering this suggestion! I believe it could truly take your plugin to the next level and make the lives of many WordPress users that much brighter.

Cheers and best wishes,

Our developer of the WordPress Tooltip plugin reviewed her ticket, and we believe this is a great suggestion. As a result, we developed WordPress Tooltips Pro Plus version 31.4.8 to implement the user’s amazing feature request 🙂

How to Create and Edit Beautiful Tooltips with the WordPress Gutenberg Editor in 3 Minutes Using WordPress Tooltips Pro Plus 31.4.8

1: Login wordpress as admin.

2: In the WordPress dashboard, go to the “Tooltips” menu. Then, click on the “Optional Settings” sub-menu item.

3: In ‘Optional Settings,’ you will find a new option: ‘Enable Gutenberg Editor for Tooltips’ at the bottom of the panel. Please enable this option.

4: When you create or edit a WordPress tooltip term, you will notice that you are using the WordPress Gutenberg editor, not the classic editor. 🙂

Please note, this function only supported by  WordPress Tooltip pro plus plugin version >= 31.4.8


Thanks for the great suggestion, supporting Gutenberg for creating and editing wordpress tooltips can greatly enhance user experience and functionality:

1. Improved User Experience

Intuitive Interface: Gutenberg’s block-based editor provides a more visual and user-friendly interface compared to the classic editor. Users can easily see how their content will look as they build it.

Drag-and-Drop Functionality: Users can easily rearrange blocks, which makes it simpler to customize the layout of their posts and pages without needing to know HTML or CSS.

2. Enhanced Customization

Blocks for Custom Content: With Gutenberg, developers can create custom blocks that allow users to add specific features or layout options tailored to their needs. This can significantly enhance what users can do with their wordpress tooltips.

Reusable Blocks: Users can create reusable blocks for frequently used content snippets, making it easier to maintain consistency across posts and saving time.

3. Better Content Management

Previewing Changes: Users can preview their changes in real time, which helps in ensuring that the end result meets their expectations before publishing.

Version Control: Gutenberg provides better support for revisions, allowing users to easily track changes over time and revert to previous versions if necessary.

4. Future-Proofing

Alignment with WordPress Trends: The shift towards the block editor is part of WordPress’s evolution. Supporting Gutenberg helps ensure that the plugin remains relevant and compatible with future updates to the WordPress core.

Access to New Features: As WordPress continues to develop new features for the block editor, supporting Gutenberg allows users to take advantage of these enhancements seamlessly.

5. Increased flexibility

Supports Additional Features: By adopting Gutenberg, wordpress tooltips can utilize additional capabilities within the editor, such as rich media, layout options, and dynamic content, which were more challenging to implement in the classic editor.

Easier Integration with Other Plugins: Many modern WordPress plugins are designed to work with Gutenberg. Supporting Gutenberg can ensure better compatibility and functionality with these tools.

Conclusion

Overall, supporting Gutenberg for wordpress tooltips not only meets user expectations for a modern editing experience but also empowers them with tools to create richer, more engaging content. This aligns with broader trends in web content management and enhances the flexibility and power of WordPress as a content management system.


Tagged with: , , ,

How to prevent tooltips from appearing on specified image? WordPress tooltips pro plus 31.3.8 released

Hi, dear WordPress Tooltip  users, I hope you are doing well and having happy weekend with your family  🙂  An amazing wordpress tooltip user wrote to us : “Hello, I’d like to remove the tooltip (“home” text) which appears hovering on site logo (every page). I use tooltips for some images on my site so I’d need to remove the tooltip ONLY on the site logo image. Thanks in advance for your help.”

Our wordpress tooltip plugin support team replied:

Hi,

Thanks for the message 🙂

We are very happy to help you 🙂

Sorry for the problem, , would you please try:

1: In wordpress tooltip global settings panel, navigate to “enable tooltips for image” option, then select “I want to disable tooltips for image”

If you want to enable tooltips function for image yet, then you can try:

2: In wordpress tooltip global settings panel, locate to “tooltips for mage setting“ option, select “use rel attribute in img tag as content of tooltips for image”

We have detailed step by step document with screenshot at:
How to Avoid WordPress Tooltip Displayed on the Site Logo and Other Images?

How to Avoid WordPress Tooltip Displayed on the Site Logo and Other Images?

Hope this have a little help 🙂

Thanks, have a blessed day with your family 🙂

Best Regard,

WordPress tooltip plugin support

The wordpress tooltip user replied:

Subject:
remove tooltip from site logo ONLY

Message:
Hello,
I’d like to remove the tooltip (“home” text) which appears hovering on site logo (every page).
I use tooltips for some images on my site so I’d need to remove the tooltip ONLY on the site logo image.
Thanks in advance for your help.

Then our wordpress tooltip developer checked this ticket, and we decided to develop a new version to prevent tooltips from appearing on specified images, because we believe more users have similar requirement and we replied:

Hi,

Thanks for the reply 🙂

In this case, we have another solution, We will write a detailed document for you and we will reply you again 🙂

Thanks, have a blessed day with your family 🙂

Best Regards,
Wordpress tooltip plugin support

That’s why re developed a new version of wordpress tooltips plugin: WordPress tooltips pro plus 31.3.8 🙂

How to prevent tooltips from appearing on specified image?

1:If you are a customer of the WordPress Tooltip Pro Plus plugin, please click on the “download wordpress tooltip” link to get the latest version of the plugin. Make sure the version number is equal to or greater than 31.3.8. If you are a new user, you will need to purchase a license for the WordPress Tooltip Pro Plus plugin.

2: Log in to your WordPress site as wordpress admin and click the “Plugins” menu in the wordpress dashboard.

3: Deactivate and delete the existing version of the WordPress Tooltip pro plus plugin from the wordpress plugin panel.

5: Click the “Add New” button to upload the WordPress Tooltip pro plus plugin version >= 31.3.8 , and activate the plugin.

6: If you are new user of wordpress tooltip plugin, please check our  video of how to install wordpress tooltip at:  WordPress Tooltips Video Tutorial 3: How to upload and activate wordpress tooltips pro plugin

7: In the WordPress dashboard, go to the “Tooltips” menu. Then, click on the “Optional Settings” sub-menu item. The WordPress Tooltip menu appears as follows:

tooltips menu in wordpress tooltips pro plus 27.5.8

tooltips menu in wordpress tooltips pro plus 27.5.8

9: Within the WordPress optional settings panel, you will find we have added a new “Prevent tooltips from appearing on specified image” option. It looks like this:

Prevent tooltips from appearing on specified images

Prevent tooltips from appearing on specified images

As you can see in the ‘Prevent tooltips from appearing on specified images’ option, you can enter the image names. If you have multiple images, separate the names with commas.

In what situations should this setting be used?

Please note that this setting will only take effect when you set the value of ‘tooltips for image keyword matching mode’ to ‘Use ALT attribute in img tag as content of tooltips for image,’ which is the setting requested by the user.”

Hope this have a little help

Thanks for the great feature request, and sorry for the delayed response, our wordpress tooltip plugin developer have added a  license in your account as a Sorry, WordPress FAQ plugin is a powerful & fast jQuery FAQ solution to help wordpress blodder create / manage / edit FAQs easily, select default pretty FAQ template and custom FAQ style in back-end via a few clicks. With wordpress faq plugin, it is very easy to create and show accordion FAQs, display FAQs grouped by category…etc, easy to use, select pretty FAQ templates from pre-designed template, custom FAQ style in back-end via a few clicks, Support use OpenAI ChatGPT to generate high-quality content for WordPress F.A.Q and wordpress post automatically, support WooCommerce Product FAQ, Responsive FAQ, Multiple FAQ Templates, FAQs grouped by category, specified number of FAQ items for each FAQ… and more and more, you can find more details at:

WordPress FAQ Pro Plugin With WordPress Tooltips (version 4.6.6)

Thanks, have a blessed day with your loved ones

Best Regards,
Wordpress Tooltips Plugin Support Team

Tagged with: , ,

How to Replace the “Glossary” Link in the Glossary Breadcrumbs in the WordPress Tooltips Plugin? WordPress Tooltips Pro Plus version 31.2.8 has been released

Hi, dear  WordPress Tooltip plugin users,I hope this message find you are doing well and having happy weekend with your family.   We recently released version 31.0.8 of the WordPress Tooltips Pro Plus plugin in response to user feedback.  A user initially reached out for help with setting up their glossary page, expressing difficulty in getting it to look as desired. Our support team guided them with steps to create a new page and insert a shortcode. After some back and forth, the user successfully set up their glossary index, but they want to replace the glossary category links in the breadcrumb with links to another SEO page.

To address this, our support team informed the user that we are working on an update to allow customization of breadcrumb links. As a result, we developed the new version to implement this feature requested by the user.

This release aims to enhance user experience and resolve the specific requests made during the support interaction. Thank you to our users for their valuable input!

Also, our WordPress tooltip plugin developer said that it’s a great idea to support customizing the glossary link in the breadcrumb, allowing it to lead to another page. So we developed WordPress Tooltips Pro Plus version 31.2.8 to bring the idea to life for wordpress tooltip users. 🙂

How to Replace the “Glossary” Link in the Glossary Breadcrumbs in the WordPress Tooltips Plugin?

  • For Existing Users: To download the latest version of the WordPress Tooltip Pro Plus plugin, click the link labeled “download wordpress tooltip” Ensure that the version number is 31.0.8 or higher. New users will need to obtain a license for WordPress Tooltip Pro Plus plugin before proceeding.
  • Admin Access: Log into your WordPress site with administrator privileges.
  • Plugin Management: In your site’s dashboard, locate the “Plugins” section.
  • Remove Old Version: Deactivate and completely delete any previous versions of the WordPress Tooltip plugin from the plugins list.
  • Upload New Version: To install the updated plugin, click the “Add New” button and select the zip file of the new WordPress Tooltip plugin.
  • Activate the Plugin: After uploading, ensure you activate the plugin from the plugins panel to access its features.
  • For First-Time Users: New to the WordPress Tooltip plugin? Check out our video tutorial on installation: WordPress Tooltips Video Tutorial 3: How to Upload and Activate WordPress Tooltips Pro Plugin.
  • Access Settings: In your WordPress dashboard, navigate to the “Tooltips” menu and click on the “Glossary Settings” option. The menu should display as follows:
  • tooltips menu in wordpress tooltips pro plus 27.5.8
  • Customize Breadcrumb Links: Within the glossary settings panel, look for the option labeled “Customize Glossary Link in Glossary Breadcrumbs.” Here’s how it appears:

    At the bottom of the settings panel, you will find a dropdown menu where you can choose from various WordPress pages. Simply select a different page to replace the existing glossary category link in the breadcrumbs.

  • Important Note:
    If you prefer not to change the glossary link in the breadcrumbs, simply select “None” from the dropdown menu.


tooltips menu in wordpress tooltips pro plus 27.5.8

9: Within the WordPress glossary settings panel, you will find the “Customize Glossary Link in Glossary Bread Crumbs” option, it looks like this:

As you can see at the bottom of the WordPress Glossary Settings panel, we have added a new option called ‘Customize Glossary Link in Glossary Bread Crumbs’ In this option, there is a dropdown box listing all WordPress pages. You can simply select a different page from this dropdown to replace the glossary category link in the breadcrumbs.

Please note:

If you do not want to replace the glossary link in Glossary Bread Crumbs, simply select the item “None” in the dropdown box

We truly appreciate your fantastic suggestion! Should you have any additional feature ideas, please feel free to reach out to us. We’re excited to assist in bringing your vision to life!

Wishing you a wonderful day filled with joy alongside your loved ones!

Warm regards,
The Support Team at WordPress Tooltip Plugin

Tagged with: , , ,

How to change the color in which links appear against the wordpress tooltip box background for better visibility?

Hey Dear  users of  WordPress Tooltip plugin Hope this message find you are doing well and having happy day A wordpress tooltip user submitted a ticket, in which he asked:

I’d like change the color in which links appear(currently black) against the wordpress tooltip box background(currently dark-grey) for better visibility. An example can be found on my site demo.com – on the home page search term “independent sources”

Our WordPress Tooltips plugin developers checked the page and realized that we had implemented this feature request in the WordPress Tooltip plugin 14.9.2 a few years ago 🙂

How to Modify Link Colors for Tooltip Content in the Tooltip Box

1. Log in to your account on the WordPress tooltip plugin website.
2. Click on the “Download” menu item to get the WordPress tooltip pro plugin or wordpress tooltips pro plus plugin.
3. Access your WordPress admin panel.
4. Select “Plugins” from the WordPress admin menu, deactivate the previous version of the WordPress tooltip plugin, remove the old WordPress tooltip plugin.
5. In the “Plugins” menu, click on “Add New” at the top of the panel. Upload the ZIP file of the tooltip plugin that you downloaded from the WordPress glossary tooltip site. Activate the latest version of the WordPress tooltip plugin.
6. Click on the “Tooltips” menu item and Select the “Tooltip Style” submenu to open the “Tooltips Style Settings” panel, which should look like this:

Tooltips Style Panel in wordpress tooltips pro plus 28.2.8

Tooltips Style Panel in wordpress tooltips pro plus 28.2.8

7. At the bottom of the “Tooltips Style Settings” panel, you’ll find the “Color of Links in Tooltip Box” option. You can customize the link color using the color picker. Simply click on the color picker to choose your desired link color. If you decide not to customize the link color, you can remove it in the color picker popup window.
8. Don’t forget to click the blue “Save Changes” button to apply your modifications.

On the front end, when you hover over a tooltip term, you’ll see that the link colors in the tooltip pop-up box have been updated.

There are screenshot demo, you can see we made a link in the word “test” in the tooltip box:

change color of links for tooltip content in the tooltip box

change color of links for tooltip content in the tooltip box

You can see by default the link color is decided by your theme — it is green, but after changes link color has been changed to red.

Furthermore, you can customize tooltip background colors with a single click:

Please go to the panel “Tooltips Box Customize Setting”, you can customize colors in here, for example:

WordPress Tooltip Box Background (required field)

You can changer wordpress tootlip popup box background easily with wordpress tooltip color picker.

Wordpress Tooltip Box Background
and then please go ahead and unleash your creativity to customize your tooltips, making them truly shine. Feel free to explore the menu and make adjustments that suit your website’s aesthetic and needs.

Also, add different background colors for each wordpress tooltip term in wordpress post:

To customize your tooltip settings, start by logging into your WordPress site and navigating to the Tooltips menu.
Next, either add a new tooltip term or modify an existing one to access the WordPress tooltip editor. At the bottom of the content editor, you’ll discover the tooltip box customization settings panel. It appears as shown below:
Tooltip Term Background in Post in tooltips pro plus 18.1.8
Tooltip Term Background in Post (Tooltips Pro Plus 18.1.8)
As highlighted in the image, the tooltip box customization settings panel now includes a new option: “Tooltip Term Background in Post.” Here, you’ll find a color picker along with a selection box labeled “Disable the Option.” If you wish to add a background color to your WordPress tooltip term, select “Enable the Option” and choose your preferred color using the color picker.
Above this customization panel, there is another section titled “Custom Unique Style for This Tooltip.” Be sure to select “Yes, I will customize a unique style for this tooltip.”
Once you’ve entered the title and content for your tooltip in the editor, publish it. Then, insert the tooltip keyword into any WordPress post. When you view the front end, you’ll see that the background color of the tooltip term has changed according to your settings in the editor.
Repeat this process to create beautiful backgrounds for additional WordPress tooltip keywords, transforming your posts into vibrant and engaging content that encourages users to stay on your page longer.


Thanks, have a blessed day with your family
Best Regards,

WordPress Tooltips Pro Plus 31.1.8 has been released, It resolves conflicts between the member directory and the ‘Don’t load tooltip style and script for this page too’ option

Happy New Year! Dear WordPress Tooltip plugin users Hope this message find you are doing well and having happy new year holiday with your family Our wordpress tooltip developer developed a new wordpress tooltip pro plus plugin to resolves conflicts between the wordpress member directory and the ‘Don’t load tooltip style and script for this page too’ option 🙂

An amazing wordpress tooltips plugin user wrote to use:

Hello,

I like the pro plus version of tooltips. However, I am running into an issue.

I am getting an error in the browser console, this occurs when I disabled the script loading on an individual post, is this intentional? If not, do you have a fix for this?

Thank you

Our wordpress tooltip plugin developer checked the ticket, and we found yes, in wordpress editor, we added an metabox “Don’t load tooltip style and script for this page too”, it looks like this:

Disable specific tooltips

By checking the “Don’t load tooltip style and script for this page too” option within this meta box, tooltips will not be automatically loaded in that specific post. This option can improve your page load speed 🙂

We have recently added too many new modules in wordpress tooltips pro plus plugin, once of them is wordpress member directory module, and it conflicts with “Don’t load tooltip style and script for this page too” option, in wordpress tooltips plugin 31.1.8 we have fixed this problem 🙂

What is member directory?

Member directory is a list of members in your site, along with user name, user description, contact information…etc

How to build a member directory quickly?

1: click download wordpress tooltip to download latest version of wordpress tooltip lugin

2: upload the wordpress tooltip zip file into your wordpress site via wordpress plugins panel

3: activate wordpress tooltip plugin and click Tooltips menu item in wordpress dashboard

4: click member directory sub menu item, it looks like this:

member directory global settings in wordpress tooltip plugin

member directory global settings in wordpress tooltip plugin

5: As you can see, you will open member directory global settings panel, in which you can enable member directory or disable functions of member directory, also you can decide which user roles will be added into the member directory list, for example, you can just add authors into member directory to build a wordpress authro wall for your site, or you can just add teachers directory of your LMS system for your students…etc

6: In front-end, you can just insert the shortcode “member_directory” in any wordpress post, then you will find member directory which looks like this:

member directory orange style via wordpress tooltip

member directory orange style via wordpress tooltip

As you can see, users can click the  letter on the Navigation bar to open the list of users starting with that letter.

In the left column of the directory, we display the user name, in the right column of the member directory, we display user information and details of the user information, the user information is come from the biographical info field in wordpress user profile panel, it looks like this:

user profile of wordpress tooltip user

user profile of wordpress tooltip user

Once user change their information in wordpress user profile, wordpress tooltip will display the new user information in member directory too

In next version, we will add more options to help wordpress tooltip admin decide which user fields should be displayed in member directory

7: You can easily to custom the style from the wordpress glossary settings panel, the glossary settings panel looks like this:

glossary custom panel in wordpress glossary 16.0.8

glossary custom panel in wordpress glossary 16.0.8

As you can see, you can customize member-directory font background, border color, navigation, search form…etc in here, we believe we can re-use the same settings with glossary section, if we need dedicated settings for member-directory, we will build new panel for member-directory in the future

8: A faster method to change style for member directory is use our built-in template, for example, one click to change from orange template to  gray template, then it looks like this:

member directory gray template in wordpress tooltip

member directory gray template in wordpress tooltip

Thanks for the bug report, we have added a license for the wordpress life quote plugin to your account for a sincere thank you 🙂

WordPress Life Quotes Plugin is a lovely plugin to display random life quote on the bottom of wordpress post, life quote can serve as a source of inspiration and motivation for readers, including a random life quote in a wordperss post can help to break up the text and make the content more visually interesting and engaging and creating a connection with readers.

After activate the WordPress Life Quotes Plugin, at the end of the content of wordpress post , readers will find a lovely random life quote, everytime when user read your wordpress post, they will find different lovely life quote

Thanks, have a blessed day with your family 🙂

Best Regards,

WordPress tooltips plugin support

Tagged with: , ,

How to Replace the Glossary Category Link in the Glossary Breadcrumbs in the WordPress Tooltips Plugin? WordPress Tooltips Pro Plus version 31.0.8 has been released

Hi, dear users of  WordPress Tooltip plugin,I truly wish that this message reaches you in high spirits, surrounded by the joy and comfort of your dear family. 🙂 We just released the version 31.0.8 of wordpress tooltips pro plus, the reason for developing this version is that a few days before, we received a few support tickets from an amazing wordpress tooltip user:


Subject:
Help with the setup

Message:
Hello dear support team, I can’t quite  get to grips with the operation. I would like it to look
like this page (https://demo/lexikon). It looks like  this for me: (https://demo/lexiko
n) The pictures are not displayed and it doesn’t look nice. Can you help me?

Thank you
Regards


Our wordpress tooltip support replied:

Hi,
Hope this message find you are doing well and having happy weekend with
your family 🙂

Sir, it is greate to know you are SEO expert! 🙂

Sir, let’s solve the problem step by step:
1: Would you please create a new page in wordpress dashboard
2: In this new page, please insert glossary shortcode: [ glossary ]
3: Then in front end, the glossary page looks like this: https ://tooltips.org/glossary-demo/  🙂

Sir, we checked pages, the page https ://demo/lexikon is glossary index page which display all
glossary terms(with links) in one  page to improve SEO rank, it is a wordpress standard category archive page, in this page, we found your theme mentioned you need check theme panel and enable some functions in block…etc,  this page is designed by wordpress theme, so please just follow the top to check your theme  panel and enable image in backend, I
guess then you will find images display in this archive page 🙂

If you have any more question, please don’t hesitate to tell us, we are very happy to help you solve the problem asap we can

Thanks, have a blessed weekend with your loved ones 🙂
Best Regards,
Wordpress Tooltips Plugin Support ——————————————————————————————————–

The user replied:

Hello Support Team,
Thank you very much for your help! I have created a new page and inserted
the shortcode [ glossary ]  “https://demo/lexikon-glossary”. Now it looks exactly like  your glossary demo page. After I set the “Glossary Index Page:” in the “Glossary Settings”, I had  the archive page again. If I simply selected another page, the links were not correct. Unfortunately I can’t get to grips with the many functions, is it  possible that you can set this correctly for me? I would like to have it just like on your site:  https://tooltips.org/glossary-demo/
Many thanks and have a good start to the week.
Greetings
———————————————————————————————————–

Our wordpress tooltip plugin support team replied:

Hi,
Thanks for the reply 🙂

It is great to know you have created new page and insert the shortcode and it works well 🙂

Sorry for heard issues of

#1: After I set the “Glossary Index Page:” in the “Glossary Settings”, I had the archive page again.

#2: If I simply selected another page, the links were not correct. We ensure 100% we can solve  the problem for you 🙂

Sir, would you please give us a screenshot of glossary settings page, If you are using Firefox, you can find the screenshot tool by going to “More Tools” –“Customize  Firefox” and then you
can easily take screenshots:)

Also would you please tell us the page URLs in:
#1: After I set the “Glossary Index Page:” in the”Glossary Settings”, I had the archive page  again.

and #2: If I simply selected another page, the links were not correct.

So we can understand it better and help you solve the problem 🙂

Please note, in general, when you set up the option “glossary index page”, please do not select  the page https://demo/lexikon-glossary , because https://demo/lexikon-glossary is a glossary table page which created by the shortcode [ glossary ], and glossary index page is a category  archive page, you can use select another page in the option “glossary index page” 🙂

Thanks, have a blessed day with your loved ones 🙂

Best Regards,
Support

———————————————————————————————————–

And we checked settings for the amazing tooltip user, we reported to the user:

Hi,

Hope you are doing well and having happy days with your family 🙂

Sir, we have resolved the problem for you 🙂

We found you have two page  which inserted the the shortcode [ glossary ]:
1: Glossary & Lexikon the URL is: http://127.0.0.1/glossary-lexikon

2: Lexikon/Glossary http://127.0.0.1/lexikon-glossary

And you set up one of them as glossary index in glossary settings panel 🙂

Okay, A simple & fast way to resolve the problem is:
1 login wordpress

2 in wordpress dashbpoard, click wordpress “pages” menu item

3 please click “add new page” to create a new page, please just enter something like: “glossary index” as page title, you do not need to enter any content in the page, then just publish the
page 🙂

4 in wordpress dashboard, please click “tooltips” menu item, then click “Glossary Settings” sub-menu item

5 you will open Glossary Settings panel, in the option “Glossary Index Page”, please select the  new page “glossary index”, then click “save changes” in Glossary Settings panel

6 now when you open the page http://127.0.0.1/glossary-index, you will find the page is a glossary index page that like our glossary index page demo: https://tooltips.org/glossary/

7 then when you open http://127.0.0.1/lexikon-glossary or http://127.0.0.1/glossary-lexikon,
You will find it is a glossary page that that like our glossary page demo: https://tooltips.org/glossary-demo/

Would you please follow our guide to do a test? Any more question is welcome 🙂

Sorry for the delayed response again, our developer have added a wordpress FAQ pro plugin license in your account as a Sorry,  WordPress FAQ plugin is a powerful & fast jQuery FAQ
solution to help wordpress blodder create / manage / edit FAQs easily, select default pretty FAQ template and custom FAQ style in back-end via a few clicks. With wordpress faq plugin, it is very easy to create and show accordion FAQs, display FAQs grouped by category…etc, easy to use, select pretty FAQ templates from pre-designed template, custom FAQ style in
back-end via a few clicks, Support use OpenAI ChatGPT to generate high-quality content for WordPress F.A.Q and wordpress post automatically, support WooCommerce Product FAQ, Responsive FAQ, Multiple FAQ Templates, FAQs grouped by category, specified number of  FAQ items for each FAQ… and more and more, you can find more details at:

WordPress FAQ Pro Plugin With WordPress Tooltips (version 4.6.6)

Thanks, have a blessed day with your loved ones 🙂

Best Regards,
Support Team


Am 28.06.2024 um 21:38 schrieb
happysupport:

Hi ,

Hope you are doing well and having happy days with your family 🙂

Thanks for the message 🙂

We are very happy to help you 🙂

I am assign our developer to check it, we will reply you again 🙂

Thanks, have a blessed day with your family 🙂

Best Regards,
Wordpress Tooltips Plugin Support Team


Then the wordpress tooltip user replied:

Hi Support Team,

thank you very much for your commitment and efforts. It worked. I still have one small point.
When I click on Lexicon, I get to the following page: https://demo/lexikon-glossary That is also OK. If I now click on the first post: https://demo/glossary/302-weiterleitung Also OK.
In the post comes:

Home / Glossary Index Page / 302 Forwarding with the link (Glossary Index Page): https://demo/glossary

And this page should not be displayed, I would like to have the index again:
https://demo/lexikon-glossary

Is that possible?

Best Regards,
—————————————————————————————————————–

Then our wordpress tooltip support replied:

Hi,

Thanks for the reply 🙂

It is great to know it works 🙂

Thanks for the new report, our developer checked your page and checked our code, in the current time:

1: in glossary settings panel, we have option “enable bread crumbs on glossary term”, you can disable / enable these links in this option

2: currently, we have no function to change the link in bread crumbs, but our developer said he is start to add a new option to allow admin to select another page as this link in breadcrumbs, once we finished this new function, we will reply you again 🙂

Thanks, have a blessed day with your family 🙂

Best Regards,
Wordpress Tooltip Plugin Support


That’s why we need develop a new version of wordpress tooltip plugin to implement the feature request from the amazing wordpress tooltip user, Our wordpress tooltips plugin developer have released a new wordpress tooltips pro plus version 31.0.8 to resolve it for the user 🙂


How to Replace the Glossary Category Link in the Glossary Breadcrumbs in the WordPress Tooltips Plugin?

1:If you are a user of the WordPress Tooltip Pro Plus plugin, please click on the “download wordpress tooltip” link to get the latest version of the tooltips plus plugin. Make sure the version number is equal to or greater than 31.0.8. If you are a new user, you will need to purchase a license for the WordPress Tooltip Pro Plus plugin.

2: Log in to your WordPress site as an administrator.

3: Navigate to the “Plugins” menu in the dashboard.

4: Deactivate and delete the existing version of the WordPress Tooltip plugin from the plugins panel.

5: Next, upload the new version of the WordPress Tooltip plugin by selecting the “Add New” button and choosing the plugin’s zip file.

6: Once the file is uploaded, activate the plugin from the plugins panel to enable its features.

7: If you are new user of wordpress tooltip plugin, please check our  video of how to install wordpress tooltip at:  WordPress Tooltips Video Tutorial 3: How to upload and activate wordpress tooltips pro plugin

8: In the WordPress dashboard, go to the “Tooltips” menu. Then, click on the “Glossary Settings” sub-menu item. The WordPress Tooltip menu appears as follows:

tooltips menu in wordpress tooltips pro plus 27.5.8

tooltips menu in wordpress tooltips pro plus 27.5.8

9: Within the WordPress glossary settings panel, you will find the “Replace Tooltip Category Link in Glossary Bread Crumbs” option, it looks like this:

As you can see at the bottom of the WordPress Glossary Settings panel, we have added a new option called ‘Replace Tooltip Category Link in Glossary Breadcrumbs’ In this option, there is a dropdown box listing all WordPress pages. You can simply select a different page from this dropdown to replace the glossary category link in the breadcrumbs. 🙂

Please note:

1: If you do not want to replace the glossary category link in Glossary Bread Crumbs, just select the item “None” in the dropdown box

2: If you selected a wordpress page from the dropdown box, even if the glossary item does not belong a  glossary category, we will still display the selected wordpress page as the glossary category, if you do not want to replace the glossary category link in the glossary breadcrumbs, please simply select the item “None” from the dropdown box

Also, we are adding new option to allow wordpress tooltip editor to replace other links in the Glossary Bread Crumbs

Thanks for the great feature request, if you have any more feature request, please don’t hesitate to contact us, we are very happy to implement it for you 🙂

Thanks, have a blessed day with your family 🙂

Best Regards,

WordPress tooltip plugin support

Tagged with: , , ,

Understanding Glossaries: Their History, Importance, and the Relevance of WordPress Glossaries

What is a Glossary?

A glossary is a specialized list of terms along with their definitions, typically related to a specific subject or field. It acts as a reference tool that helps clarify jargon and technical language, making complex concepts more accessible to readers. Glossaries are found in various areas, including education, technical writing, medicine, and law, serving to enhance understanding and facilitate effective communication.

The Purpose of a Glossary

Glossaries serve several important functions:

  1. Clarification of Jargon: Many fields of study involve specialized terminology. A glossary provides clear definitions, helping newcomers understand complex language.
  2. Enhanced Learning: For educational contexts, glossaries aid students in mastering the vocabulary specific to a subject, which promotes better comprehension and retention.
  3. Improved Communication: In professional and casual settings, glossaries ensure that all parties have a shared understanding of critical terms.
  4. Localization: For global audiences, glossaries help maintain the intended meaning of terms when translated.

The Historical Context of Glossaries

The concept of glossaries dates back to ancient civilizations. Scholars in ancient Greece and Rome compiled lexicons and glossaries to preserve knowledge and assist readers in understanding complex language. Some of the earliest glossaries, dating back to the first century AD, contributed to academic work across various disciplines. As education systems developed, particularly during the Middle Ages, glossaries became integral to university curricula. The advent of the printing press in the 15th century facilitated the production and distribution of glossaries, allowing them to reach broader audiences. In the modern era, glossaries continue to find relevance in academic, technical, and digital content, emphasizing the necessity of clear communication in specialized domains.

What is a WordPress Glossary?

A WordPress glossary adapts traditional glossary concepts to the WordPress platform. It provides a dedicated section or feature where users can find definitions of terms relevant to the site’s content. This enhances user experience by allowing visitors to grasp key concepts quickly and efficiently. It looks like this:

Thanks for contact us, we are very happy to help you 🙂   For help you better, would you please: give us as much text as possible, please don't try to describe complex problems with just a simple sentence 🙂 if you have a screenshot, please upload it to https://screenshot.net or just upload it to Read More
Hey, you are super welcome! This is required field, please enter your name, thank you very much 🙂
Tooltip for Search Form Scan QR Code On Your Mobile
Would you please try to be as detailed as possible? So we can understand your requirement, Thanks 🙂
Easy to use In setting panel, you can add/edit/delete any tooltip, you can add new tooltips categories, assign tooltips to categories.
Video  Tooltip = More Conversions
Your browser does not support the HTML5 Video element.Video Tooltip Wordpress Tooltips Pro support any multimedia content. Hover the trigger, you'll see a wordpress multimedia tooltip that contains text, charts, image, audio, video, wiki, PDF, WooCommerce products, QR Code, even third-party data sources, and more..
Strawberry & Cream Torte $9 only! On sale! Limited Time Offer! SHOP NOW

Features of a WordPress Glossary

  1. Definitions and Explanations: Lists terms alongside their definitions, allowing users quick reference to jargon or technical language.
  2. Enhanced Navigation: It organizes terminology for easy access, helping users find terms while exploring related content.
  3. Search Functionality: Users can type a term and quickly find its definition, improving usability.
  4. Alphabetical Listings: Well-structured glossaries enable users to navigate terms easily.
  5. Tooltips: Some glossaries display definitions when hovering over specific terms, facilitating seamless access to information.

Why Include a Glossary on Your WordPress Site?

  1. Improved User Experience: Glossaries help visitors who encounter unfamiliar terms, allowing for greater engagement with the material.
  2. Increased Engagement: Quick access to definitions encourages users to spend more time on your site, exploring additional content.
  3. Search Engine Optimization (SEO): Glossaries create extra content that improves search visibility, potentially drawing more visitors to your site.
  4. Establishing Authority: By providing well-researched definitions, a glossary positions your site as a trusted information source.
  5. Facilitating Learning: For educational websites, glossaries are vital in helping learners navigate complex subject matter.

Why Should WordPress Webmasters Use a WordPress Glossary Plugin?

Using a WordPress glossary plugin can greatly simplify the creation and management of a glossary:

1. Simplicity and Ease of Use

These plugins are user-friendly, allowing webmasters to create and manage glossaries without extensive technical skills. Most provide intuitive interfaces for adding and editing terms.

2. Customization Options

Many plugins offer customization features, allowing you to tailor the appearance and functionality of the glossary to match your site’s design.

3. Search Functionality

Built-in search features let users locate terms quickly, enhancing the overall user experience.

4. Tooltip Capabilities

Plugins often include tooltips, providing definitions when users hover over terms, thus improving accessibility.

5. Automatic Linking

Some plugins can automatically link defined terms throughout your website, ensuring consistent presentations and easier access to definitions.

6. Responsive Design

Most plugins are designed to work seamlessly across devices and screen sizes, ensuring accessibility for all users, whether on a smartphone, tablet, or desktop.

7. SEO Optimization

Glossary plugins allow for SEO-friendly URLs and metadata for better search visibility, positively impacting your site’s ranking.

8. Time Efficiency

Glossary plugins automate many processes, allowing webmasters to save time and redirect focus to other essential site aspects.

9. Support and Updates

Popular glossary plugins typically offer dedicated support and regular updates, ensuring functionality with the latest WordPress versions.

10. Comprehensive User Documentation

Good plugins come equipped with extensive documentation, helping users maximize their potential through installation guidelines and customization tips.

More details please check WordPress glossary features

Implementing a Glossary on Your WordPress Site

Creating a WordPress glossary involves several straightforward steps:

Step 1: Choose the Right Glossary Plugin

Explore various glossary plugins available in the WordPress Plugin Directory. Popular options include:

  • WordPress Tooltips Plugin: Features tooltips, an easy-to-navigate glossary page, and automatic linking of terms.  (pro version download URL: https://tooltips.org)
  • WP Glossary: A simple solution for creating a glossary section on your site.
  • Glossary by Tips and Tricks HQ: Offers customization options suitable for any site.

Step 2: Install and Activate the Plugin

After choosing a plugin, install and activate it through your WordPress admin dashboard. Navigate to “Plugins” > “Add New,” search for your chosen plugin, click “Install Now,” and then “Activate.”

Step 3: Configure Plugin Settings

Navigate to the plugin’s settings page to customize options like glossary appearance, tooltip behaviors, and search features.

Step 4: Add Terms and Definitions

Begin building your glossary by adding terms and their definitions using the plugin interface.

Step 5: Organize the Glossary

Consider grouping terms by topics or using an alphabetical listing to enhance usability.

Step 6: Embed the Glossary on Your Site

Decide where to make your glossary accessible; creating a dedicated page, linking it in your navigation menu, or embedding it in related articles are effective options.

Step 7: Keep the Glossary Updated

Regularly update the glossary as your website evolves, ensuring you include relevant new terms and remove outdated ones.

Conclusion

Glossaries play a critical role in enhancing understanding and navigation within specialized fields. As they have evolved over time, their relevance has only increased, especially with the rise of digital content. A WordPress glossary offers tailored solutions to improve user experience, engagement, and SEO performance. By utilizing a WordPress glossary plugin, webmasters can create an engaging resource that enriches their site and positions it as an authoritative source of information in its niche. Implementing a glossary on your WordPress site not only empowers your audience with valuable knowledge but also enhances your site’s overall effectiveness in conveying information.

Tagged with: , ,

What is WordPress Glossary?

Unlock the power of knowledge with our WordPress Tooltips Pro Plus plugin! Easily build stunning glossaries, lists, and directories that enhance user understanding and engagement.

A glossary is more than just a list of terms; it’s a valuable educational tool that dates back to ancient lexicons. By integrating glossaries into your WordPress site, you offer your visitors immediate access to complex terminology, making their experience smoother and more enjoyable.

You can create a versatile knowledge base, including glossaries, WooCommerce product lists, member directories, and much more. Customize your formats to match your brand’s style, and seamlessly integrate third-party data sources—turning your site into a powerful knowledge hub!

Tagged with: , ,

Support for ‘Display glossary term exactly as entered in the title column of the glossary’ in WordPress Tooltips Free Plugin 9.8.9

Hello, valued users of the WordPress Tooltip plugin! I trust you are having a wonderful weekend with your loved ones. We recently received an inquiry from a user regarding the WordPress Tooltip plugin, specifically asking how to resolve the “upper and lower case” concern on the glossary page. The user stated:”

hello,
as I reported on wordpress.org I noticed that if I enter a tooltip
with a capital letter, for example: “Open source” he replaces all
the words in my paragraph from open source to Open source.

Is it possible to make it keep the upper and lower case of the
paragraph and not be replaced by the tooltip title?

Thanks!

Our wordpress tooltip support team replied:


Hi,

Hope you are doing well and having happy days with your family

Thanks for the message

We are very happy to help you

Because we have many plugin versions with different functions, Would you please tell us:
1 the plugin version you are using
2 the URL related with the problem
3 a little more details to tell us how to find the problem in the URL

I will assign our developer to check it and solve it for you?

Thank you so much for the bug report, we’d like give you a gift as a THANKS, would you please make a $0 fake order at our demo:
https://tooltips.org/product/show-tooltips-in-woocommerce-products/
And then we can add one of our pro plugin license in your account as a THANKS?

Thanks, have a blessed day with your family

Best Regards,
Wordpress Tooltips Plugin Support Team

The amazing user replied:

Hello,

1. i am using version 9.6.9
2. my URL is: (removed)
3. As you can see all tooltips are with a capital initial letter but
within the article I wrote them with a lower case letter. For example
browser became Browser or even fork became Fork. I think it’s because
the tooltips were recorded with a capital letter but I think it’s not
correct that in the text they display capital letters without much
meaning.

What I expect is for the text to stay true to what I wrote in the
article.

Thank you.

Our wordpress tooltip support team replied:

Hi,

Thanks for the reply

I am assign our developer to check it and we will reply you again

Thanks, have a happy day with your loved ones

Best Regards,
Wordpress Tooltip Support

Then, our WordPress Tooltips plugin developer examined the user’s page, and we understood what the problem was. A few years ago, another amazing user of the WordPress glossary requested that glossary terms be displayed in uppercase to create a more dignified appearance. Now, we have developed a new version of the WordPress Tooltips plugin, version 9.8.9, to address this issue for WordPress Tooltip users. They can choose their preferred style for glossary terms.

How to Set Up Glossary Term Capitalization in the WordPress Tooltips Plugin?

1. Update to the most recent version of the WordPress Tooltips available through the WordPress Tooltips Free Plugin on WordPress, or easily obtain it at no cost from our official WordPress Tooltips download link.”

2. Within the WordPress admin panel, select the ‘Tooltips’ option from the menu. Then, from the list that appears, click on ‘Glossary Settings.’. This action will display the ‘Glossary Settings’ section, as depicted in the screenshot provided below:”

3. As you can see, at the bottom of the glossary settings panel, there is a new option: “Glossary Term Capitalization”. In the “Glossary Term Capitalization”, there are 2 options:

a: Display glossary term exactly as entered in the title column of the glossary

b: Uppercase letters display for glossary term in the title column of the glossary


with wordpress tooltips pro plus version, we added two more options:

c: Lowercase letters display for glossary term in the title column of the glossary

d: Initial Capitalization of glossary terms in the glossary title column

It looks like this:

In the case of what the user is requesting, you can simply select the option: “Display glossary term exactly as entered in the title column of the glossary” from the “Glossary Term Capitalization” dropdown box, then in the glossary page, you will find we have fulfilled your requirement:  “What I expect is for the text to stay true to what I wrote in the article”

You can select options based on your needs

We got a question from a new user of wordpress tooltip user, he asked us what is glossary, okay, a glossary looks like this:

Thanks for contact us, we are very happy to help you 🙂   For help you better, would you please: give us as much text as possible, please don't try to describe complex problems with just a simple sentence 🙂 if you have a screenshot, please upload it to https://screenshot.net or just upload it to Read More
Hey, you are super welcome! This is required field, please enter your name, thank you very much 🙂
Tooltip for Search Form Scan QR Code On Your Mobile
Would you please try to be as detailed as possible? So we can understand your requirement, Thanks 🙂
Easy to use In setting panel, you can add/edit/delete any tooltip, you can add new tooltips categories, assign tooltips to categories.
Video  Tooltip = More Conversions
Your browser does not support the HTML5 Video element.Video Tooltip Wordpress Tooltips Pro support any multimedia content. Hover the trigger, you'll see a wordpress multimedia tooltip that contains text, charts, image, audio, video, wiki, PDF, WooCommerce products, QR Code, even third-party data sources, and more..
Strawberry & Cream Torte $9 only! On sale! Limited Time Offer! SHOP NOW

The Historical Context of Glossaries

The history of glossaries can be traced back to ancient civilizations, where scholars documented specialized vocabulary to preserve knowledge and facilitate understanding. For example, in ancient Greece and Rome, lexicons served a similar purpose, providing definitions and usage notes for complex language. Some of the earliest known glossaries date back to the first century AD, when scholars began compiling lists of terms for various fields of study. As languages evolved, the need for glossaries continued. During the Middle Ages, the rise of universities produced scholarly works that often included glossaries to aid students in comprehending new ideas. The advent of the printing press in the 15th century made it easier to produce and disseminate glossaries, thus expanding their reach and influence. In the modern era, glossaries have found a permanent place in educational materials, academic papers, and digital content, further reflecting the necessity of clear communication in an increasingly specialized world.

Understanding Glossary and WordPress Glossary

A glossary is a list of terms in a specific domain of knowledge, accompanied by definitions. It serves as a reference tool to help users understand jargon, technical language, or specialized terminology that may not be immediately clear. Glossaries are commonly found in books, articles, websites, and various forms of media, providing clarity and enhancing comprehension for the audience. In many fields, having a glossary is essential, as it can help bridge the gap between experts and novices. For instance, in technical or academic writing, the inclusion of a glossary allows readers to grasp complex ideas without getting lost in unfamiliar vocabulary. Businesses, educators, and organizations often create glossaries tailored to their specific contexts to ensure effective communication. In the digital realm, a WordPress glossary is a similar concept adapted for websites built on the WordPress platform. It offers a dedicated section where visitors can find definitions of terms relevant to the content of the website. A WordPress glossary enhances user experience, making it easier for visitors to understand key concepts and terminologies used throughout the site.

Why Use a WordPress Glossary?

  1. Improved User Experience: A well-structured glossary provides quick access to definitions, making it easier for users to follow along with your content. This is especially beneficial for websites that use technical terms or industry-specific jargon. By having a glossary, you reduce the likelihood of visitors leaving the site due to confusion or frustration.
  2. Increased Engagement: When users can easily find explanations for terms they encounter, they are more likely to stay on your site longer. An engaging experience can lead to increased page views, longer session durations, and higher user satisfaction.
  3. SEO Benefits: Search engines appreciate content that is clear and valuable to users. By including a glossary, you can create additional content optimized for relevant keywords, potentially improving your site’s visibility in search engine rankings. Additionally, when users share your glossary on social media or link to it from their own websites, you gain backlinks that can further enhance your SEO efforts.
  4. Establishing Authority: A glossary showcases your expertise in your field. By providing clear definitions and information, you can position your website as a reliable resource for visitors seeking knowledge in your area of specialization. This can help build trust and credibility with your audience.

Implementing a WordPress Glossary

Creating a glossary on your WordPress site can be simple. Many plugins are available that facilitate the inclusion of a glossary feature with minimal effort. These plugins often allow you to input terms and definitions, generate additional pages for each entry, and even apply tooltips that display definitions when users hover over terms in your content. For those who prefer a more customized approach, you can create a dedicated page or section for your glossary, manually inputting terms and descriptions. Organizing the glossary alphabetically or categorically can enhance its usability, allowing users to quickly find the information they seek.

Conclusion

In conclusion, a glossary plays a vital role in enhancing understanding and communication, making it an essential tool for various forms of content, especially in specialized fields. A WordPress glossary not only aids users in navigating complex terminology but also contributes to improved SEO, increased engagement, and the establishment of your website’s authority. By integrating a glossary into your WordPress site, you provide valuable resources for your audience while simultaneously enhancing their overall experience.

If you have any more question, please don’t hesitate to contact us, we are very happy to implement your feature request to build a better and better wordpress glossary plugin

Thanks, have a blessed weekend with your family

Best Regards,

WordPress tooltips plugin support team


Tagged with: , , , ,
Top