Tag: wordpress tooltip

How to Replace the Glossary Category Link in the Glossary Breadcrumbs in the WordPress Tooltips Plugin? WordPress Tooltips Pro Plus version 31.0.8 has been released

Hi, dear users of  WordPress Tooltip plugin,I truly wish that this message reaches you in high spirits, surrounded by the joy and comfort of your dear family. 🙂 We just released the version 31.0.8 of wordpress tooltips pro plus, the reason for developing this version is that a few days before, we received a few support tickets from an amazing wordpress tooltip user:


Subject:
Help with the setup

Message:
Hello dear support team, I can’t quite  get to grips with the operation. I would like it to look
like this page (https://demo/lexikon). It looks like  this for me: (https://demo/lexiko
n) The pictures are not displayed and it doesn’t look nice. Can you help me?

Thank you
Regards


Our wordpress tooltip support replied:

Hi,
Hope this message find you are doing well and having happy weekend with
your family 🙂

Sir, it is greate to know you are SEO expert! 🙂

Sir, let’s solve the problem step by step:
1: Would you please create a new page in wordpress dashboard
2: In this new page, please insert glossary shortcode: [ glossary ]
3: Then in front end, the glossary page looks like this: https ://tooltips.org/glossary-demo/  🙂

Sir, we checked pages, the page https ://demo/lexikon is glossary index page which display all
glossary terms(with links) in one  page to improve SEO rank, it is a wordpress standard category archive page, in this page, we found your theme mentioned you need check theme panel and enable some functions in block…etc,  this page is designed by wordpress theme, so please just follow the top to check your theme  panel and enable image in backend, I
guess then you will find images display in this archive page 🙂

If you have any more question, please don’t hesitate to tell us, we are very happy to help you solve the problem asap we can

Thanks, have a blessed weekend with your loved ones 🙂
Best Regards,
Wordpress Tooltips Plugin Support ——————————————————————————————————–

The user replied:

Hello Support Team,
Thank you very much for your help! I have created a new page and inserted
the shortcode [ glossary ]  “https://demo/lexikon-glossary”. Now it looks exactly like  your glossary demo page. After I set the “Glossary Index Page:” in the “Glossary Settings”, I had  the archive page again. If I simply selected another page, the links were not correct. Unfortunately I can’t get to grips with the many functions, is it  possible that you can set this correctly for me? I would like to have it just like on your site:  https://tooltips.org/glossary-demo/
Many thanks and have a good start to the week.
Greetings
———————————————————————————————————–

Our wordpress tooltip plugin support team replied:

Hi,
Thanks for the reply 🙂

It is great to know you have created new page and insert the shortcode and it works well 🙂

Sorry for heard issues of

#1: After I set the “Glossary Index Page:” in the “Glossary Settings”, I had the archive page again.

#2: If I simply selected another page, the links were not correct. We ensure 100% we can solve  the problem for you 🙂

Sir, would you please give us a screenshot of glossary settings page, If you are using Firefox, you can find the screenshot tool by going to “More Tools” –“Customize  Firefox” and then you
can easily take screenshots:)

Also would you please tell us the page URLs in:
#1: After I set the “Glossary Index Page:” in the”Glossary Settings”, I had the archive page  again.

and #2: If I simply selected another page, the links were not correct.

So we can understand it better and help you solve the problem 🙂

Please note, in general, when you set up the option “glossary index page”, please do not select  the page https://demo/lexikon-glossary , because https://demo/lexikon-glossary is a glossary table page which created by the shortcode [ glossary ], and glossary index page is a category  archive page, you can use select another page in the option “glossary index page” 🙂

Thanks, have a blessed day with your loved ones 🙂

Best Regards,
Support

———————————————————————————————————–

And we checked settings for the amazing tooltip user, we reported to the user:

Hi,

Hope you are doing well and having happy days with your family 🙂

Sir, we have resolved the problem for you 🙂

We found you have two page  which inserted the the shortcode [ glossary ]:
1: Glossary & Lexikon the URL is: http://127.0.0.1/glossary-lexikon

2: Lexikon/Glossary http://127.0.0.1/lexikon-glossary

And you set up one of them as glossary index in glossary settings panel 🙂

Okay, A simple & fast way to resolve the problem is:
1 login wordpress

2 in wordpress dashbpoard, click wordpress “pages” menu item

3 please click “add new page” to create a new page, please just enter something like: “glossary index” as page title, you do not need to enter any content in the page, then just publish the
page 🙂

4 in wordpress dashboard, please click “tooltips” menu item, then click “Glossary Settings” sub-menu item

5 you will open Glossary Settings panel, in the option “Glossary Index Page”, please select the  new page “glossary index”, then click “save changes” in Glossary Settings panel

6 now when you open the page http://127.0.0.1/glossary-index, you will find the page is a glossary index page that like our glossary index page demo: https://tooltips.org/glossary/

7 then when you open http://127.0.0.1/lexikon-glossary or http://127.0.0.1/glossary-lexikon,
You will find it is a glossary page that that like our glossary page demo: https://tooltips.org/glossary-demo/

Would you please follow our guide to do a test? Any more question is welcome 🙂

Sorry for the delayed response again, our developer have added a wordpress FAQ pro plugin license in your account as a Sorry,  WordPress FAQ plugin is a powerful & fast jQuery FAQ
solution to help wordpress blodder create / manage / edit FAQs easily, select default pretty FAQ template and custom FAQ style in back-end via a few clicks. With wordpress faq plugin, it is very easy to create and show accordion FAQs, display FAQs grouped by category…etc, easy to use, select pretty FAQ templates from pre-designed template, custom FAQ style in
back-end via a few clicks, Support use OpenAI ChatGPT to generate high-quality content for WordPress F.A.Q and wordpress post automatically, support WooCommerce Product FAQ, Responsive FAQ, Multiple FAQ Templates, FAQs grouped by category, specified number of  FAQ items for each FAQ… and more and more, you can find more details at:

WordPress FAQ Pro Plugin With WordPress Tooltips (version 4.6.6)

Thanks, have a blessed day with your loved ones 🙂

Best Regards,
Support Team


Am 28.06.2024 um 21:38 schrieb
happysupport:

Hi ,

Hope you are doing well and having happy days with your family 🙂

Thanks for the message 🙂

We are very happy to help you 🙂

I am assign our developer to check it, we will reply you again 🙂

Thanks, have a blessed day with your family 🙂

Best Regards,
Wordpress Tooltips Plugin Support Team


Then the wordpress tooltip user replied:

Hi Support Team,

thank you very much for your commitment and efforts. It worked. I still have one small point.
When I click on Lexicon, I get to the following page: https://demo/lexikon-glossary That is also OK. If I now click on the first post: https://demo/glossary/302-weiterleitung Also OK.
In the post comes:

Home / Glossary Index Page / 302 Forwarding with the link (Glossary Index Page): https://demo/glossary

And this page should not be displayed, I would like to have the index again:
https://demo/lexikon-glossary

Is that possible?

Best Regards,
—————————————————————————————————————–

Then our wordpress tooltip support replied:

Hi,

Thanks for the reply 🙂

It is great to know it works 🙂

Thanks for the new report, our developer checked your page and checked our code, in the current time:

1: in glossary settings panel, we have option “enable bread crumbs on glossary term”, you can disable / enable these links in this option

2: currently, we have no function to change the link in bread crumbs, but our developer said he is start to add a new option to allow admin to select another page as this link in breadcrumbs, once we finished this new function, we will reply you again 🙂

Thanks, have a blessed day with your family 🙂

Best Regards,
Wordpress Tooltip Plugin Support


That’s why we need develop a new version of wordpress tooltip plugin to implement the feature request from the amazing wordpress tooltip user, Our wordpress tooltips plugin developer have released a new wordpress tooltips pro plus version 31.0.8 to resolve it for the user 🙂


How to Replace the Glossary Category Link in the Glossary Breadcrumbs in the WordPress Tooltips Plugin?

1:If you are a user of the WordPress Tooltip Pro Plus plugin, please click on the “download wordpress tooltip” link to get the latest version of the tooltips plus plugin. Make sure the version number is equal to or greater than 31.0.8. If you are a new user, you will need to purchase a license for the WordPress Tooltip Pro Plus plugin.

2: Log in to your WordPress site as an administrator.

3: Navigate to the “Plugins” menu in the dashboard.

4: Deactivate and delete the existing version of the WordPress Tooltip plugin from the plugins panel.

5: Next, upload the new version of the WordPress Tooltip plugin by selecting the “Add New” button and choosing the plugin’s zip file.

6: Once the file is uploaded, activate the plugin from the plugins panel to enable its features.

7: If you are new user of wordpress tooltip plugin, please check our  video of how to install wordpress tooltip at:  WordPress Tooltips Video Tutorial 3: How to upload and activate wordpress tooltips pro plugin

8: In the WordPress dashboard, go to the “Tooltips” menu. Then, click on the “Glossary Settings” sub-menu item. The WordPress Tooltip menu appears as follows:

tooltips menu in wordpress tooltips pro plus 27.5.8

tooltips menu in wordpress tooltips pro plus 27.5.8

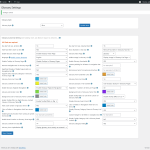
9: Within the WordPress glossary settings panel, you will find the “Replace Tooltip Category Link in Glossary Bread Crumbs” option, it looks like this:

As you can see at the bottom of the WordPress Glossary Settings panel, we have added a new option called ‘Replace Tooltip Category Link in Glossary Breadcrumbs’ In this option, there is a dropdown box listing all WordPress pages. You can simply select a different page from this dropdown to replace the glossary category link in the breadcrumbs. 🙂

Please note:

1: If you do not want to replace the glossary category link in Glossary Bread Crumbs, just select the item “None” in the dropdown box

2: If you selected a wordpress page from the dropdown box, even if the glossary item does not belong a  glossary category, we will still display the selected wordpress page as the glossary category, if you do not want to replace the glossary category link in the glossary breadcrumbs, please simply select the item “None” from the dropdown box

Also, we are adding new option to allow wordpress tooltip editor to replace other links in the Glossary Bread Crumbs

Thanks for the great feature request, if you have any more feature request, please don’t hesitate to contact us, we are very happy to implement it for you 🙂

Thanks, have a blessed day with your family 🙂

Best Regards,

WordPress tooltip plugin support
Tagged with: , , ,

Understanding Glossaries: Their History, Importance, and the Relevance of WordPress Glossaries

What is a Glossary?

A glossary is a specialized list of terms along with their definitions, typically related to a specific subject or field. It acts as a reference tool that helps clarify jargon and technical language, making complex concepts more accessible to readers. Glossaries are found in various areas, including education, technical writing, medicine, and law, serving to enhance understanding and facilitate effective communication.

The Purpose of a Glossary

Glossaries serve several important functions:

  1. Clarification of Jargon: Many fields of study involve specialized terminology. A glossary provides clear definitions, helping newcomers understand complex language.
  2. Enhanced Learning: For educational contexts, glossaries aid students in mastering the vocabulary specific to a subject, which promotes better comprehension and retention.
  3. Improved Communication: In professional and casual settings, glossaries ensure that all parties have a shared understanding of critical terms.
  4. Localization: For global audiences, glossaries help maintain the intended meaning of terms when translated.

The Historical Context of Glossaries

The concept of glossaries dates back to ancient civilizations. Scholars in ancient Greece and Rome compiled lexicons and glossaries to preserve knowledge and assist readers in understanding complex language. Some of the earliest glossaries, dating back to the first century AD, contributed to academic work across various disciplines. As education systems developed, particularly during the Middle Ages, glossaries became integral to university curricula. The advent of the printing press in the 15th century facilitated the production and distribution of glossaries, allowing them to reach broader audiences. In the modern era, glossaries continue to find relevance in academic, technical, and digital content, emphasizing the necessity of clear communication in specialized domains.

What is a WordPress Glossary?

A WordPress glossary adapts traditional glossary concepts to the WordPress platform. It provides a dedicated section or feature where users can find definitions of terms relevant to the site’s content. This enhances user experience by allowing visitors to grasp key concepts quickly and efficiently. It looks like this:

The ideals which have lighted my way, and time after time have given me new courage to face life cheerfully, have been Kindness, Beauty, and Truth. The trite subjects of human efforts, possessions, outward success, luxury have always seemed to me contemptible.
Do something wonderful, people may imitate it.
To follow, without halt, one aim: There is the secret of success.
This is wordpress audio tooltip demo, audio is loading, please wait a moment. Your browser does not support the audio element.
Robert Louis Stevenson
Since wordpress tooltips pro 5.9.2 (the current version is 17.1.4), we start to support bullet screen effect, what is bullet screen? In some countries, for example Korean, China... and so on, a few site start to allows show text messages fly across the screen like bullets, we call it bullet screen, a example site which Read More
Bullet Screen lets you add scrolling comments, quotes, or tips to any WordPress post, offering users a unique and engaging experience
Strawberry & Cream Torte $9 only! On sale! Limited Time Offer! SHOP NOW

Features of a WordPress Glossary

  1. Definitions and Explanations: Lists terms alongside their definitions, allowing users quick reference to jargon or technical language.
  2. Enhanced Navigation: It organizes terminology for easy access, helping users find terms while exploring related content.
  3. Search Functionality: Users can type a term and quickly find its definition, improving usability.
  4. Alphabetical Listings: Well-structured glossaries enable users to navigate terms easily.
  5. Tooltips: Some glossaries display definitions when hovering over specific terms, facilitating seamless access to information.

Why Include a Glossary on Your WordPress Site?

  1. Improved User Experience: Glossaries help visitors who encounter unfamiliar terms, allowing for greater engagement with the material.
  2. Increased Engagement: Quick access to definitions encourages users to spend more time on your site, exploring additional content.
  3. Search Engine Optimization (SEO): Glossaries create extra content that improves search visibility, potentially drawing more visitors to your site.
  4. Establishing Authority: By providing well-researched definitions, a glossary positions your site as a trusted information source.
  5. Facilitating Learning: For educational websites, glossaries are vital in helping learners navigate complex subject matter.

Why Should WordPress Webmasters Use a WordPress Glossary Plugin?

Using a WordPress glossary plugin can greatly simplify the creation and management of a glossary:

1. Simplicity and Ease of Use

These plugins are user-friendly, allowing webmasters to create and manage glossaries without extensive technical skills. Most provide intuitive interfaces for adding and editing terms.

2. Customization Options

Many plugins offer customization features, allowing you to tailor the appearance and functionality of the glossary to match your site’s design.

3. Search Functionality

Built-in search features let users locate terms quickly, enhancing the overall user experience.

4. Tooltip Capabilities

Plugins often include tooltips, providing definitions when users hover over terms, thus improving accessibility.

5. Automatic Linking

Some plugins can automatically link defined terms throughout your website, ensuring consistent presentations and easier access to definitions.

6. Responsive Design

Most plugins are designed to work seamlessly across devices and screen sizes, ensuring accessibility for all users, whether on a smartphone, tablet, or desktop.

7. SEO Optimization

Glossary plugins allow for SEO-friendly URLs and metadata for better search visibility, positively impacting your site’s ranking.

8. Time Efficiency

Glossary plugins automate many processes, allowing webmasters to save time and redirect focus to other essential site aspects.

9. Support and Updates

Popular glossary plugins typically offer dedicated support and regular updates, ensuring functionality with the latest WordPress versions.

10. Comprehensive User Documentation

Good plugins come equipped with extensive documentation, helping users maximize their potential through installation guidelines and customization tips.

More details please check WordPress glossary features

Implementing a Glossary on Your WordPress Site

Creating a WordPress glossary involves several straightforward steps:

Step 1: Choose the Right Glossary Plugin

Explore various glossary plugins available in the WordPress Plugin Directory. Popular options include:

  • WordPress Tooltips Plugin: Features tooltips, an easy-to-navigate glossary page, and automatic linking of terms.  (pro version download URL: https://tooltips.org)
  • WP Glossary: A simple solution for creating a glossary section on your site.
  • Glossary by Tips and Tricks HQ: Offers customization options suitable for any site.

Step 2: Install and Activate the Plugin

After choosing a plugin, install and activate it through your WordPress admin dashboard. Navigate to “Plugins” > “Add New,” search for your chosen plugin, click “Install Now,” and then “Activate.”

Step 3: Configure Plugin Settings

Navigate to the plugin’s settings page to customize options like glossary appearance, tooltip behaviors, and search features.

Step 4: Add Terms and Definitions

Begin building your glossary by adding terms and their definitions using the plugin interface.

Step 5: Organize the Glossary

Consider grouping terms by topics or using an alphabetical listing to enhance usability.

Step 6: Embed the Glossary on Your Site

Decide where to make your glossary accessible; creating a dedicated page, linking it in your navigation menu, or embedding it in related articles are effective options.

Step 7: Keep the Glossary Updated

Regularly update the glossary as your website evolves, ensuring you include relevant new terms and remove outdated ones.

Conclusion

Glossaries play a critical role in enhancing understanding and navigation within specialized fields. As they have evolved over time, their relevance has only increased, especially with the rise of digital content. A WordPress glossary offers tailored solutions to improve user experience, engagement, and SEO performance. By utilizing a WordPress glossary plugin, webmasters can create an engaging resource that enriches their site and positions it as an authoritative source of information in its niche. Implementing a glossary on your WordPress site not only empowers your audience with valuable knowledge but also enhances your site’s overall effectiveness in conveying information.

Tagged with: , ,

What is WordPress Glossary?

Unlock the power of knowledge with our WordPress Tooltips Pro Plus plugin! Easily build stunning glossaries, lists, and directories that enhance user understanding and engagement.

A glossary is more than just a list of terms; it’s a valuable educational tool that dates back to ancient lexicons. By integrating glossaries into your WordPress site, you offer your visitors immediate access to complex terminology, making their experience smoother and more enjoyable.

You can create a versatile knowledge base, including glossaries, WooCommerce product lists, member directories, and much more. Customize your formats to match your brand’s style, and seamlessly integrate third-party data sources—turning your site into a powerful knowledge hub!

Tagged with: , ,

Y a-t-il un moyen d’afficher sélectivement des infobulles WordPress à partir de catégories spécifiques ?

Bonjour, chers utilisateurs de WordPress Tooltip, j’espère que vous allez bien et que vous passez un bon week-end en famille. Nous avons reçu un ticket de support d’un incroyable utilisateur de WordPress Tooltip : « Y a-t-il un moyen d’afficher sélectivement des infobulles à partir de catégories spécifiques ? », a-t-il dit :
Par exemple, j’écris des articles sur différents jeux vidéo basés sur des cartes. Je veux ajouter des cartes comme infobulles pour chacun de ces jeux. Il y aura inévitablement des chevauchements avec les noms des cartes, et je voulais exclusivement afficher des cartes pour chaque jeu spécifique dont parle l’article. Je veux que seules les infobulles « Hearthstone » se chargent dans les articles Hearthstone, pareil pour « Slay the Spire », et ainsi de suite.
Je voudrais créer des règles pour afficher les infobulles de manière sélective. Par exemple, sur les pages contenant « hearthstone » dans l’URL, n’affichez que les infobulles de la catégorie « Hearthstone ».
Je sais que vous pouvez regrouper les infobulles par catégories, mais elles n’ont d’autre but que l’organisation en backend.
Désolé, c’est la première fois que nous entendons ce genre de question. Actuellement, nous n’avons pas de fonction pour désactiver/activer l’effet des infobulles en fonction des mots dans une URL. Je suppose que le nombre d’utilisateurs ayant ce besoin est peut-être relativement faible. Cependant, dans WordPress Tooltips Pro Plus, nous avons une solution pour répondre à votre besoin :

Y a-t-il un moyen d’afficher sélectivement des infobulles WordPress à partir de catégories spécifiques ?
1 : Connectez-vous au site du plugin WordPress Tooltip.
2 : Cliquez sur l’élément de menu “Télécharger” pour télécharger le plugin WordPress Tooltip, ce sera un fichier zip du plugin WordPress.
3 : Connectez-vous à votre site WordPress en tant qu’administrateur WordPress.
4 : Dans votre tableau de bord WordPress, veuillez cliquer sur le menu “Plugins”.
5 : Si vous avez installé le plugin gratuit WordPress Tooltips ou un ancien plugin WordPress Pro, veuillez le désactiver et supprimer l’ancien plugin WordPress Tooltip.
6 : Ensuite, dans le panneau “Plugins” de WordPress, veuillez cliquer sur le lien “Ajouter nouveau” en haut du panneau des plugins pour installer le plugin WordPress GIF Tooltip que vous avez téléchargé depuis tooltips.org.
7 : Téléchargez le fichier zip du plugin WordPress Tooltips que vous avez téléchargé depuis le site du plugin WordPress Tooltip Pro Plus.
8 : Activez la nouvelle version du plugin WordPress Tooltip que vous avez installée via le menu des plugins.
9 : Ensuite, créez un nouvel article WordPress ou modifiez un article WordPress existant.
10 : Dans l’éditeur WordPress, vous trouverez une nouvelle métabox “Désactiver des catégories d’infobulles spécifiques ?”, elle ressemble à ceci :
Désactiver des catégories d’infobulles spécifiques
Dans la métabox “Désactiver des catégories d’infobulles spécifiques”, vous pouvez entrer les ID des catégories dans la zone de saisie, séparés par une virgule “,” — pour exclure des catégories d’infobulles WordPress spécifiques sur cette page.
11 : Une fois que vous cliquez sur le bouton Publier dans l’éditeur WordPress, alors sur le front-end, vous verrez que l’effet des infobulles des termes d’infobulles dans ces catégories spécifiques a été supprimé.
Avec cette méthode, dans l’éditeur d’articles WordPress, vous pouvez afficher sélectivement des infobulles avec la catégorie “Hearthstone”
J’espère que cela vous aidera un peu
Merci, passez une journée bénie avec votre famille
Cordialement,
Support du plugin WordPress Tooltips.


Tagged with: ,

WordPress Tooltips Pro Plus 30.9.8 Released — New Option to Support Glossary Term Capitalization

Hey, dear  WordPress Tooltip plugin users , I hope this message finds you are doing well and that you are enjoying happy weekend with your family   We have received a ticket from a user of the WordPress Tooltip plugin who asked us how to fix the “Upper and lower case” issue on the glossary page, he said:


hello,
as I reported on wordpress.org I noticed that if I enter a tooltip
with a capital letter, for example: “Open source” he replaces all
the words in my paragraph from open source to Open source.

Is it possible to make it keep the upper and lower case of the
paragraph and not be replaced by the tooltip title?

Thanks!

Our wordpress tooltip support team replied:


Hi,

Hope you are doing well and having happy days with your family 🙂

Thanks for the message 🙂

We are very happy to help you 🙂

Because we have many plugin versions with different functions, Would you please tell us:
1 the plugin version you are using
2 the URL related with the problem
3 a little more details to tell us how to find the problem in the URL

I will assign our developer to check it and solve it for you? 🙂

Thank you so much for the bug report, we’d like give you a gift as a THANKS, would you please make a $0 fake order at our demo:
https://tooltips.org/product/show-tooltips-in-woocommerce-products/
And then we can add one of our pro plugin license in your account as a THANKS? 🙂

Thanks, have a blessed day with your family 🙂

Best Regards,
Wordpress Tooltips Plugin Support Team

The amazing user replied:

Hello,

1. i am using version 9.6.9
2. my URL is: (removed)
3. As you can see all tooltips are with a capital initial letter but
within the article I wrote them with a lower case letter. For example
browser became Browser or even fork became Fork. I think it’s because
the tooltips were recorded with a capital letter but I think it’s not
correct that in the text they display capital letters without much
meaning.

What I expect is for the text to stay true to what I wrote in the
article.

Thank you.

Our wordpress tooltip support team replied:

Hi,

Thanks for the reply 🙂

I am assign our developer to check it and we will reply you again 🙂

Thanks, have a happy day with your loved ones 🙂

Best Regards,
Wordpress Tooltip Support

Then our wordpress tooltips plugin developer checked the user’s page and we decided to develop a new version to resolve the “Upper and lower case” issue for wordpress tooltip users.

How to Set Up Glossary Term Capitalization in the WordPress Tooltips Plugin?

If you haven’t installed the WordPress Tooltips Pro Plus, please log in to your account on the WordPress Glossary Tooltip Plugin website at tooltip.org. If you have already done this, please refer to step #11.

Next, navigate to the ‘My Account‘ section and download the WordPress Glossary Tooltip Plugin.

Now, let’s proceed with the installation process:
1. Log in to your WordPress admin dashboard as an administrator.

2. In the WordPress dashboard, click on the ‘Plugins’ menu item.

3. Deactivate any older versions of the tooltip plugin that may be present.

4. Completely remove the previous WordPress Tooltip plugin.

5. Still within the ‘Plugins’ menu, click ‘Add New’ at the top of the plugins panel.

6. Upload the tooltip plugin ZIP file that you downloaded from the WordPress Glossary Plugin site.

7. Activate the most recent version of the WordPress Tooltip Glossary plugin. Excellent work!

8. In wordpress dashboard, click on the ‘Tooltips’ menu item. From the drop-down menu, choose ‘Glossary Settings’. This will open the ‘Glossary Settings’ panel, as shown in the screenshot below:

9. As you can see, at the bottom of the glossary settings panel, there is a new option: “Glossary Term Capitalization”. In the “Glossary Term Capitalization”, there are 4 options:

a: Display glossary term exactly as entered in the title column of the glossary

b: Uppercase letters display for glossary term in the title column of the glossary

c: Lowercase letters display for glossary term in the title column of the glossary

d: Initial Capitalization of glossary terms in the glossary title column

In the case of what the user is requesting, you can simply select the option: “Display glossary term exactly as entered in the title column of the glossary” from the “Glossary Term Capitalization” dropdown box, then in the glossary page, you will find we have fulfilled your requirement:  “What I expect is for the text to stay true to what I wrote in the article” 🙂

You can select options based on your needs 🙂

Understanding Glossary and WordPress Glossary

A glossary is a list of terms in a specific domain of knowledge, accompanied by definitions. It serves as a reference tool to help users understand jargon, technical language, or specialized terminology that may not be immediately clear. Glossaries are commonly found in books, articles, websites, and various forms of media, providing clarity and enhancing comprehension for the audience. In many fields, having a glossary is essential, as it can help bridge the gap between experts and novices. For instance, in technical or academic writing, the inclusion of a glossary allows readers to grasp complex ideas without getting lost in unfamiliar vocabulary. Businesses, educators, and organizations often create glossaries tailored to their specific contexts to ensure effective communication. In the digital realm, a WordPress glossary is a similar concept adapted for websites built on the WordPress platform. It offers a dedicated section where visitors can find definitions of terms relevant to the content of the website. A WordPress glossary enhances user experience, making it easier for visitors to understand key concepts and terminologies used throughout the site.

Why Use a WordPress Glossary?

  1. Improved User Experience: A well-structured glossary provides quick access to definitions, making it easier for users to follow along with your content. This is especially beneficial for websites that use technical terms or industry-specific jargon. By having a glossary, you reduce the likelihood of visitors leaving the site due to confusion or frustration.
  2. Increased Engagement: When users can easily find explanations for terms they encounter, they are more likely to stay on your site longer. An engaging experience can lead to increased page views, longer session durations, and higher user satisfaction.
  3. SEO Benefits: Search engines appreciate content that is clear and valuable to users. By including a glossary, you can create additional content optimized for relevant keywords, potentially improving your site’s visibility in search engine rankings. Additionally, when users share your glossary on social media or link to it from their own websites, you gain backlinks that can further enhance your SEO efforts.
  4. Establishing Authority: A glossary showcases your expertise in your field. By providing clear definitions and information, you can position your website as a reliable resource for visitors seeking knowledge in your area of specialization. This can help build trust and credibility with your audience.

Implementing a WordPress Glossary

Creating a glossary on your WordPress site can be simple. Many plugins are available that facilitate the inclusion of a glossary feature with minimal effort. These plugins often allow you to input terms and definitions, generate additional pages for each entry, and even apply tooltips that display definitions when users hover over terms in your content. For those who prefer a more customized approach, you can create a dedicated page or section for your glossary, manually inputting terms and descriptions. Organizing the glossary alphabetically or categorically can enhance its usability, allowing users to quickly find the information they seek.

Conclusion

In conclusion, a glossary plays a vital role in enhancing understanding and communication, making it an essential tool for various forms of content, especially in specialized fields. A WordPress glossary not only aids users in navigating complex terminology but also contributes to improved SEO, increased engagement, and the establishment of your website’s authority. By integrating a glossary into your WordPress site, you provide valuable resources for your audience while simultaneously enhancing their overall experience.

If you have any more question, please don’t hesitate to contact us, we are very happy to implement your feature request to build a better and better wordpress glossary plugin 🙂

Thanks, have a blessed weekend with your family 🙂

Best Regards,

WordPress tooltips plugin support team

Tagged with: ,

Gibt es eine Möglichkeit, WordPress-Tooltips selektiv aus bestimmten Kategorien anzuzeigen?

Hallo, liebe WordPress Tooltip Nutzer, ich hoffe, es geht euch gut und ihr verbringt ein tolles Wochenende mit eurer Familie. Wir haben ein Support-Ticket von einem großartigen WordPress Tooltip-Nutzer erhalten: „Gibt es eine Möglichkeit, Tooltips selektiv aus bestimmten Kategorien anzuzeigen?“, sagte er:

Zum Beispiel schreibe ich Artikel über verschiedene kartenbasierte Videospiele. Ich möchte für jedes dieser Spiele Karten als Tooltips hinzufügen. Es wird zwangsläufig einige Überschneidungen mit den Kartennamen geben, und ich möchte ausschließlich die Karten für jedes spezifische Spiel anzeigen, über das der Artikel handelt. Ich möchte, dass nur „Hearthstone“-Tooltips in Hearthstone-Artikeln geladen werden, gleiches gilt für „Slay the Spire“ und so weiter.
Ich würde gerne selektiv Regeln erstellen, für die die Tooltips angezeigt werden. Zum Beispiel: Auf Seiten mit „hearthstone“ in der URL sollen nur Tooltips mit der Kategorie „Hearthstone“ angezeigt werden.
Ich weiß, dass man Tooltips nach Kategorien gruppieren kann, aber sie haben keinen Zweck außer der organisatorischen Verwaltung im Backend.

Entschuldigung, das ist das erste Mal, dass wir so eine Frage hören. Momentan haben wir keine Funktion, um den Tooltip-Effekt basierend auf den Wörtern in einer URL zu deaktivieren oder zu aktivieren. Ich schätze, die Anzahl der Nutzer, die dieses Bedürfnis haben, ist wahrscheinlich relativ klein. In WordPress Tooltips Pro Plus haben wir jedoch eine Umgehungslösung, um eure Anforderungen zu erfüllen:“

Gibt es eine Möglichkeit, WordPress-Tooltips selektiv aus bestimmten Kategorien anzuzeigen?

1. Melde dich auf der Website des WordPress Tooltip-Plugins an.
2. Klicke auf den Menüpunkt „Herunterladen“, um das WordPress Tooltip-Plugin herunterzuladen. Es wird eine ZIP-Datei des WordPress-Plugins sein.
3. Melde dich als WordPress-Administrator auf deiner WordPress-Website an.
4. Klicke in deinem WordPress-Dashboard bitte auf den Menüpunkt „Plugins“.
5. Wenn du das kostenlose WordPress Tooltip-Plugin oder das alte WordPress Pro-Plugin installiert hast, deaktiviere es bitte und lösche das alte WordPress Tooltip-Plugin.
6. Klicke dann im WordPress „Plugins“-Panel oben auf den Link „Neu hinzufügen“, um das WordPress GIF Tooltip-Plugin zu installieren, das du von tooltips.org heruntergeladen hast.
7. Lade die ZIP-Datei des WordPress Tooltips-Plugins hoch, die du von der WordPress Tooltip Pro Plus-Plugin-Website heruntergeladen hast.
8. Aktiviere die neue Version des WordPress Tooltip-Plugins, die du über das Plugins-Menü installiert hast.
9. Erstelle dann einen neuen WordPress-Beitrag oder bearbeite einen vorhandenen WordPress-Beitrag.
10. Im WordPress-Editor findest du ein neues Metafeld „Spezifische Tooltip-Kategorien deaktivieren?“, das so aussieht:

Disable specific tooltip categories
Spezifische Tooltip-Kategorien deaktivieren
In dem Metafeld „Spezifische Tooltip-Kategorien deaktivieren“ kannst du die Kategorien-IDs in das Eingabefeld eingeben, durch Kommas „,“ getrennt — um spezifische WordPress Tooltip-Kategorien auf dieser Seite auszuschließen.
11. Nachdem du die Schaltfläche „Veröffentlichen“ im WordPress-Editor geklickt hast, wirst du im Frontend feststellen, dass der Tooltip-Effekt der Tooltip-Begriffe, die in diesen spezifischen Tooltip-Kategorien enthalten sind, entfernt wurde.
Mit dieser Methode kannst du im WordPress-Beitragseditor selektiv Tooltips mit der Kategorie „Hearthstone“ anzeigen.
Ich hoffe, das hilft ein wenig.
Danke, wünsche dir einen gesegneten Tag mit deiner Familie.
Mit freundlichen Grüßen,
Support für das WordPress Tooltip-Plugin

Tagged with: ,

Как скрыть слова «Читать далее» в конце текстов подсказок в плагине подсказок WordPress?

Привет, дорогие пользователи плагина WordPress Tooltip! Надеюсь, это сообщение находит вас в добром здравии и с хорошим настроением на выходных с вашей семьей. Мы получили запрос на поддержку от пользователя плагина WordPress Tooltip, который просил скрыть слова “Читать далее” в конце текстов подсказок. Я думаю, что у многих пользователей есть подобные вопросы, поэтому я хотел бы ответить на вопрос пользователя здесь публично. Потрясающий пользователь подсказок написал:

Привет,
Я использую плагин Tooltips Pro и хотел бы, чтобы слова “Читать далее” не отображались в текстах подсказок. Возможно ли увеличить высоту боксов подсказок, чтобы слова “Читать далее” не появлялись?
Как я могу это сделать?
Заранее спасибо.

Наша команда поддержки плагина WordPress Tooltip ответила пользователю:

Привет,
Надеюсь, у вас все хорошо, и вы проводите счастливые дни с вашей семьей
Спасибо за ваше сообщение
Мы очень рады помочь вам
Не могли бы вы:
1: войти в WordPress как администратор
2: нажать на меню подсказок в панели управления WordPress
3: нажать на подменю “дополнительные настройки”, чтобы открыть панель дополнительных настроек подсказок WordPress,
4: в панели дополнительных настроек подсказок WordPress, пожалуйста, проверьте опцию “показать аннотацию или полный текст подсказок в всплывающем окне подсказок”, затем выберите “использовать полный текст в всплывающем окне”, и нажмите кнопку “обновить сейчас”.
Таким образом, подсказки больше не будут отображать ссылку “Читать далее”
Надеюсь, это немного поможет. Если я неправильно понял ваш вопрос, пожалуйста, предоставьте больше деталей, и мы будем рады помочь вам решить проблему
Спасибо, желаем вам благословенного дня с вашей семьей
С наилучшими пожеланиями,
Команда поддержки WordPress Tooltips


Затем потрясающий пользователь подсказок ответил нам:

Привет!
Разобрался!
Спасибо за вашу быструю и эффективную поддержку.
Хорошего дня!
Большое вам спасибо!
С наилучшими пожеланиями,

Наша команда поддержки плагина WordPress Tooltip ответила:

Привет,
Спасибо за ответ, здорово знать, что все работает хорошо
Спасибо, и желаем вам благословенного дня с вашими близкими
С наилучшими пожеланиями,
Команда поддержки WordPress Tooltips


Также у нас есть более простое решение: плагин AJAX “Читать далее” с подсказкой WordPress. Плагин AJAX “Читать далее” автоматически добавит ссылку “читать далее” в постах WordPress, читателям не нужно обновлять страницу WordPress, что экономит время для читателя и ресурсы вашего сервера. Вы можете настроить количество слов, отображаемых в посте WordPress; когда пользователь нажимает на ссылку “читать далее”, полное содержание перезагружается с помощью AJAX.

Что такое плагин AJAX “Читать далее”?

Плагин AJAX “Читать далее” автоматически добавит ссылку “читать далее” в постах WordPress, читателям не нужно обновлять страницу WordPress, что экономит время для читателя и ресурсы вашего сервера.
Вы можете настроить количество слов, отображаемых в посте WordPress; когда пользователь нажимает на ссылку “читать далее”, полное содержание перезагружается с помощью AJAX.

Почему я разработал плагин AJAX “Читать далее”?

У нас есть много постов WordPress, некоторые из них содержат очень много слов. Например, если вы посмотрите наш документ по использованию AI-редактора WordPress (который автоматически сгенерирован OpenAI, чтобы помочь пользователям подсказки WordPress понять, как использовать ChatGPT для автоматического создания подсказок WordPress), вы обнаружите, что статья имеет более 4000 слов с множеством изображений и т.д. Этот пост загружает много текста с множеством изображений, и пользователям может потребоваться несколько минут, чтобы научиться использовать плагин подсказок WordPress для автоматического создания постов через OpenAI API, как получить ключ API OpenAI, что такое OpenAI, стоимость и т.д. В этом случае мы надеемся показывать только отрывки для читателей, например, отображая около 400 слов, с красивой ссылкой “читать далее”. Если пользователю понравится пост, он нажмет на ссылку “читать далее”, чтобы быстро загрузить полное содержание поста WordPress с помощью AJAX. Если мы используем стандартную ссылку “читать далее” WordPress, читателям придется долго ждать загрузки полной страницы, что тратит время пользователей и ресурсы сервера.
По сути, как вы знаете, у WordPress есть ссылка “читать далее”, но она требует перезагрузки полной страницы на стороне сервера. В эпоху быстрой передачи информации многие пользователи не будут ждать долго, чтобы получить документ, и обновление страницы потратит ресурсы сервера. Вот почему мы решили разработать этот плагин “читать далее” с использованием AJAX для нашего сайта WordPress. После использования AJAX для загрузки полного контента страница загружается быстро, только пользователи, которым действительно нужно прочитать детальный документ, нажмут на ссылку AJAX “читать далее”, и с помощью плагина AJAX “Читать далее” полное содержание будет загружаться очень быстро с сервера.
Администраторы WordPress могут настраивать длину отрывков, размер шрифта “читать далее”, цвет “читать далее” в бэкэнде и т.д., чтобы привлечь внимание читателей.

Read More Ajax Settings

Настройки AJAX “Читать далее”
На фронтенде это выглядит так

Read More Ajax front end

Фронтенд AJAX “Читать далее”

Почему веб-мастера WordPress должны использовать плагин AJAX “Читать далее”?

Администраторы могут предпочесть использовать функцию AJAX “читать далее” в своих постах WordPress по нескольким причинам:
Улучшенный пользовательский опыт: Когда пользователи нажимают на кнопку “Читать далее”, они попадают на новую страницу, что может нарушить поток их сеанса просмотра. Использование функции AJAX “читать далее” позволит им увидеть полный контент поста, не покидая текущую страницу, создавая более плавный и бесшовный пользовательский опыт.
Более быстрые времена загрузки: Загрузка новой страницы каждый раз, когда пользователь хочет увидеть полный контент поста, требует дополнительных сетевых запросов, что может привести к более медленным временам загрузки. Используя AJAX для загрузки контента, можно асинхронно загружать содержание статьи, что делает её загрузку более быстрой и повышает производительность сайта.
Повышенное вовлечение: С помощью функции AJAX “читать далее” пользователи не должны покидать страницу, чтобы увидеть полный контент поста. Это может побудить их оставаться на сайте дольше и читать больше статей, увеличивая вовлечение.
Лучшее SEO: Сайты, использующие функцию AJAX “читать далее”, могут получить преимущества в поисковой оптимизации (SEO), так как алгоритм Google предпочитает сайты с более быстрой загрузкой страниц.
В целом использование функции AJAX “читать далее” для постов WordPress может обеспечить улучшенный пользовательский опыт, более быстрые времена загрузки, повысить вовлечение и улучшить SEO, что будет полезно как владельцам сайтов, так и пользователям.

Tagged with: ,

¿Cómo ocultar las palabras ‘Leer más’ al final de los textos de consejos en el plugin de tooltips de WordPress?

Hola, queridos usuarios del plugin de wordpress tooltips, espero que este mensaje los encuentre bien y que estén disfrutando de un feliz fin de semana con su familia. Hemos recibido un ticket de soporte de un usuario del plugin de Tooltips de WordPress que solicita ocultar las palabras “Leer más” al final de los textos de consejos. Creo que más usuarios tienen preguntas similares, así que me gustaría responder al usuario aquí públicamente. El increíble usuario de tooltips dijo:

¡Hola!
Estoy usando el plugin Tooltips Pro y me gustaría no mostrar las palabras “Leer más” en los textos de los consejos. ¿Es posible aumentar la altura de las cajas de consejos para que las palabras “Leer más” no aparezcan?
¿Cómo puedo hacer esto?
Gracias de antemano.

Nuestro equipo de soporte del plugin de Tooltips de WordPress respondió al usuario:

Hola,
Espero que estés bien y disfrutando de días felices con tu familia
Gracias por el mensaje
Estamos muy contentos de ayudarte
¿Podrías por favor:
1: iniciar sesión en WordPress como administrador
2: hacer clic en el menú de tooltips en el panel de WordPress
3: hacer clic en el elemento del submenú “configuraciones opcionales” para abrir el panel de configuraciones opcionales de Tooltips de WordPress,
4: en el panel de configuraciones opcionales de Tooltips de WordPress, por favor verifica la opción “mostrar extracto o contenido completo de tooltips en la caja emergente de tooltips”, luego selecciona “usar contenido completo en la caja emergente” y haz clic en el botón “actualizar ahora”.
De esta manera, los tooltips ya no mostrarán el enlace “leer más”
Espero que esto ayude un poco, si he malinterpretado tu pregunta, por favor proporciona más detalles y estaremos encantados de ayudarte a resolver el problema
Gracias, que tengas un día bendecido con tu familia
Saludos cordiales,
Equipo de Soporte de Tooltips de WordPress

Luego, el increíble usuario de tooltips nos respondió:

¡Hola!
¡Todo resuelto!
Gracias por su apoyo rápido y efectivo.
¡Que tengas un gran día!
¡Muchas gracias!
Saludos cordiales,

Nuestro equipo de soporte del plugin de Tooltips de WordPress respondió:

Hola,
Gracias por la respuesta, es genial saber que funciona bien
Gracias y que tengas un día bendecido con tus seres queridos
Saludos cordiales,
Equipo de Soporte de Tooltips de WordPress

También tenemos una solución más fácil: el complemento AJAX Read More con WordPress Tooltip. El complemento AJAX Read More añadirá automáticamente un enlace de “leer más” en las publicaciones de WordPress, los lectores no necesitan actualizar la página de WordPress nuevamente, ahorrando tiempo para el lector y recursos de tu servidor. Puedes personalizar el número de palabras que se mostrarán en la publicación de WordPress, cuando el usuario haga clic en el enlace de “leer más”, se recargará el contenido completo con AJAX.

¿Qué es el complemento AJAX Read More?

El complemento AJAX Read More añadirá automáticamente un enlace de “leer más” en las publicaciones de WordPress, los lectores no necesitan actualizar la página de WordPress nuevamente, ahorrando tiempo para el lector y recursos de tu servidor.

Puedes personalizar el número de palabras que se mostrarán en la publicación de WordPress, cuando el usuario haga clic en el enlace de “leer más”, se recargará el contenido completo con AJAX.

¿Por qué desarrollé el complemento AJAX Read More?

Tenemos muchas publicaciones en WordPress, algunas de ellas tienen muchas palabras, por ejemplo, si revisas nuestro documento de escritor de IA en WordPress (que se generó automáticamente mediante OpenAI para ayudar a los usuarios de WordPress Tooltip a entender cómo usar chatGPT para generar automáticamente tooltips de WordPress), encontrarás que el artículo tiene más de 4000 palabras, con muchas imágenes, etc. Esta publicación carga mucho texto y muchas imágenes, y los usuarios necesitan algunos minutos para aprender cómo usar el complemento de tooltips de WordPress para generar automáticamente la publicación de WordPress a través de la API de OpenAI, cómo obtener la clave de API de OpenAI, qué es OpenAI, el costo, etc. En este caso, esperamos mostrar solo un extracto para los lectores, por ejemplo, mostrar alrededor de 400 palabras para los lectores, con un bonito enlace de “leer más”; si al usuario le gusta la publicación, hará clic en el enlace de “leer más” para cargar el contenido completo de la publicación de WordPress con AJAX, lo que es rápido. Si usamos el enlace de “leer más” predeterminado de WordPress, los lectores necesitarán esperar mucho tiempo para cargar nuevamente la página completa, lo que desperdicia el tiempo de los usuarios y también desperdicia recursos del servidor.
Así que, básicamente, como saben, WordPress tiene un enlace de “leer más”, pero eso necesita refrescar toda la página desde el lado del servidor nuevamente. En los tiempos de lectura rápida, muchos usuarios no esperarán mucho tiempo para obtener un documento, y actualizar la página desperdiciará recursos del servidor, por eso decidimos desarrollar este complemento de “leer más” con AJAX para nuestro sitio de WordPress. Después de usar AJAX para cargar el contenido completo, la página carga rápido, solo los usuarios que realmente necesitan leer el documento detallado harán clic en el enlace de “leer más” de AJAX, y con el complemento AJAX Read More, el contenido completo se cargará muy rápido desde el lado del servidor.
El administrador de WordPress puede personalizar la longitud del extracto, el tamaño de la fuente de “leer más”, el color de “leer más” en el backend, etc., para captar la atención de los lectores.

Read More Ajax SettingsConfiguraciones de Read More Ajax
En el frontend, se ve así:

Read More Ajax front end

Read More Ajax frontend

¿Por qué los webmasters de WordPress deberían usar el complemento AJAX Read More?

El administrador puede preferir usar una función de “leer más” con AJAX en sus publicaciones de WordPress por varias razones:
Mejor Experiencia de Usuario: Cuando los usuarios hacen clic en el botón “Leer más”, son llevados a una nueva página, lo que puede interrumpir el flujo de su sesión de navegación. Usar una función de “leer más” con AJAX les permitiría ver el contenido completo de la publicación sin tener que salir de la página actual, creando una experiencia de usuario más fluida y continua.
Tiempos de Carga Más Rápidos: Cargar una nueva página cada vez que un usuario quiere ver el contenido completo de la publicación requiere solicitudes de red adicionales, lo que puede resultar en tiempos de carga más lentos. Al usar AJAX para cargar el contenido, el contenido del artículo se puede obtener de manera asíncrona, lo que lo hace más rápido de cargar y mejora el rendimiento del sitio.
Mayor Compromiso: Con una función de “leer más” con AJAX, los usuarios no tendrán que navegar fuera de la página para ver el contenido completo de la publicación. Esto puede alentarlos a permanecer en el sitio más tiempo y leer más artículos, aumentando el compromiso.
Mejor SEO: Los sitios que utilizan una función de “leer más” con AJAX pueden beneficiarse de una mejor optimización para motores de búsqueda (SEO) porque el algoritmo de Google prefiere sitios con velocidades de carga de página más rápidas.
En general, usar una función de “leer más” con AJAX para publicacion


Tagged with: ,

Is there a way to selectively show wordpress tooltips from specific categories?

Hi, dear WordPress Tooltip  users, I hope you are doing well and having happy weekend with your family We have received a support ticket from an amazing wordpress tooltip user: “Is there a way to selectively show tooltips from specific categories?”, he said:

For example, I write articles about different card-based video games. I want to add cards as tooltips for each of these games. There will inevitably be some overlap with card names, and I wanted to exclusively show cards for each specific game the article is about. I only want “Hearthstone” tooltips to load on Hearthstone articles, same for “Slay the Spire”, and so on.

I would love to selectively create rules for which the Tooltips are shown. For example, on pages with “hearthstone” in the URL, only show tooltips with the category “Hearthstone”.

I know that you can group tooltips by categories, but they don’t have any purpose besides backend organization.

Sorry, this is the first time we heard this kind of question, currently, we have no a function to disable / enable tooltip effect based on the words in a URL, I guess the number of users who have this need maybe relatively small. However, In wordpress tooltips pro plus, we have a workaround to achieve your requirement:

Is there a way to selectively show wordpress tooltips from specific categories?

1: Login to wordpress tooltip plugin site

2: Click “download”  menu item to download wordpress tooltip plugin, it will be a wordpress plugin zip file.

3: Login your wordpress site as wordpress administrator

4: In your wordpress dashboard, please click “Plugins” menu please

5: If you installed wordpress tooltips free plugin or old wordpress pro plugin, please deactivate it and delete the old wordpress tooltip plugin

6: Then in the wordpress “Plugins” panel, please click “add new” link at the top of the plugins panel to install the wordpress gif tooltip plugin which downloaded from tooltips.org

7: Upload the wordpress tooltips plugin zip file which you downloaded from wordpress tooltip pro plus plugin site

8: Activate the new wordpress tooltip plugin version which you installed via plugins menu

9: Then create a new wordpress post or edit a existed wordpress post

10: In wordpress editor, you will find a new metabox “Disable specific tooltip categories?”, it looks like this:

Disable specific tooltip categories

Disable specific tooltip categories

You can see in the “Disable specific tooltip categories” metabox, you can enter categories ids in the input box, split by comma “,” — to exclude  specific wordpress tooltip categories on this page

11: Once click publish button in the wordpress editor, then in the front end, you will find tooltips  effect of the tooltip terms which in these specific tooltip categories has been removed

By this method, in the wordpress posts editor, you can selectively show tooltips with the category “Hearthstone” 🙂

I hope this have a little help 🙂

Thanks, have a blessed day with your family 🙂

Best Regards,

WordPress tooltips plugin support

Tagged with: ,

Can you enable wordpress tooltips on a page-by-page basis?

Hi, dear WordPress Tooltip  users, I hope you are doing well and having happy weekend with your family 🙂 We have received a support ticket from a user of the WordPress Tooltip plugin: ” Can you enable tooltips on a page by page basis? I’d love a little button on the page editor that will enable/disable Tooltips on the page. I don’t want to load the Tooltips scripts on the majority of pages, so I’d enjoy having this option.”

Yes, in wordpress tooltips pro plus version, we have implemented this function a few year ago, we provide a few methos to allow wordpress tooltip users enable / disable tooltips in wordpress pages:

1: Method 1 of disable tooltip in wordpress page:

When you add or edit a WordPress post or page using the standard editor, in the right-hand section of the WordPress standard editor,  you’ll find a “disable tooltip for this page” meta box.

By checking the “disable tooltips for the page” option within this meta box, tooltips will not be displayed automatically in that specific post. It will look something like this:

Disable specific tooltips

Disable specific tooltips

Disable specific tooltips Allow wordpress tooltip admin to provide a clearer explanation with an example. Let’s say you have a tooltip term called “WordPress” and its corresponding content is “We all love WordPress.” Normally, if your posts contain the word “WordPress,” our tooltips plugin will detect it and add tooltip effects like dotted lines or double lines.

When users hover over the word “WordPress,” a tooltip popup window will be displayed. However, if you disable tooltips for this page, even if your post includes the word “WordPress,” no tooltip effects will be added. Consequently, when users hover over the word “WordPress,” the tooltip content will not appear automatically. 🙂

Please note that while tooltips won’t function automatically on this specific page, you can still manually add tooltips using the tooltip shortcode “tooltips”.


Also you can check the “don’t load tooltip style and scripts for this page too” option within this meta box, by this way, you can speed up wordpress site by remove  tooltip style and javascript scripts on this wordpress page 🙂

2: Method 2 of disable tooltip on wordpress page:

The WordPress Tooltip Plugin offers a convenient feature that allows you to disable tooltips in multiple WordPress posts using their respective IDs. Here’s a step-by-step guide on how to bulk disable tooltips using post IDs:

  1. Begin by logging into your WordPress admin area.
  2. Navigate to the “Tooltips” menu item.
  3. Click on the “Tooltips Optional Settings” sub-menu item. This can be found within the Tooltip plugin menu, resembling the following: WordPress Tooltips Menu Item
  4. You will be directed to the “Tooltips Optional Settings” panel, where you’ll find the “Bulk disable tooltips in post by post ID” option box:Bulk disable tooltips in post by post id displayed as: Bulk disable tooltips in post by post ID In this input box, you can simply enter the post IDs you wish to disable tooltips for. To specify multiple IDs, separate them with commas. For instance, you can input the following format: 3,22,58,126,583. Once you save these settings, the WordPress Tooltip Plugin will cease adding tooltip effects to those specified posts on the front end. Kindly note that this option is not applicable to tooltips generated through the “tooltips” shortcode.

By this method, you can disable tooltips on multiple wordpress pages at once,  you do not need to disable tooltips on each wordpress page manually 🙂

I hope this have a little help 🙂

Thanks, have a blessed day with your family 🙂

Best Regards,

WordPress Tooltips Plugin Support

Tagged with: , ,
Top