Tag: wordpress tooltip plugin

How to automatically link the wordpress tooltip keyword inside a wordpress post to the wordperss glossary item page? WordPress tooltip pro plus 19.8.8 released

Hi, Dear WordPress tooltip users , hope this message find you are doing well and having happy day with your family 🙂 We just released wordpress tooltip pro plus 19.8.8, to realize an amazing wordpress tooltip user’s feature request: automatically link the wordpress tooltip keyword inside a wordpress post to the wordperss glossary item page, in the back-end of new version of wordpress tooltips pro + version, you will find a new option to link wordpress glossary keywords in wordpress posts to glossary item page automatically.  🙂

After read the user’s feature request, our wordpress tooltip developer said this is a great requirement, we heard similar request before,

A WordPress admin want to link glossary keywords to their respective glossary item pages he wan to improve the user experience by providing easy access to additional information and context for technical or industry-specific terms used within the content. By linking these keywords to corresponding glossary item pages, visitors can quickly and easily learn the definitions and meaning of these terms without leaving the page they are on.

Another wordpress glossary admin want to link glossary keywords to their respective glossary item pages is to improve search engine optimization (SEO). Linking internally within a website can help search engines crawl and index pages more effectively, which can improve search engine rankings and increase website traffic.

Overall, linking glossary keywords to their respective glossary item pages can enhance the user experience and potentially improve SEO, making it a worthwhile consideration for WordPress admins looking to enhance their website’s functionality and effectiveness. 🙂

How to automatically link the wordpress tooltip keyword inside a wordpress post to the wordperss glossary item page?

1:  download last version of wordpress tooltip pro + 19.8.8 via wordpress tooltip glossary plugin

2: Install latest version of wordpress tooltips pro plus plugin in your wordpress site,  new user please check our  video of how to install wordpress tooltip at:  WordPress Tooltips Video Tutorial 3: How to upload and activate wordpress tooltips pro plugin

3: In wordperss dashboard click “Tooltip” menu , then click “optional settings” sub menu item, you will open “optional settings panel”, it looks like this:

add link on tooltip term to tooltip page in tooltip optional settings panel in tooltips pro plus 19.8.8

add link on tooltip term to tooltip page in tooltip optional settings panel in tooltips pro plus 19.8.8

4:As you can see, at the bottom of optional settings panel, there are new option “link tooltip terms to tooltip page automatically?” if you select “Yes”, then in front-end, all tooltip keyword in wordpress post will be linked to wordpress glossary item page automatically.

If you select “No”, then nothing will be changed 🙂

Please note, we will not add glossary item link in wordpress menu item, wordpress title, because in general, these section in wordpress have important links already, wordpress tooltip plugin will only add links for wordpress tooltip keyword in wordpress post / wordpress pages / wordpress glossary page…etc 🙂

Conclusion:

Thanks for the great suggestion again, one major benefit of linking glossary keywords in WordPress posts to their respective glossary item pages is that it can enhance the user experience. By linking technical or industry-specific terms within a post to their corresponding glossary definitions, readers can quickly and easily learn what these terms mean without having to leave the page they are on. This can improve comprehension and help readers engage with the content more effectively.

Another benefit of linking glossary keywords to their respective glossary item pages is that it can potentially improve search engine optimization (SEO). Internal linking within a website can help search engines crawl and index pages more effectively, which can improve search engine rankings and increase website traffic. By linking glossary keywords to their corresponding glossary item pages, WordPress users can create a more interconnected and optimized website structure.

Overall, linking glossary keywords in WordPress posts to glossary item pages can improve the user experience, potentially boost SEO, and make it easier for visitors to engage with technical or specialized content. It is a useful technique for anyone looking to create an effective and engaging website.

If you have any more feature request or if you have any question about wordpress tooltip plugin, please don’t hesitate to contact us 🙂


Thanks, have a blessed day with your family 🙂

Best Regards,

WordPress tooltip support

Tagged with: , , , , ,

How to build multiple glossaries via difference taxonomy in wordpress tooltips pro plugin?

Hi, Dear  users of WordPress tooltip plugin , hope this message find you are doing well and having happy weekend with your family 🙂  Maybe you known , wordpress tooltips have many amazing  functions — based on amazing users feature request in last 12 years, include tooltip, glossary, directory, AI writer…etc.  many user said they like our glossary function and give us many great suggestion about wordpress glossary (glossary is a list of terms in a special subject, field, or area of usage, with accompanying definitions. In other words, it’s a reference tool that provides definitions for key terms and phrases related to a specific topic or industry. Glossaries are commonly used in academic, technical, and specialized fields to help readers understand the jargon and terminology used in those areas)

Yesterday we get an amazing glossary  user’s ticket in which he asked us how to build multiple glossaries via difference taxonomy in wordpress tooltips pro plugin:

Hi there, is it possible to have multiple glossaries with tooltip pro?

So that for example I would have a certain taxonomy where only tooltips from glossary A are shown, and another taxonomy where tooltips from glossary B are shown, and so on…?

Thanks

This is a great question, we believe many more wordpress tooltip glossary users have similar question, we’d like write a detailed document for wordpress glossary users 🙂

How to build multiple glossaries via difference taxonomy in wordpress tooltips pro plugin?

1: Login your wordpress tooltip account to download wordpress tooltip glossary plugin

2: Login your wordpress site as admin and install latest version of wordpress tooltip plugin via wordpress “Plugins” panel

3: In wordpress dashboard, please click “Posts” menu item to create a new wordpress post or wordpress page

4: In wordpress post editor, you can insert [glossary] shortcode to create wordpress glossary, you can find a glossary demo at here

5: You can create glossary that only display glossary items from a specific category, just do it like this:

a: You can  use [glossary catid='1,2,3'] to just allow tooltips from glossary categories  which category id = 1 or  category id = 2 or category id = 3 to be displayed in glossary list

b: You can  use [glossary catid='4'] to just allow tooltips from glossary categories  which category id = 4 be displayed in glossary list

c: You can  use [glossary catname='classmate,family,school'] to just allow tooltips from glossary categories “classmate”or “family”or”school” to be displayed in glossary list

6: If you want to remove any glossaries from a specific glossary category, just do not insert glossary cat id or glossary cat name in glossary shortcode

7: Then publish the wordpress post, you will find all things will works like you want 🙂

The user asked a great question, we understand It’s possible that the user wants to build multiple glossaries to organize and present information in a more manageable way for their visitors. By categorizing glossary terms into different categories, users can find the specific terms they need more easily without browsing through a long list of terms. This can improve the user experience and make the site more user-friendly.

For example, if a website is related to the medical field, it may have glossary categories for terminology related to various medical specialties, such as cardiology, neurology, and oncology. By separating these categories, users can easily find definitions for terms specific to their area of interest or concern.

Also we understand another reason for building multiple glossaries could be to accommodate different levels of expertise. Some visitors may be experts in a particular field, while others may be beginners. By organizing glossary terms into different categories, the website can cater to the needs of both types of visitors.

Overall, building multiple glossaries can help wordpress admins present their content in a more organized and user-friendly manner, which can enhance the overall experience for their visitors.

Hope this have a little help you to build multiple glossaries via difference taxonomy via wordpress tooltip  plugin 🙂

Tagged with: , , , ,

New option to click anywhere out of tooltip window. Supported by wordpress tooltips pro plus 19.6.8

Hi, Dear users of  wordpress tooltip ,  hope you are doing well and having happy days with your family 🙂  A user said his wordpress tooltip popup window would close abnormally under certain circumstances, and he gave us screenshots. We repeated the experiment on our own site, but it worked fine on our end.  After consulting with our users, we thought a solution would be to close the popup window when the user clicks anywhere out of the popup window in the wordpress tooltip, which is why we developed this new version — wordpress tooltip pro plus plugin 19.6.8. 🙂

Yes, a tooltip is a small box that displays additional information on a web page, usually when the user hovers over an element with a prompt message. Although tooltip was not an early invention of the Internet, its use in Web applications and Web sites has been around for a long time.
According to reliable sources, tooltip first appeared in operating systems, where it was called “Balloon Help”. This feature was first introduced by Apple in 1991 to provide users with help information in the Macintosh operating system. In the Windows operating system, it is called “ToolTip” and first appeared in Windows 95.
With the rise of web applications, tooltip became widely used on web pages. According to some reliable sources, the use of tooltip in web applications dates back to around 2000. For example, early JavaScript libraries such as Prototype and jQuery included tooltip plugins that helped web developers easily add hints to their websites.
In summary, although tooltip was not an early invention of the Internet, it has become one of the commonly used features on Web applications and Web sites and has been used extensively throughout the history of the Internet.

In 2011 we developed wordpress tooltip plugin,  after a few months, we uploaded it on wordpress, our wordpress tooltip plugin support insert image, text…etc in wordpress tooltip window — with wordpress standard editor, then many users start install our wordpress tooltip plugin because help webmaster build a better wordpress site 🙂

Now is 2023, we have released more than 420 versions for wordpress tooltip plugin, and wordpress tooltip support insert video, youtube, vimeo, audio, soundcloud, google map, QR code, images, woocommerce products…etc in wordpress tooltip window, and many users insert many other kinds of content and javascript in the wordpress tooltip window too, this make the things complex, for example, some 3rd component will close the window based on their javascript event…etc  🙂

From wordpress tooltip pro plus 19.6.8, we solved this problem, you can avoid this kind of problem by this way:

1: Login wordpress tooltip ,  click download menu to download wordpress tooltips pro plus(version >= 19.6.8)

2: Upload the new version of wordpress tooltip plugin to wordpress site,  please check our  video — how to install wordpress tooltip at:  WordPress Tooltips Video Tutorial 3: How to upload and activate wordpress tooltips pro plugin

3: After activate the wordpress tooltip plugin,  please  click “Tooltips” menu item in wordpress backend, then click “Tooltip style” sub menu item, you will open tooltip style settings panel, it looks like this:

new option hide when click on out of tooltip window

new option hide when click on out of tooltip window

4: in the option “tooltip hides when:”, please select “Click anywhere out of tooltip window”, and click the blue “Save Changes” button at the bottom of the wordpress tooltip settings panel

5: In front end, users can click anything in the wordpress tooltip popup window, for example, video / audio / image / links….etc, then if user click anywhere out of the tooltip popup window, the tooltip window will be closed 🙂

We know the great user is urgent so we lost our sleeps to developed this feature for the user from the day to night, if there are any more question of any more feature request, please don’t hesitate to contact us. Now we can have a good sleep now 🙂

Thanks, have a blessed day with your family 🙂

Best Regards,

WordPress tooltip plugin support

Tagged with: , , ,

How to use artificial intelligence to automatically generate tooltip content, supported by wordpress tooltips pro plus 19.4.8

Hi, Dear users of  wordpress tooltip ,  hope this message find you are doing well and having happy weekend with your family 🙂  In last article we reported that we are working hard to develop a new amazing function for wordpress tooltip users: AI Tooltips — wordpress tooltip users can use OpenAI chatgpt to generate content for wordpress tooltip automatically. After many days research and  tacking key problems from morning to night and some days of all night work, we are happy to report you, we developed a new wordpress tooltip pro plus plugin 19.4.8 to support use artificial intelligence to generate content for tooltip automatically, what you need to do is just enter tooltip title and a few prompts, you will get a high level content for your tooltip in one minute, in our test,  wordpress tooltips plugin generated a few wordpress tooltips with 5000 words in 3 minutes via artificial intelligence automatically, we cannot wait to dedicate this product to you! 🙂

How to use artificial intelligence to automatically generate tooltip content?

1: Please login tooltips.org and click download wordpress tooltip  to download wordpress tooltip pro + plugin (version >=19.4.8)

2: Install latest version of wordpress tooltips pro plus plugin in your wordpress site,  new user please check our  video of how to install wordpress tooltip at:  WordPress Tooltips Video Tutorial 3: How to upload and activate wordpress tooltips pro plugin

3: After activated  wordpress tooltip pro + plugin,  click “Tooltips” menu item, click “Optional Settings” sub menu item, then enter your openai api key in “OpenAI keys” input text,  it looks like this:

openai key in Optional Settings for AI tooltips

openai key in Optional Settings for AI tooltips

example openai key looks like:
apikey: sk-p999HAfj6Xm1bO00SXgJc7kFxvFPtQ1KBBWrqSXT

This is not a real openai key, please check our section “using openai costs money”  in next section in this document.

If you don’t know what is OpenAI , please just read our detailed instructions on how to register and obtain openai key later in this article — by the way, all instructions is generated by artificial intelligence.

4: After end your openai key, please click “AI Tooltips” sub menu item, it looks like this:

Generate Tooltips via OpenAI settings panel for AI Tooltips

Generate Tooltips via OpenAI settings panel for AI Tooltips

5: Please enter tooltip title in the “Title” input box, and then enter prompt in “Prompt” input box, in our test, we’d like ask AI to generate with this kind of format: “Please write a long article about ‘what is tooltip'”, if you just enter “what is tooltip”, then oepnai chatgpt will just give you a short message, if you tell AI give you a “long article”, then OpanAI chatgpt will generate a high-level detailed content for you automatically. Please don’t forget to enter max tokens, you will see detailed instruction about max tokens in the later part of the article 🙂

6: After enter all the requirements, please click the blue “Generate Tooltips Automatically” button, then AI will generate AIGC(AI Generated Content) content for you automatically, just need about a few seconds. 🙂

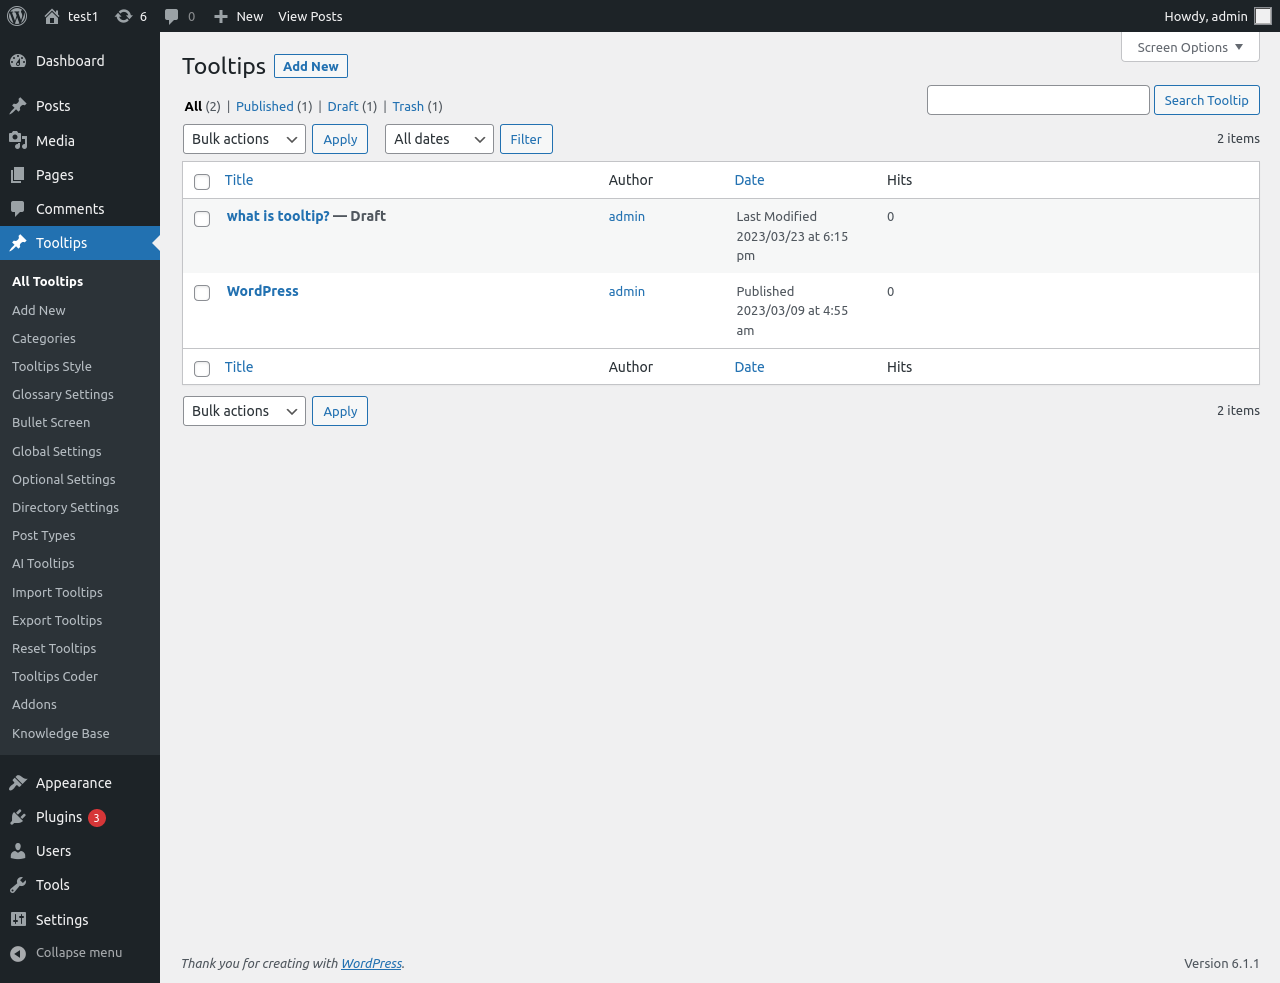
In wordpress tooltip plugin, we will save the AIGC content as draft, and we will give you a notification bar with the link to edit this AIGC content, you can edit the edit link to check the content and publish it — in next version we will develop a new option to let wordpress tooltip admin to decide publish AIGC content directly or save it as draft first…etc 🙂

The notification bar looks like this:

generated AI Tooltips via OpenAI

generated AI Tooltips via OpenAI

7: You can edit the AIGC content in wordpress tooltps editor, our developer asked Artificial Intelligence tell us “What is tooltip”, and wordpress tooltips plugin  saved the AIGC content as tooltip draft and displayed a editor link of the AIGC tooltip post, after click the edit link, wordpress tooltip editor can check the content and publish the tooltip,   it looks like this:

the content of the long article that generated by AI automatically

the content of the long article that generated by AI automatically

At front-end, wordpress tooltip plugin will display the AIGC content in wordpress tooltip popup box, it looks like this:

AI generated tooltip in front-end

AI generated tooltip in front-end

AI generated a high-level article, right? 🙂

8: Also in All tooltips panel, you can find AIGC post listed in here as draft, you can use quick edit to publish it directly:

auto-generated AI tooltips just need publish it

auto-generated AI tooltips just need publish it

8: Via wordpress tooltip AI tooltip function, you can easily add various interesting content to enhance the taste of the article and feed back your readers with a feast of thoughts, for example, let’s add a light seasoning to relax the reader, let’s ask the openai chat bot to generate a joke for the word “writing”, OpenAI chatbot create a short joke in 1 second like this:

Q: What did one page of writing say to the other page?
A: Nothing, they were just separated by a sheet of paper.

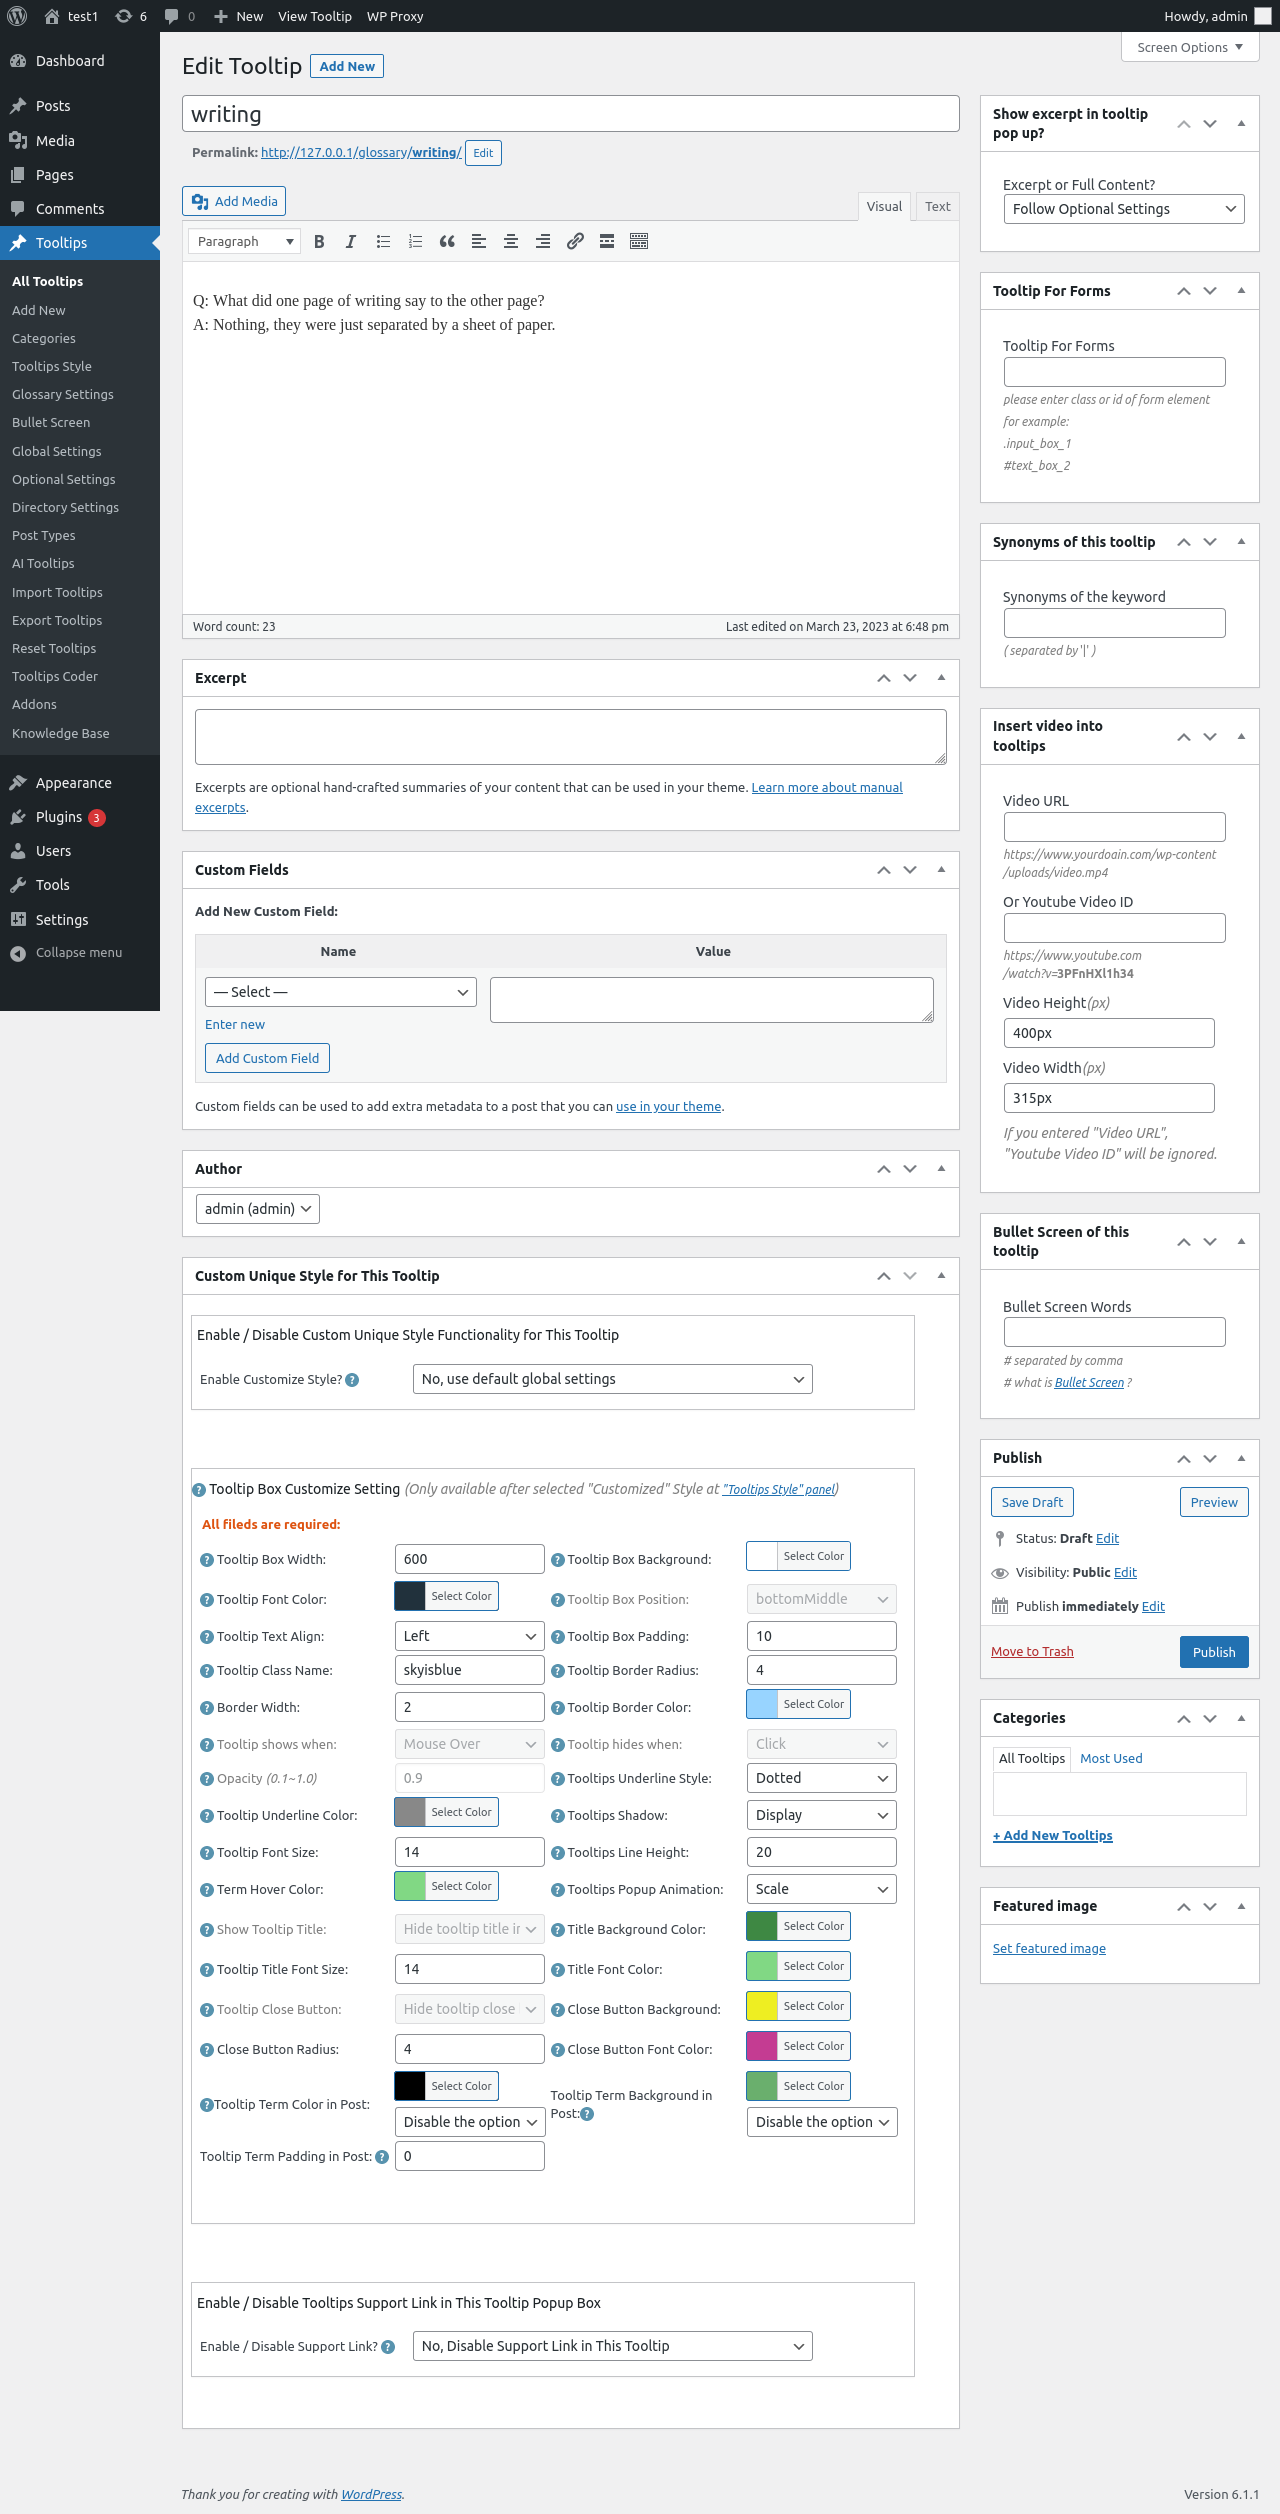
Then wordpress tooltips plugin saved the joke and guide the wordpress tooltip editor to the tooltip editor, after review the content that generated by AI, you can decide publish it or not, it looks like this:

a joke about writing that generated by AI

a joke about writing that generated by AI

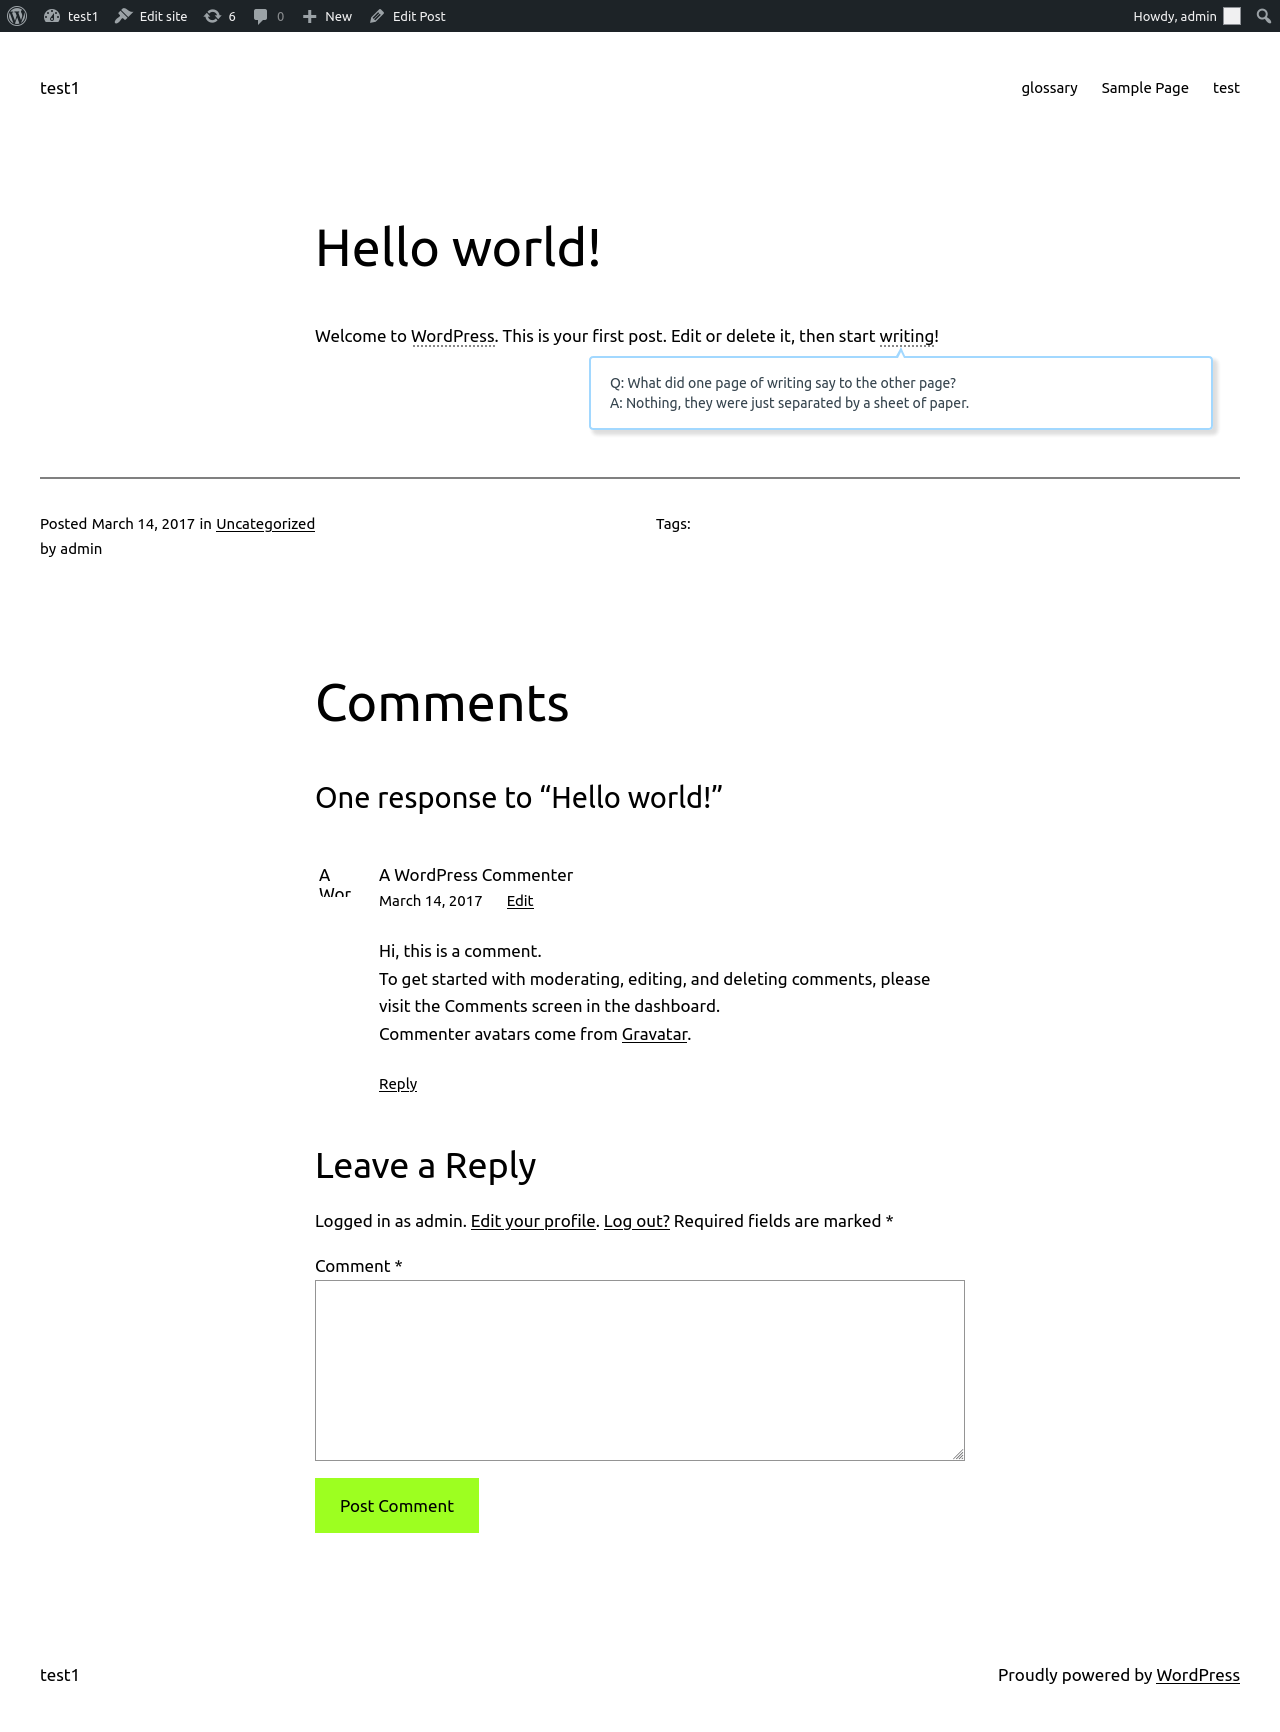
In front end, wordpress tooltip plugin will display AIGC content in wordpress tooltip popup window like this:

the joke that generated by AI in front-end

the joke that generated by AI in front-end

Wow, this makes writing extremely easy and you can provide readers with a lot of interesting additional information, which will add a lot of color to your masterpiece 🙂

In next version, we will allow wordpress tooltip users opt to save the AIGC content as wordpress post, you will get many many great high-level content for your site automatically  🙂

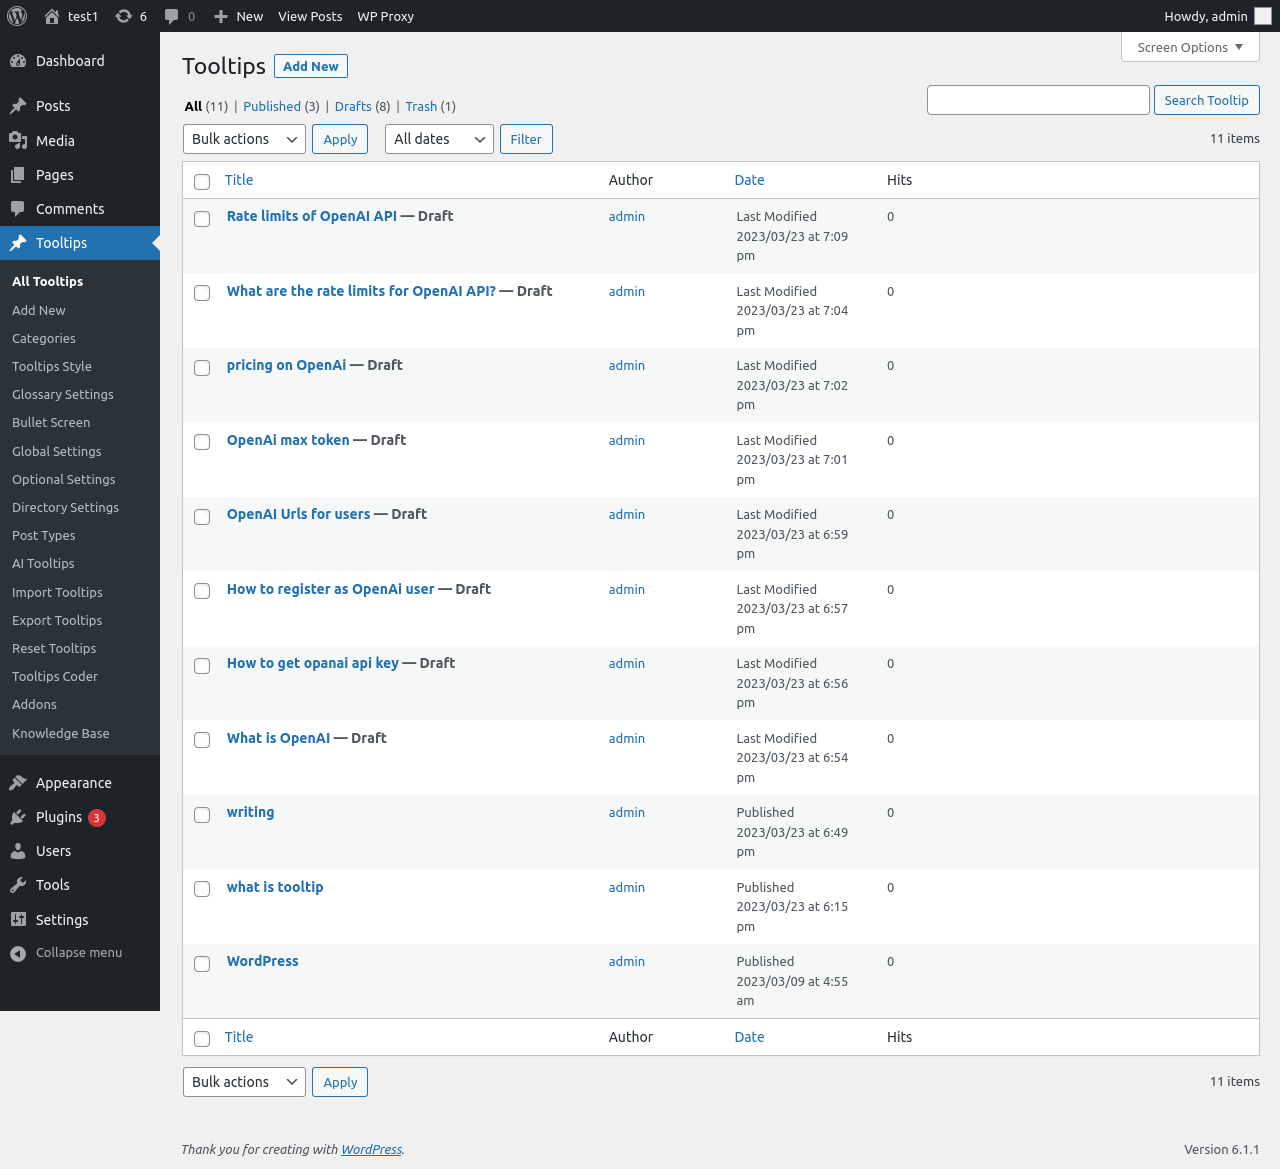
We spent three minutes getting AI to write all the remaining articles for us, all these content is generated by artificial intelligence:

All these article generated by AI automatically -- more than 5000 words in 3 minutes

All these article generated by AI automatically — more than 5000 words in 3 minutes

All the rest is generated by artificial intelligence.

How to register as OpenAi user

Registering as an OpenAI User

OpenAI is an artificial intelligence research laboratory consisting of the greatest minds in the field of machine learning and artificial intelligence. It was founded in 2015 with the goal of advancing artificial intelligence in order to benefit humanity. OpenAI has become one of the most successful research labs in this field, and has made great advances in many fields, such as robotics and natural language processing.

If you are interested in learning more about OpenAI and contributing to its research, you need to register as an OpenAI user. This article will discuss the general steps necessary when registering as an OpenAI user.

Step 1: Create an OpenAI Account

If you are a new user, the first step towards registering as an OpenAI user is to create an account on the OpenAI website. To do this, you will need to provide a valid email address and some personal information. After registering your account, you will receive an account activation email.

Step 2: Verify Your OpenAI Account

Once you have registered your OpenAI account, the next step is to verify your account. This is done by clicking the link in your account activation email. You will be asked to enter a username and password. Once you have successfully verified your account, you will be able to access the OpenAI resources.

Step 3: Join a Research Group

Once your OpenAI account has been verified, you need to join a research group. The OpenAI team is divided into three groups – the Collaboration Team, the OpenAI Executives, and the OpenAI Fellows. Each of these groups has their own section of the main website and their own research projects. Once you have selected the research group you wish to take part in, you can fill out the application form and submit your application.

Step 4: Participate in Research Projects

Once you have been accepted into a research group, you will be able to participate in their research projects. Depending on the project and the research group, this can involve working on coding projects, helping to collect data, or providing feedback on the research. You can also attend meetings or seminars related to the research projects.

Step 5: Access OpenAI Resources

As an OpenAI user, you will have access to the OpenAI resources, such as the OpenAI Universe, OpenAI Gym, and the OpenAI Platform. You will also be able to use the OpenAI Library, which is a collection of open source software for research on artificial intelligence.

Step 6: Participate in Research Outreach

As an OpenAI user, you have the opportunity to participate in research outreach to the community. This includes giving back to the open source community and providing feedback on current research projects. It is a great way to stay connected with the research and to learn more about the current development of artificial intelligence.

Step 7: Submit Research Proposals

OpenAI encourages users to submit research proposals. This is a great way to contribute to the research conducted by the OpenAI team. If your proposal is accepted, you may be awarded an OpenAI Fellowship, and gain access to resources and funding to further develop your research.

Conclusion

Registering as an OpenAI user is a great way to become involved in the world of artificial intelligence research. From joining a research group and participating in projects, to accessing OpenAI resources and even submitting research proposals, there are many ways to contribute and be part of the OpenAI community. All you need to do is create an OpenAI account and begin your journey.

How to register as openai user and generated openai key

Step 1: Visit the OpenAI homepage and click the “Sign Up” button at the upper right corner of the page.

URL: https://beta.openai.com/

Step 2: Create an OpenAI account. You can create an account by providing your address, phone number, and creating a password.

Step 3: Log in to your OpenAI account.

URL: https://beta.openai.com/sign-in/

Step 4: After you log in, click the “API Keys” button in the left navigation bar.

URL: https://beta.openai.com/account/keys/

Step 5: In the API Keys page, you can generate new API keys. Click the ” Generate API key” button to generate a new API key.

Step 6: Once the API key has been generated, you can copy the API key and use it with OpenAI API services.

That’s it! You now have registered as an user of OpenAI and generated the OpenAI API Key.

OpenAi max token?

OpenAi Max Token is a crypto token created by Elon Musk’s AI research firm, OpenAI. It is a Decentralized Autonomous Organization (DAO) token designed to serve as a utility token to power OpenAI’s products and services. The token will allow users to access OpenAI’s products and services, such as its AI systems, analytics, and more. It is an ERC-20 compliant token, based on the Ethereum blockchain, so users can store, transfer, and trade it just like any other cryptocurrency. OpenAi Max Tokens are intended to incentivize developers to use OpenAI’s services, helping to build a stronger and more robust platform. As such, the token provides users with access to a wide range of AI tools and services, such as machine learning and natural language processing. Additionally, the token will help fund the development of new features and products for OpenAI, allowing for better and more powerful AI technology.

What is tooltip?

Tooltips are useful, small pieces of information that are displayed whenever a user places their cursor over an item or element on a website. They are sometimes referred to as “mouseovers” or “pointers”, and they provide helpful information related to the item or element in question. For instance, when a user places their cursor over a button, a tooltip may appear which describes the function of that button, or when a user hovers over text, a tooltip might provide a definition for a phrase or word that appears in the text.

Tooltips can be used to communicate information related to any element of a webpage, from form fields and links, to icons and images. The aim of a tooltip is to reduce the need for extra clicks by further explaining the function of a given item at a glance. As well as providing potentially useful contextual information for users, tooltips can also be used to cleverly guide people’s interactions with a page, helping to create a more natural, user-friendly experience.

So, how are tooltips usually created? For smaller projects and websites, it’s often possible to create or modify basic HTML or CSS code to create custom tooltips. In more complex sites, though, automated Javascript plugins are often needed to quickly, easily, and reliably generate tooltips on individual pages.

Despite their usefulness, it’s important to remember that tooltips should not be relied upon too heavily. It’s important to provide clear, self-explanatory menus and links, rather than relying on tooltips to supply all of the necessary information. This way, users will be able to quickly and smoothly navigate the site, no matter where their cursor happens to be.

In conclusion, tooltips are invaluable pieces of information that can greatly improve the user experience of a website, providing helpful contextual information at a glance. However, it’s also important to ensure that sites are optimised for usability in other ways too, as tooltips cannot and should not be counted on to provide all the necessary information.

What is OpenAI

OpenAI is a research laboratory focused on artificial intelligence and machine learning. Founded in December 2015, the lab is backed by entrepreneurs Elon Musk, Peter Thiel, and several other tech luminaries. OpenAI’s mission is to “advance digital intelligence in the way that is most likely to benefit humanity as a whole, unconstrained by a need to generate financial return.”

The OpenAI team consists of scientists, engineers, and economists working to develop advanced artificial technology. OpenAI works with a wide range of research initiatives, such as robotics, computer vision, and natural language processing (NLP). Through its research, OpenAI hopes to explore the world of intelligent machines, identify the application and ethical concerns of AI technologies, and help businesses use secure and reliable AI systems in their operations.

OpenAI pursues its research objectives mainly through deep learning, a specialized AI application where computers learn to identify patterns in large datasets. Deep learning models are trained with massive amounts of data to pick out patterns, enabling computers to understand patterns in images, videos, and audio recordings. OpenAI uses its own deep learning models to explore various AI topics and applications such as autonomous driving, computer vision, and natural language processing.

In addition to exploring AI topics, OpenAI pursues its research goals through partnerships and collaborations with universities, corporations, and industry leaders. OpenAI also works with entities such as Google and Microsoft to develop AI frameworks and libraries for other companies to use.

OpenAI also pursues its research goals through open source projects and competitions. By releasing projects and libraries open source, OpenAI allows developers and companies to learn and apply artificial intelligence concepts to their own projects and products. OpenAI also runs the AI Dungeon, which offers AI-based game competitions that allow developers to compete against each other’s AI-powered approaches.

In addition to research and development, OpenAI also specializes in policy and ethics research. Through its policy research, OpenAI strives to explore the impact of AI technologies on society, identify legal and ethical policies to ensure the safe and responsible use of AI, and work to ensure that AI technologies do not become a source of inequality and exploitation.

OpenAI’s primary goal is to make the world a better place through artificial intelligence and machine learning. With its commitment to research and development, partnerships, open source efforts, and policy initiatives, OpenAI is working to make this goal a reality.

How to get opanai api key

If you are a developer looking to make use of OpenAI’s powerful suite of AI tools, then you will first need to get your OpenAI API key. An OpenAI API key grants you access to OpenAI’s open-source platform to build, train, and deploy AI models. But before you can access the OpenAI platform, you must first understand both the benefits that an OpenAI API key offers you, as well as the process of obtaining one. In this article, we will discuss everything you need to know to get an OpenAI API key.

What Does an OpenAI API Key Offer You?

An OpenAI API key offers you unprecedented access to OpenAI’s powerful suite of AI tools for training, deploying, and managing models. By obtaining an OpenAI API key, you become part of the OpenAI community and can access their expansive suite of open source AI tools. These tools can be used to build and train AI models, as well as to explore the latest advances in AI research. Accessing OpenAI’s AI platform can significantly simplify and speed up the process of developing and deploying AI solutions.

In addition to these base features, the OpenAI platform provides advanced tools for training and deploying AI models, such as hyperparameter optimization, integration with advanced computing resources, and more. With an OpenAI API key, these tools are at your fingertips, allowing you to more easily develop innovative AI solutions.

How to Get an OpenAI API Key

First and foremost, customers wanting to obtain an OpenAI API key need to understand the eligibility requirements for the key. Many of OpenAI’s AI tools are open to all developers, however, the advanced computing resources and the ability to develop and deploy models require some sort of payment. Accordingly, OpenAI has put in place a strict criteria for eligibility in order to obtain an OpenAI API key.

In order to be eligible to obtain an OpenAI API key, you will need to apply and fill in the Online Application Form. You will need to provide details such as your name, contact information and company or developer website (if applicable). Once submitted, the OpenAI team will review your Application and if approved, you will receive an OpenAI API key via email.

In addition to the application, OpenAI requires you to sign up for one of their AI plans and make a payment to be eligible for an OpenAI API key. The OpenAI Team offers four tiers for their AI plans ranging from the Pro plan for developers working on small projects up to the Enterprise Plan for commercial companies building advanced AI solutions. Depending on your project, you can select the most suitable AI plan for your work and make the payment using a credit card. After the payment is made, you will receive an OpenAI API key via email, allowing you to access the OpenAI platform.

Conclusion
OpenAI is an open-source platform for developing and deploying AI models. Obtaining an OpenAI API key grants you access to the OpenAI platform and all the powerful AI tools they have to offer. In order to get an OpenAI API key, you need to fill out the application and make the payment for one of the OpenAI AI plans. Once completed, the OpenAI Team will review your application and if approved, you will receive an OpenAI API key via email. With an OpenAI API key in hand, developers can build, train, and deploy AI models more easily.


Okay, we can generated many many content automatically via AI, but there are a problem, Using OpenAI costs money

Pricing on OpenAI?

Pricing on OpenAI is a complex subject, due to the wide range of services it provides. OpenAI is an artificial intelligence research and development company committed to creating beneficial smart agents that learn and act as needed in partnership with humans. It focuses on machine learning, natural language processing, computer vision, robotic systems, and more.

OpenAI provides clients with access to their pre-trained AI models, APIs, and tools for the development of new products and services. Pricing for these services varies based on the complexity of the job and access granted to the user. As a general rule, larger projects with greater complexity will require higher rates.

For instance, access to OpenAI’s pre-trained models can cost as little as $0.01 per API call (for the Economy tier) or as much as $25 per API call (for the Professional tier). OpenAI also offers an Enterprise tier that can cost as much as $100,000 or more depending on the complexity of the project.

In addition to the cost of using OpenAI’s pre-trained models, some projects may require the use of additional tools, such as Natural Language (NL) processing, natural language understanding (NLU) , computer vision (CV), and robotic systems. The cost of these additional services will vary based on the complexity of the task and the type of services needed. For example, using OpenAI’s deep learning framework (GPT-2) to build an NLU system can cost in the tens of thousands of dollars.

Finally, OpenAI also offers custom services for users who want to build a totally unique AI system from scratch. This service involves a consultation with an Open AI professional consultant to develop your specific project and an unspecified monthly fee, usually ranging from $10,000 to $50,000 per month.

OpenAI’s services are very versatile and can help you in many different ways. However, when deciding to use OpenAI’s services, it is important to understand the different pricing tiers and services available. This will ensure that you are not paying too much for what you need and can optimize your expenses.

Okay, stop,  don’t worry about what the AI said…, the following is written by a real person, which is waht we wordpress tooltip support wrote: Actually we write many articles, we did not consume a lot of money

Another important problem is:

What are the rate limits for OpenAI API?

In wordpress tooltips AI tooltips panel, we requested artificial intelligence to write a instruction like this:

“write a long article to tell users about “Rate limits of OPANAI API”, include types, 1 TMP equals how much token, and users level “Free trial users” , “Pay-as-you-go users (first 48 hours)”… etc,”

The OpenAI ChatGPT replied:

Rate limits of OpenAI API

When using the OpenAI API, your application is subject to certain rate limits – the number of requests your application can make in a set amount of time. Understanding these limits is important to ensure that your application is using OpenAI resources responsibly and efficiently.

Types of Rate Limits
OpenAI offers two types of rate limits: a global limit, which applies to all of OpenAI’s resources, and a per-resource limit, which varies depending on the resource type.

Global Limit
The global limit, also referred to as the TMP limit, is the total number of request tokens you may use in a given time window, which is two hours. The number of tokens consumed for requests depends on the resource, but each TMP is generally equivalent to 1000 requests. Therefore, the number of requests will vary depending on the resource type.

Per-Resource Limit
In addition to the global rate limit, OpenAI also has a per-resource rate limit, which is specific to each resource type. These limits are based on the number of requests you can make in a given time window, which is two hours. The maximum number of requests allowed per two hour period also varies by resource.

User Levels
OpenAI offers two levels of users: Free Trial users and Pay-as-you-go users. Free trial users are limited to a total of 500 request tokens in a two hour window and 100 requests per resource type. Pay-as-you-go users, during the first 48 hours of usage, are limited to a total of 1000 request tokens in a two hour window and 200 requests per resource type. After the first 48 hours, Pay-as-you-go users will be subject to the rate limits of their chosen pricing plan.

It’s important to keep track of your usage and make sure that your application falls within these rate limits. OpenAI enforces rate limits to ensure that all users receive the best possible experience and performance. If an application exceeds the rate limit, OpenAI may temporarily block it from making additional requests until the usage falls within the rate limit again.

This is good, we checked OpenAI official page, this section is copy from  the page https://platform.openai.com/docs/guides/rate-limits/overview:

Rate limits are a way for OpenAI to manage the number of requests made to its API (Application Programming Interface). OpenAI limits the number of calls per hour and per day to ensure a stable experience for all users.

OpenAI’s rate limits depend on the type of API being used. For the OpenAI GPT-3 API, the rate limit is 1 call per second and 1000 calls per day. This rate limit applies to all GPT-3 API requests from all sources and is managed using a rolling time window.

The OpenAI CLI (Command Line Interface) has a slightly different rate limit. The CLI rate limit is 4 concurrent calls per second, with a maximum of 2,000 concurrent calls per day.

When rate limiting is triggered, the OpenAI API will return a 429 error code. This code indicates that the request has been rate limited and any further requests will be dropped until the request rate has dropped below the limit.

In order to handle large numbers of requests, it is recommended that users request resources in batches instead of making individual requests. This will ensure that your rate requests do not exceed the rate limit and ensure a consistent experience.

Rate limiting is an important feature of any API, and OpenAI’s rate limits are designed to ensure quality of service for all users. It is important to keep in mind when making requests to OpenAI’s API and ensure that you are not exceeding the rate limits set in place. Doing so will ensure your requests are processed efficiently and help make the OpenAI API experience smoother for all users.

Conclusion:

Via wordpress tooltip pro plus plugin, you can easily add various interesting content to enhance the taste of the article and feed back your readers with a feast of thoughts, for example, let’s add a light seasoning to relax the reader. You can generate high-level content from openai chat bot automatically, what you need just enter a title and enter a prompt. WordPress tooltip developer is working hard to add new AIGC functions for wordpress tooltip users, you can generate wordpress post, woocommerce product…etc automatically, via wordpress tooltips plugin,  artificial intelligence writer will automatically generate all kinds content for your wordpress site. 🙂


Tagged with: , , , , ,

How to change the size of wordpress tooltip close button? Supported by wordpress tooltips pro plus 18.9.8

Hey, Dear  WordPress Tooltip plugin users,  hope this message find you are doing well and having happy days with your family 🙂 We just released wordpress tooltips plus plugin 18.9.8, to help wordpress tooltip users custom the size of wordpress tooltip close button, based on an amazing user’s feature request. The user’s report is here:

Is it currently possible to change the size of the close button? I can see minor adjustments for the padding of the button but no the size itself.

Our wordpress tooltip developer checked this question and he think this is important suggestion for wordpress tooltip users, in the current time, the close button of wordpress tooltip pop-up window looks well, but it should bigger for old man, a bigger  close button is easier to click. After get this feature reqeust, our wordpress tooltip developer lost the sleep in the night to finish the new version of wordpress tooltip for this amazing wordpress tooltip user asap 🙂

How to customize wordpress tooltip close button?

1: Please sign in your account on wordpress tooltip site and click download wordpress tooltip  to download the latest version of wordpress tooltip pro + plugin that version >- 18.9.8

2: After downloaded the tooltip plugin zip file, please login wordpress dashboard and click plugins menu item to upload the new version of wordpress tooltip plugin and activate it, you can find  video of how to install wordpress tooltip at:  WordPress Tooltips Video Tutorial 3: How to upload and activate wordpress tooltips pro plugin

3: After activated new version of wordpress tooltip pro + plugin, please click tooltips menu item in wordpress dashboard, then click tooltip style sub menu item, it looks like this:

tooltip style settings panel in tooltips pro plus 18.9.8

tooltip style settings panel in tooltips pro plus 18.9.8

4: As you can see, at the bottom of the screenshot, there are new option “Close Button Margin”, you can change the margin in the input box, for example, 4 or 0. 🙂

By default the margin of close button in wordpress tooltip popup window is 0px, if you want a bigger close button in wordperss tooltip popup window, you can change the size pf close button via enter a larger number of margin size, for example 4, it will looks larger and easier to click to close the tooltip popup window. of course, you can enter larger number of close button, so reader can easy to open and close tooltip window when they view your wordpress blog, for example 6px. 🙂

If you do not want a larger size of tooltip window close button, just enter 0 and save the changes again 🙂

Thanks for the great suggestion to wordpress tooltip plugin, if you have any more feature request or have any question to wordpress tooltip, please don’t hesitate to contact us, we are always happy to improve our wordpress tooltip plugin for users 🙂

Thanks, have a blessed weekend with your family 🙂

Best Regards,

WordPress tooltip plugin support

Tagged with: , ,

How to create a job board directory in 2 minutes? Supported by wordpress tooltips pro plus plugin 18.8.

Hi, Dear WordPress Tooltip users, hope this message find you are doing well and having happy weekend with your family 🙂 We got a suggestion from an amazing user of wordpress tooltip plugin, he said he have a job site and employers released some job recruitment information through wordpress job manager, via the shortcode [[jobs]] in that great job board,  but he found in job listing page, there re only job title, location, date of the position, job seekers told him that they want to display the job content in the recruitment list, or at least the excerpt of the job position, by this way, candidates do not need speed a lot of time to open one recruitment post after another, but he found that this option is not available in the job board plugin. After upgraded to wordpress tooltip 18.6.8, he found wordpress tooltip plugin support wordpress member directory, and he think this is the format he looking for, he hope we can develop a job board directory and he hope he can add wordpress tooltip effect on keywords in the content of job listings so he can add some advertisements in wordpess tooltip pop-up window, so when users view the content of job, they can view advertisements and upgrade to paid membership 🙂

Our wordpress tooltip plugin developer said this is a great requirement, he installed the great wordpress job board plugin and he found that is developed by the great plugin developer Automattic, Automattic developed many great plugins, for example, woocommerce, jetpack, gravatar, akismet…etc, our tooltip developer decide to develop a new job board directory shortcode to support this great job listing plugin. By the way, in the current time, wordpress tooltip plugin support woocommerce tooltip and support woocommerce product directory already 🙂

We released a new version of wordpress tooltip pro plus plugin 18.8.8, in this version, we support recruitment tooltip automatically,  recruitment site owner can insert advertisements in wordpress tooltip pop-up and add tooltip effect on keywords in the content of job posts that published by wordpress job manager plugin, and recruitment site owner can build a job board directory in 2 minutes 🙂

What is wordpress job manager plugin?

wordpress job manager plugin is a lightweight, open source job board plugin for wordpress, via wordpress job manager plugin, you can add job-board like functionality to your wordpress site, being shortcode based. WP job manager plugin can add manage and category job listings, searchable job listings, allow guest or members to create and mange job listings, with email, site address, date, job content…etc. Allow employers edit / view , mark filled, delete their activate job listings. Also there are a few addons like woocommerce paid listings, resume manager, job alerts….etc. In the current time, there are 100,000 users using wordpress job manager plugin 🙂

How to create a wordpress job board directory quickly?

WordPress tooltip plugin support create a job board directory from job listings that generated by wordpress job manager, and wordpress tooltip support add tooltip effect on keywords in wordpress job board directory too, so job site employer can insert advertisements, videos, audios, google map, pdf documents, woocommerce payment QR, images, text…etc in wordpress tooltip popup windown, when users mouse hover keyword in job title or job content, or job excerpt, job seekers will find a pop=up window with these important information of jobs 🙂

Via wordpress tooltips pro + plugin, it is very easy to set up a wordpress job baord directory in 2 minutes. 🙂

1: Customer of WordPress tooltip pro plus  plugin can click download wordpress tooltip to download the new version directly, new user please purchase a license of wordpress tooltip pro plus

2: Downloaded and install  wordpress tooltip pro + plugin which version >= 18.8.8

New users please check our detailed video tutorail at WordPress Tooltips Video Tutorial 3: How to upload and activate wordpress tooltips pro plugin

3: Crete a new wordpres post and insert the wordpress tooltip job board directory shortcode :[jobmanagerdirectory] in the content of wordpress post, publish the job board directory post

4: Please check the front end of wordpress tooltip job board directory page, you will find the we have listed all job title and job content with navigator bar and search box and page links like #1, #2…etc

5: In the backend of wordpress tooltip plugin, you can setup the wordpress listing directory  via wordpress glossary settings panel, it looks like this:

glossary custom panel in wordpress glossary 16.0.8

wordpress glossary custom panel in wordpress glossary 16.0.8

In here, you can custom the font size in the job board directory, enable / disable wordpress job board directory search box,  select job board directory color template via default built-in pretty templates, or custom each element via customize settings panel, there are many more functions, for example,  enable / disable tooltip effect on job title or job content in the job board directory, custom letters in job board directory navigation bar…etc, just a few click, very easy 🙂

Conclusion:

WordPress tooltip pro plugin support build a wordpress job boar directory quickly, with many powerful function, wordpress job listing directory will help job seekers read job content directly and search job in result quickly and filter jobs via letters in job board directory navigation bar, and job site owner can custom pretty style for wordpress tooltip job board directory easily 🙂

Tagged with: , , , , , , ,

How to quickly create a wordperss page directory? Supported by wordpress tooltips pro plus 18.7.8

Hi, Dear users of WordPress Tooltip plugin, hope this message find you are doing well and having happy days with your family 🙂  In recent months, we got many feature request about use our tooltip glossary functionality to build wordpress directory, in recent days, based on a few amazing wordpress tooltip users’ suggestion,  we have developed wordpress member directory, wordpress woocommerce directory,  wordpress post directory for wordpress tooltip users, today we released a new version wordperss tooltips pro plus 18.7.8, to support wordpress page directory for tooltip users 🙂

What is wordpress page?

WordPress page is a built-in post type in wordpress, it be developed since wordpress 1.5 in 2005. When you install a wordperss site, by default, wordpress will create two default post type for you, “Page” and “Post”. In general, blogger can use WordPress page to build static content pages, for example, contact us, about us, TOCs, Private…etc. 🙂

Also we have some wordpress tooltip users using pages to build their sites,they do not use wordpress post, some user said they using a few advanced theme with elementor editor, use page to build their document is better option, so they have many pages in their wordpress site,  in this case a page directory will help readers find all pages just in one page and search and get result of all pages just in one page, you can use wordpress page directory as a knowledge base or wordpress page site map 🙂

How to quickly create a wordperss page directory?

1: As an customer of wordpress tooltip plugin, please click download wordpress tooltip and upload the latest version of wordpress tooltip pro plug plugin to your wordpress,  as a new wordpress tooltip user, please check our  detailed video tutorail at WordPress Tooltips Video Tutorial 3: How to upload and activate wordpress tooltips pro plugin  to install wordpress tooltip pro plus plugin 🙂

2: Create a new wordpress page, insert the wordpress page directory shortcode [pagedirectory] in the page

3: After publish the page directory, you will find in front-end, you the wordpress post directory listed all pages in the directory, left column is page titles, and right column is page content or page excerpt, based on your settings in back-end,   your readers can find all pages in one list and click letters in navigation to find a specific page faster, also users can search the keyword of page content and then click navigation in search result again to get the information easier and faster. 🙂

4: In backend, you can custom the style of the wordpress page directory, you can custom functions of wordpress page directory in wordpress glossary settings panel, it looks like this:

glossary custom panel in wordpress glossary 16.0.8

glossary custom panel in wordpress glossary 16.0.8

As you can see, you can custom the font size in the wordpress post directory, enable / disable wordpress page directory search form, select wordpress page directory template, enable / disable tooltip effect on wordpress page directory terms in the wordpress page directory, custom letters in wordpress page directory navigation bar…, and so on 🙂


Conclusion:

With WordPress tooltips pro plus plugin, it is very easy to create a wordpress page directory, in 2 minutes, and you can one click to select built-in pretty templates to create a pretty wordpress page directory , also you can custom functions and style of wordpress page directory in settings panel, just a few clicks 🙂

Tagged with: , , ,

How to create a wordpress post directory quickly? Supported by WordPress Tooltips Pro Plus Plugin 18.6.8

Hi, Dear WordPress Tooltip plugin users, hope this message find you are doing well and having happy days with your family 🙂 In recent months, we got many suggestion about turn wordpress glossary function into a directory, it seems many users need directory functions, we decide start to realize all these wordpress directory functions. Based on wordpress tooltip users’ feature request, in recent days, we released new wordpress tooltips pro plus versions to allow wordpress tooltip users create member directory, woocommerce product directory, today we released wordpress tooltip pro plus plugin 18.6.8 to support wordpress tooltip users create a wordpress post directory in 2 minutes 🙂

Why we need a wordpress post directory?

A wordpress tooltip user told us he use wordpress tooltip plugin to created about 3,000 tooltip terms, and he created more wordpress posts in last 10 years, we visited his site wow, it’s our honor to have such a user 🙂  He suggested us to develop a wordpress post directory function. We feel strange because we have wordpress post category archive pages in wordpress already, why we need a wordpress post directory? He told us, he used a Tons of time to shared his life on wordpress site, he put his heard and soul into these posts, there recorded his life in past ten years. When he want to remember a specific event in his life, he found he need search and read his post many times, he thought if there are a life directory, that would be great 🙂 He said after use our wordpress glossary functionality, he appreciates the function of our worpdress tooltip glossary plugin, he have 3,000 tooltip keywords, and our tooltip glossary function help users find tooltip terms quickly, he think he can use it manage his post too, but he do not know how to start 🙂

We do not have this kind of function to make a wordpress post directory, this is the first time we heard this kind of demand, but our wordpress tooltip developer think this is a good requirement, wordpress built in 199x, and many blogger have built their blog more than 10 years, we do need a good method to help readers to browser Tons of post easier, a post directory will help wordpress blogger to display their thoughts and posts quickly, just one shortcode [postdirectory], wordpress tooltip plugin will create wordpress post directory to list all of your posts in one directory page,  readers can quickly find corresponding wordpress posts by clicking the initials on the product navigation bar, and readers can use search box that under the navigation bar to search keywords in all wordpress post, if users search the keyword dinner, then all wordpress post include the “dinner” will be displayed in the result, and reader still can quickly find the post they really want via click the letters in the wordpress post directory navigation bar 🙂

How to create a wordpress post directory quickly?

1: Login wordpress tooltip and  click download wordpress tooltip ,then follow our  detailed video tutorail at WordPress Tooltips Video Tutorial 3: How to upload and activate wordpress tooltips pro plugin  to install wordpress tooltip plugin

2: Create a new wordpress page, insert the wordpress post directory shortcode [postdirectory] in the page

3: Check the wordpress page in front end, you will find the wordpress post directory in the page and wordpress tooltip plugin will list all your published post in the directory, users can browser all posts via navigation and search form

4: In backend, you can custom the style of the wordpress post directory and custom functions of wordpress post directory in wordpress glossary settings panel, it looks like this:

glossary custom panel in wordpress glossary 16.0.8

glossary custom panel in wordpress glossary 16.0.8

You can custom the font size in the wordpress post directory, enable / disable wordpress post directory search form, select wordpress post directory template, enable / disable tooltip effect on wordpress post directory terms in the wordpress post directory, custom letters in wordpress post directory navigation bar…, and so on 🙂

Thanks for the great feature request, if you have any more suggestion or question about wordpress tooltip plugin, please don’t hesitate to contact us, we are happy to realize if for you 🙂

Thanks, have a blessed day with your family 🙂

Best Regards,

WordPress Tooltip Plugin Support

Tagged with: , , ,

Recent Works on WordPress Tooltips Until 2023-02-02

Hi, dear wordpress tooltip users,  hope this message find you are doing well and having happy weekend with your family 🙂  We are happy to report, you, in recent days, we have developed 26 wordpress tooltip plugin versions for wordpress tooltip users, and we write 6 detailed step by step document for wordpress tooltip users. 🙂

We developed 23 wordpress tooltip plugin versions:

At first, we released a few wordpress tooltip versions to enhance tooltips for wordpress new blocks and support wordpress gutenberg editor:

1: In WordPress Tooltips Free Plugin 7.9.9, wordpress tooltip start to support WordPress Block Theme

2: In WordPress Tooltips Pro Plus 16.5.8, we added a few new faq items in wordpress tooltip plugin knowledge base, and  support Tooltip in Gutenberg Block Theme, and support Gutenberg Editor Better

3: In WordPress Tooltips Pro 16.0.2, we support WordPress Tooltips Shortcode in Gutenberg Editor

4: In WordPress Tooltips Pro Plugin 16.0.6, we support WordPress Gutenberg Block Theme better

Then we released a few versions to add a few new functions and improve functions of wordpress tooltip plugin, based on a few wordpress tooltip users’ suggestion:

5: In WordPress Tooltips Pro Plus 16.7.4, we added a new option to Disable WordPress Tooltips functionality in front-end and still enable WordPress Glossary functionality  at the same time

6: In WordPress Tooltips Pro Plus 16.8.8, we enhanced wordpress tooltip plugin to fix issues which caused by error format which import from other CMS system or 3rd wordpress plugin

7: In WordPress Tooltips Pro Plus 16.9.4, wordpress tooltip editor can change cursor style of WordPress Tooltip keyword 🙂

8: In WordPress Tooltips Pro Plus 17.0.4, wordpress tooltip user can change Cursor Style for tooltip keyword in wordpress post, and wordpress tooltip user can change cursor style  in WordPress Tooltip Popup Window too 🙂

9: In WordPress Tooltips Plugin 17.0.8,  wordpress tooltip user can set up WordPress Bullets Screen Font Family for WordPress Tooltip keyword

10: In WordPress Tooltip Pro Plus Plugin 17.1.4 , wordpress tooltip admin can  insert images in Bullet Screen to Make a Pretty & Lovely Bullet Screen for wordpress tooltip / buddypress tooltip / bbpress tooltip

11: In WordPress Tooltips Pro Plus Plugin 17.1.8, we fixed the issue of “Tooltip Term Color in Post” option in style settings  of  “unique style for each tooltip”

Then we enhanced wordpress bullets screen function for wordpress tooltip plugin, based on a few users’ feedback

12: In WordPress tooltip pro plus 17.2.4, wordpress tooltip user can  make the bullets screen follow the specified direction

13: And we released WordPress Tooltips Free 8.0.9, we added Bullet Screen for WordPress Tooltip Term function for wordpress toottip free user  too

14: Then we fixed a few problem in WordPress Tooltips Pro Plus Plugin 17.3.4 and WordPress Tooltips Pro Plugin 16.1.2

15: In WordPress Tooltips Pro Plus plugin version 17.3.8 ,we fixed a duplicated option in tooltip style panel

16: In WordPress Tooltips Free 8.1.1,  we added a new option to disable tooltip in entire Site but enable glossary in entire wordpress site

17: In WordPress Tooltips Plus 17.5.8, wordpress tooltip user can insert a  youtube videos in tooltip pop-up via tooltip shortcode easyly

18: In WordPress Tooltips Free Plugin 8.1.3, start display tooltip in content which generated by 3rd wordpress plugin’s shortcode

19: In WordPress Tooltips Pro Plus 17.6.8, wordpress tooltip plugin can custom wordpress tooltip keyword background in WordPress post

20: In WordPress Tooltip Pro Plus 17.7.8,  wordpress tooltip admin can change Padding of WordPress Tooltip keyword  in wordPress post too

21: In WordPress Tooltips Pro Plus 17.8.8, wordpress tooltip user can custom Margin of WordPress Tooltip keyword in WordPress Pages 🙂

22: In WordPress Tooltip Pro Plus 17.9.8, wordpress tooltip editor can insert vimeo videos into wordpress tooltip pop-up window easily

23: In WordPress Tooltips Free Plugin 8.1.5, we improved WordPress Tooltips shortcode to support display tooltip in the content that generated by 3rd plugin for example learnpress

24: In wordpress tooltip pro plugin 16.1.6, we enhanced woocommerce tooltip,  wordpress tooltip plugin tooltip_by_id shortcode in Woocommerce product variant

25: In wordpress tooltips pro plus 18.1.8,  wordpress tooltip user can add different background colors for each wordpress tooltip term in specific wordpress post

26: In wordpress tooltip pro plus plugin 18.2.8, wordpress tooltip editor can customize unique WordPress Tooltip Term padding for each WordPress Tooltip Keyword in specific wordPress post

Also we have wrote 6 detailed wordpress tooltip document with screenshot for wordpress tooltip users:

1: How to remove wordpress tooltip dotted lines from Menu?

2: How to use the wordpress post name “glossary” as glossary index page in wordpress tooltip plugin?

3: How to set the display time before the popup vanishes in wordpress tooltips plugin?

4: How to popup different pictures on one wordpress tooltip term like “Family”?

5: How to Add SoundCloud Player with Pretty Songs in WordPress Post Easily via WordPress Tooltip Plugin?

6: How to Disable WordPress Tooltips In Menus?

We are working hard to develop tiktok tooltip based on an amazing wordpress tooltip users’ feature request, you will see it soon 🙂

Thanks, have a blesed weekend with your family 🙂

WordPress tooltip plugin support

Tagged with: , , ,

How to Customize WordPress Tooltip Term Padding for Each WordPress Tooltip Keyword in WordPress Post? Supported by tooltip pro plus 18.2.8

Hey, Dear  WordPress Tooltip plugin users, hope this message find you are doing well and having happy days with your family 🙂 Our wordpress tooltip developer just finished a new wordpress tooltip pro plus plugin version 18.2.8, in this version, wordpress tooltip plugin support customize wordpress tooltip term padding of each wordpress keyword. Why we need  customized an unique padding for each wordpress keyword, just check this screenshot:

tooltip term background padding in wordpress post

tooltip term background padding in wordpress post

In last updates of last wordpress tooltip version, we have been trying to provide users with more ability to customize eye-catching and beautiful tooltip style, now you can customize background of each wordperss tooltip term and customize padding of each wordpress tooltip term, by this way, as you can see in the screenshot above, wordpress tooltip editor can create a unique, eye-catching and beautiful style for each wordpress tooltip keyword. 🙂  Compared with the underline tooltip method in the past, using the large color blocks can more strongly attract users’ attention 🙂

How to Customize WordPress Tooltip Term Padding for Each WordPress Tooltip Keyword in WordPress Post?

1 login your account in wordpress tooltip plugin site, and download wordpress tooltip pro + that version >= 18.2.8

2 login your wordpress site and go to dashboard and click tooltips menu item

3 click add new sub menu item to add a new tooltip  or just edit an existed wordpress tooltip term

4 then you will open wordperss tooltip editor, at the bottom of the wordpress tooltip editor, you can find tooltip box customize settings panel, we make a screenshot to help users find it easier:

Tooltip Term Padding in Post for each tooltip term

Tooltip Term Padding in Post for each tooltip term

5: As you can see in the screenshot above, there are a new option “Tooltip Term Padding in Post”, if you do not want a padding for wordpress tooltip keyword, enter 0, else enter a number, for example 6

6:Now you need enable unique style for this tooltip term, or wordpress tooltip plugin will use the default global settings which you set in the tooltip style menu

How to enable unique style for this tooltip term? Above the “tooltip box customize settings panel”, you will find the panel “Custom unique style for this tooltip”, if you want to enable unique style for the wordpress term, please select  “yes, I will customize a unique style for this tooltip”, else please select NO

7: After finished wordpress tooltip content and title in wordpress tooltip editor, please click publish button to publish the tooltip.

8: Then in any wordpress post, just insert this wordpress tooltip keyword in the content, then  in the front end, you will see the new tooltip effect in your wordpress post

Conclusion:

WordPress tooltips pro plus included many pretty style and template for wordpress tooltip and wordpress glossary, and wordpress tooltip users can customize default global style in wordpress tooltip style panel. And if you want to own the unique different style for specific wordpress tooltip term, you can customize a unique and beautiful style via tooltip box customize settings panel in the wordpress tooltip editor. We are adding more and more pretty powerful tools for wordpress tooltip plugin to help wordpress tooltip users can create colorful wordpress tooltip for your wordpress posts


Tagged with: , , , , , ,
Top