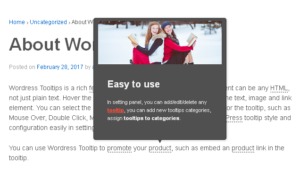
Hi dear WordPress Tooltip users, hope you are doing well and have happy day with your family 🙂 An new wordpress tooltip user asked us a question about set up wordpress tooltip border:
Hello,
I managed to get it to work after changing the url. Thanks you for your help with that.
I have a couple of questions about the styling now. I have tried setting the boarder width and radius to 0 but it won’t allow in the settings
I think may be there are more new wordpress tooltip users have similar question, I’d like write a document with detailed step by step text and images to help you do this easier 🙂
How to Customize WordPress Tooltip Border Width and Border Color?
With WordPress Tooltip Plugin, it is very easy to customize each elements of wordpress tooltip, at first, what you need to do is download the latest wordpress tooltip version, if you have downloaded and installed wordpress glossary plugin, please jump to step #9 directly 🙂
1: Login wordpress tooltip glossary plugin site
2: Click “download” menu item to download newest wordpress tooltip plugin, please note, it is a wordpress plugin .zip file.
3: Login your wordpress site admin area as wordpress admin user.
4: In your wordpress dashboard, click “Plugins” menu.
5: If you have installed wordpress tooltips glossary free plugin or old wordpress tooltips pro version or wordpress tooltips pro plugin version, please deactivate it and delete the old wordpress tooltip plugin
6: Then in the wordpress “Plugins” panel, please click “add new” link at the top of the plugins panel to install the wordpress tooltip pro plugin which downloaded from tooltips.org
7: Upload the wordpress tooltip plugin .zip file which you downloaded from wordpress tooltip glossary pro plus plugin site
8: Activate the new wordpress tooltip glossary plugin version which you uploaded via plugins menu
9: Click “Tooltips” menu item
10: Click “Tooltips Style” sub menu item
11: You will open “Tooltip Style Settings” panel, it looks like this:

wordpress tooltip style panel 14.8.0
12: In the “Tooltip Bx Style” option panel, please select the option “Customized” option and click “Update Now” blue button
13: Then in the “Tooltip Box Customize Setting” panel, you will find “Tooltip Border Radius”, “Border Width”, “Tooltip Border Color” options, please just set up it to match your site style and design
14: In the front end, you will find wordpress tooltip pop-up box border will works like what you customized in tooltip style settings panel.
Also wordpress tooltip plugin support customize unique tooltip style for each wordpress tooltip term
From the step #1 to step #14 at the above, you can see it is very easy to set up wordpress tooltip box border, actually, it is tooltip style global settings, you can customize a unique tooltip style for eech wordpress tooltip term very easy 🙂
If you want to set up a different tooltip style for specific tooltip term, please:
1: Login your wordpress site admin area as wordpress admin user.
2: Click tooltips menu item and then click add new sub menu item
3: You will open the wordpress tooltip editor, and at the bottom of the wordpress tooltip editor, you will find tooltip box customize setting panel which only works for this tooltip term, it looks like this:

unique pretty style for each tooltip term
Just change your tooltip border radius, border color, border width, and enter your tooltip title and tooltip content, then click publish button
4: In the front end, just mouse hover this tooltip term in your wordpress post, you will find this tooltip term have dedicated tooltip border color and border width 🙂
Thanks for the question about tooltips border, if you have any more question or feature request of wordpress tooltip glossary plugin, please don’t hesitate to contact us, we are happy to help you use wordpress tooltip plugin easier and realize more amazing features for the wordrpess tooltip plugin 🙂
Best Regards,
WordPress Glossary Plugin Support Team