Tag: wordpress glossary

Support for Customizable Glossary Excerpt Length, WordPress Tooltips Pro Plus 32.3.8 Released

WordPress Tooltips Pro Plus 32.3.8 Released, Support for Customizable Glossary Excerpt Length

Hello, dear WordPress Tooltips plugin users, I trust this message finds you in good spirits and enjoying joyful moments with your family.   A few days ago,  we received a ticket from a user of wordpress tooltips plugin. The user inquired:

I would like to ask if it is possible to change the appearance of the glossary page, like the length of the excerpt, or to write a specific excerpt for each term

Our wordpress tooltips plugin developer reviewed this feedback and added a new option, ‘Glossary Excerpt Length,’ in the WordPress Glossary Settings Panel to fulfill the tooltip user’s feature request! 🙂

How to Customize the Glossary Excerpt Length for Content in WordPress Glossary?

1 If you are a customer of the WordPress Tooltips Pro Plus plugin, kindly log in to tooltips.org and select “WordPress Tooltip Download” to acquire the most recent edition of the WordPress Tooltips Pro Plus plugin.

2 Then, please login your wordpress , in wordpress dashboard,  please click “plugins” menu to deactivate the current version of wordpress tooltips plugin, then click the “delete” link to delete it in plugins panel.

3 Upload the latest version of the WordPress Tooltip pro plus plugin that version >= 32.3.8. Then, activate the tooltips pro plus plugin after successful installation. If you are new to the WordPress Tooltip plugin and need guidance on installation, please refer to our instructional video on how to install WordPress Tooltip at:

WordPress Tooltips Video Tutorial 3: How to upload and activate wordpress tooltips pro plugin

4: In WordPress dashboard, navigate to the “Tooltips” menu item, followed by the “Glossary Settings” sub-menu item, the wordpress tooltip menu looks like this:

tooltips menu in wordpress tooltips pro plus 27.5.8

tooltips menu in wordpress tooltips pro plus 27.5.8

5 After completing the previous steps, you will be able to access the WordPress Tooltip Glossary Settings panel. The appearance of this panel in wordpress tooltips pro plus is as follows:

Please note that there is a black bar created by the screenshot software in the WordPress tooltips glossary settings panel. This black bar does not appear in the actual settings panel.

6: In the WordPress glossary settings panel, you will find the option ‘Glossary Excerpt Length.’ Here, you can enter the desired length for the glossary excerpt, for example: 50.

7: Now, please navigate to the option “Glossary Excerpt or Full Content” in the wordpress glossary settings panel, then select “Use Glossary Excerpt in Glossary Pages”

8: Please remember to click the blue ‘Save Changes’ button to apply your modifications.

Now, please check the WordPress glossary page. You will find that everything functions correctly according to your settings in the glossary panel. 🙂

We are developing a new version based on another feature request of yours, and you will see it very soon! 🙂

Tagged with: , , ,

Jak zamienić link „Glosariusz” w okruszkach nawigacyjnych glosariusza w wtyczce WordPress Tooltips?

Cześć, drodzy użytkownicy wtyczki , Mam nadzieję, że ta wiadomość zastaje Was w dobrym zdrowiu i że spędzacie radosny weekend z rodziną. Ostatnio wydaliśmy wersję 31.0.8 wtyczki WordPress Tooltips Pro Plus w odpowiedzi na opinie użytkowników. Użytkownik początkowo skontaktował się z nami, prosząc o pomoc w skonfigurowaniu swojej strony glosariusza, wyrażając trudności w uzyskaniu pożądanego wyglądu. Nasz zespół wsparcia poprowadził go przez kroki stworzenia nowej strony i wstawienia shortcode’u. Po kilku wymianach wiadomości użytkownik pomyślnie skonfigurował swój indeks glosariusza, ale chciał zamienić linki kategorii glosariusza w okruszkach nawigacyjnych na linki do innej strony SEO.

Aby to rozwiązać, nasz zespół wsparcia poinformował użytkownika, że pracujemy nad aktualizacją, która umożliwi dostosowanie linków w okruszkach. W rezultacie opracowaliśmy nową wersję, aby wdrożyć tę funkcję, o którą prosił użytkownik.

To wydanie ma na celu poprawę doświadczenia użytkownika i rozwiązanie konkretnych próśb zgłoszonych podczas interakcji z zespołem wsparcia. Dziękujemy naszym użytkownikom za cenne uwagi!
Również nasz programista wtyczki WordPress Tooltip powiedział, że to świetny pomysł, aby wspierać dostosowywanie linku do glosariusza w okruszkach, umożliwiając przekierowanie na inną stronę. Dlatego opracowaliśmy wersję 31.2.8 WordPress Tooltips Pro Plus, aby zrealizować ten pomysł dla użytkowników wtyczki WordPress Tooltips.

Jak zamienić link „Glosariusz” w okruszkach nawigacyjnych glosariusza w wtyczce WordPress Tooltips?

Dla istniejących użytkowników: Aby pobrać najnowszą wersję wtyczki WordPress Tooltip Pro Plus, kliknij link zatytułowany „pobierz wordpress tooltip”. Upewnij się, że numer wersji to 31.0.8 lub wyższy. Nowi użytkownicy muszą uzyskać licencję na wtyczkę WordPress Tooltip Pro Plus przed kontynuowaniem.

Dostęp administratora: Zaloguj się na swoją stronę WordPress jako administrator.

Zarządzanie wtyczkami: W panelu nawigacyjnym swojej strony zlokalizuj sekcję „Wtyczki”.

Usuń starą wersję: Dezaktywuj i całkowicie usuń wszystkie wcześniejsze wersje wtyczki WordPress Tooltip z listy wtyczek.

Prześlij nową wersję: Aby zainstalować zaktualizowaną wtyczkę, kliknij przycisk „Dodaj nową” i wybierz plik zip nowej wtyczki WordPress Tooltip.

Aktywuj wtyczkę: Po przesłaniu upewnij się, że aktywujesz wtyczkę z panelu wtyczek, aby uzyskać dostęp do jej funkcji.

Dla nowych użytkowników: Nowi w wtyczce WordPress Tooltip? Sprawdź nasz film instruktażowy dotyczący instalacji: Samouczek wideo WordPress Tooltips 3: Jak przesłać i aktywować wtyczkę WordPress Tooltips Pro.

Dostęp do ustawień: W swoim panelu WordPress przejdź do menu „Tooltips” i kliknij opcję „Ustawienia glosariusza”. Menu powinno wyglądać następująco:

  • tooltips menu in wordpress tooltips pro plus 27.5.8

Dostosuj linki w okruszkach: W panelu ustawień glosariusza, poszukaj opcji oznaczonej jako „Dostosuj link glosariusza w okruszkach nawigacyjnych”. Oto jak to wygląda:


Na dole panelu ustawień znajdziesz rozwijane menu, w którym możesz wybierać spośród różnych stron WordPress. Po prostu wybierz inną stronę, aby zamienić istniejący link kategorii glosariusza w okruszkach.
WaŜna uwaga:
Jeśli wolisz nie zmieniać linku do glosariusza w okruszkach, po prostu wybierz „Brak” z rozwijanego menu.

Jak widać na dole panelu ustawień glosariusza WordPress, dodaliśmy nową opcję o nazwie „Dostosuj link glosariusza w okruszkach nawigacyjnych”. W tej opcji znajduje się pole rozwijane z listą wszystkich stron WordPress. Możesz po prostu wybrać inną stronę z tego rozwijanego menu, aby zamienić link kategorii glosariusza w okruszkach.
Proszę pamiętać:
Jeśli nie chcesz zastępować linku do glosariusza w okruszkach nawigacyjnych, po prostu wybierz element „Brak” w polu rozwijanym.
Naprawdę doceniamy Waszą fantastyczną sugestię! Jeśli macie dodatkowe pomysły na funkcje, nie wahajcie się z nami skontaktować. Jesteśmy podekscytowani, mogąc pomóc w urzeczywistnieniu Waszej wizji!
Życzymy Wam wspaniałego dnia pełnego radości wśród najbliższych!
Z pozdrowieniami,
Zespół wsparcia wtyczki WordPress Tooltip

Tagged with: , , ,

Come sostituire il link “Glossario” nelle briciole di pane del glossario nel plugin WordPress Tooltips?

Ciao, cari utenti del plugin WordPress Tooltip, spero che questo messaggio vi trovi bene e che stiate trascorrendo un felice fine settimana con la vostra famiglia. Recentemente abbiamo rilasciato la versione 31.0.8 del plugin WordPress Tooltips Pro Plus in risposta ai feedback degli utenti. Un utente ha contattato inizialmente per ricevere aiuto con la configurazione della propria pagina del glossario, esprimendo difficoltà nel farla apparire come desiderato. Il nostro team di supporto li ha guidati con i passaggi per creare una nuova pagina e inserire uno shortcode. Dopo alcuni scambi, l’utente ha configurato con successo il proprio indice del glossario, ma desidera sostituire i link delle categorie del glossario nei breadcrumb con link a un’altra pagina SEO.

Per affrontare questo, il nostro team di supporto ha informato l’utente che stiamo lavorando a un aggiornamento per consentire la personalizzazione dei link dei breadcrumb. Di conseguenza, abbiamo sviluppato la nuova versione per implementare questa funzionalità richiesta dall’utente.

Questo rilascio mira a migliorare l’esperienza dell’utente e a risolvere le richieste specifiche fatte durante l’interazione di supporto. Grazie ai nostri utenti per il loro prezioso contributo!

Inoltre, il nostro sviluppatore del plugin WordPress Tooltip ha detto che è una grande idea supportare la personalizzazione del link del glossario nei breadcrumb, consentendo di portare a un’altra pagina. Così abbiamo sviluppato la versione 31.2.8 di WordPress Tooltips Pro Plus per dare vita a questa idea per gli utenti di WordPress Tooltip.

### Come sostituire il link “Glossario” nei breadcrumb del glossario nel plugin WordPress Tooltips?

Per utenti esistenti: Per scaricare l’ultima versione del plugin WordPress Tooltip Pro Plus, clicca sul link etichettato “scarica wordpress tooltip”. Assicurati che il numero della versione sia 31.0.8 o superiore. I nuovi utenti dovranno ottenere una licenza per il plugin WordPress Tooltip Pro Plus prima di procedere.
Accesso amministratore: Accedi al tuo sito WordPress con privilegi da amministratore.

Gestione plugin: Nel pannello di controllo del tuo sito, trova la sezione “Plugin”.

Rimuovi la vecchia versione: Disattiva ed elimina completamente eventuali versioni precedenti del plugin WordPress Tooltip dalla lista dei plugin.

Carica la nuova versione: Per installare il plugin aggiornato, clicca sul pulsante “Aggiungi Nuovo” e seleziona il file zip del nuovo plugin WordPress Tooltip.

Attiva il plugin: Dopo aver caricato, assicurati di attivare il plugin dal pannello dei plugin per accedere alle sue funzionalità.

Per utenti alla prima esperienza: Sei nuovo nel plugin WordPress Tooltip? Dai un’occhiata al nostro video tutorial sull’installazione: WordPress Tooltips Video Tutorial 3: Come caricare e attivare il plugin WordPress Tooltips Pro.

Accedi alle impostazioni: Nel tuo dashboard WordPress, vai al menu “Tooltips” e clicca sull’opzione “Impostazioni Glossario”. Il menu dovrebbe apparire come segue:

  • tooltips menu in wordpress tooltips pro plus 27.5.8

tooltips menu in wordpress tooltips pro plus 27.5.8

Personalizza i link dei breadcrumb: All’interno del pannello delle impostazioni del glossario, cerca l’opzione etichettata “Personalizza il link del glossario nei breadcrumb del glossario.” Ecco come appare:


Alla fine del pannello delle impostazioni, troverai un menu a discesa dove puoi scegliere tra varie pagine di WordPress. Seleziona semplicemente un’altra pagina per sostituire il link della categoria del glossario esistente nei breadcrumb.

Nota importante: Se preferisci non cambiare il link del glossario nei breadcrumb, scegli semplicemente “Nessuno” dal menu a discesa.

Nell’area delle impostazioni del glossario di WordPress, troverai l’opzione “Personalizza il link del glossario nei breadcrumb del glossario”, e appare così:

Come puoi vedere in fondo al pannello delle impostazioni del Glossario di WordPress, abbiamo aggiunto una nuova opzione chiamata ‘Personalizza il link del glossario nei breadcrumb del glossario’. In questa opzione, c’è una casella a discesa con l’elenco di tutte le pagine di WordPress. Puoi semplicemente selezionare un’altra pagina da questo menu a discesa per sostituire il link della categoria del glossario nei breadcrumb.
Ti preghiamo di notare:
Se non vuoi sostituire il link del glossario nei breadcrumb del glossario, seleziona semplicemente l’opzione “Nessuno” nella casella a discesa.
Apprezziamo davvero il tuo fantastico suggerimento! Se hai ulteriori idee per funzionalità, non esitare a contattarci. Siamo entusiasti di assisterti nel realizzare la tua visione!
Ti auguriamo una giornata meravigliosa, piena di gioia insieme ai tuoi cari!
Cordiali saluti,
Il team di supporto del plugin WordPress Tooltip

Tagged with: , , ,

¿Cómo reemplazar el enlace de “Glosario” en las migas de pan del glosario en el plugin de WordPress Tooltips?

Hola, queridos usuarios del plugin WordPress Tooltip, Espero que este mensaje los encuentre bien y disfrutando de un feliz fin de semana con su familia. Recientemente lanzamos la versión 31.0.8 del plugin WordPress Tooltips Pro Plus en respuesta a los comentarios de los usuarios. Un usuario se comunicó inicialmente en busca de ayuda para configurar su página de glosario, expresando dificultades para lograr que se viera como deseaba. Nuestro equipo de soporte los guió con los pasos para crear una nueva página e insertar un shortcode. Después de algunos idas y venidas, el usuario logró configurar su índice de glosario, pero desea reemplazar los enlaces de categoría de glosario en las migas de pan por enlaces a otra página SEO.

Para abordar esto, nuestro equipo de soporte informó al usuario que estamos trabajando en una actualización para permitir la personalización de los enlaces de las migas de pan. Como resultado, desarrollamos la nueva versión para implementar esta función solicitada por el usuario.
Este lanzamiento tiene como objetivo mejorar la experiencia del usuario y resolver las solicitudes específicas planteadas durante la interacción de soporte. ¡Gracias a nuestros usuarios por sus valiosos aportes!

Además, nuestro desarrollador del plugin WordPress Tooltip mencionó que es una gran idea soportar la personalización del enlace de glosario en las migas de pan, permitiendo que dirija a otra página. Así que desarrollamos la versión 31.2.8 de WordPress Tooltips Pro Plus para hacer realidad esta idea para los usuarios de WordPress Tooltip.

¿Cómo reemplazar el enlace de “Glosario” en las migas de pan del glosario en el plugin de WordPress Tooltips?

Para usuarios existentes: Para descargar la última versión del plugin WordPress Tooltip Pro Plus, haga clic en el enlace etiquetado “descargar wordpress tooltip”. Asegúrese de que el número de versión sea 31.0.8 o superior. Los nuevos usuarios deberán obtener una licencia para el plugin WordPress Tooltip Pro Plus antes de continuar.
Acceso de administrador: Inicie sesión en su sitio de WordPress con privilegios de administrador.
Gestión de plugins: En el panel de su sitio, ubique la sección “Plugins”.
Eliminar versión anterior: Desactive y elimine completamente cualquier versión anterior del plugin WordPress Tooltip de la lista de plugins.
Cargar nueva versión: Para instalar el plugin actualizado, haga clic en el botón “Agregar nuevo” y seleccione el archivo zip del nuevo plugin WordPress Tooltip.
Activar el plugin: Después de cargarlo, asegúrese de activar el plugin desde el panel de plugins para acceder a sus características.
Para usuarios por primera vez: ¿Nuevo en el plugin WordPress Tooltip? Consulte nuestro video tutorial sobre instalación: Video tutorial de WordPress Tooltips 3: Cómo cargar y activar el plugin WordPress Tooltips Pro.
Acceder a la configuración: En su panel de WordPress, navegue al menú “Tooltips” y haga clic en la opción “Configuración del glosario”. El menú debería mostrarse de la siguiente manera:

  • tooltips menu in wordpress tooltips pro plus 27.5.8

Menú de tooltips en WordPress Tooltips Pro Plus 27.5.8
Personalizar enlaces de migas de pan: Dentro del panel de configuración del glosario, busque la opción etiquetada “Personalizar enlace de glosario en las migas de pan del glosario”. Aquí hay una vista de cómo aparece:


En la parte inferior del panel de configuración, encontrará un menú desplegable donde puede elegir entre varias páginas de WordPress. Simplemente seleccione una página diferente para reemplazar el enlace de categoría de glosario existente en las migas de pan.
Nota importante:
Si prefiere no cambiar el enlace de glosario en las migas de pan, simplemente seleccione “Ninguno” del menú desplegable.
Menú de tooltips en WordPress Tooltips Pro Plus 27.5.8
Dentro del panel de configuración del glosario de WordPress, encontrará la opción “Personalizar enlace de glosario en las migas de pan del glosario”. Se ve así:


Como puede ver en la parte inferior del panel de configuración del glosario de WordPress, hemos agregado una nueva opción llamada ‘Personalizar enlace de glosario en las migas de pan del glosario’. En esta opción, hay un cuadro desplegable que lista todas las páginas de WordPress. Puede simplemente seleccionar una página diferente de este desplegable para reemplazar el enlace de categoría de glosario en las migas de pan.
Tenga en cuenta:
Si no desea reemplazar el enlace de glosario en las migas de pan, simplemente seleccione el elemento “Ninguno” en el cuadro desplegable.
¡Realmente apreciamos su fantástica sugerencia! Si tiene ideas adicionales sobre funciones, no dude en comunicarse con nosotros. ¡Estamos emocionados de ayudar a hacer realidad su visión!
¡Les deseamos un maravilloso día lleno de alegría junto a sus seres queridos!
Saludos cordiales,
El equipo de soporte del plugin WordPress Tooltip

Tagged with: , , ,

Wie ersetzt man den „Glossar“-Link in den Glossar-Breadcrumbs im WordPress Tooltips Plugin?

Hallo, liebe Benutzer des WordPress Tooltip Plugins, ich hoffe, diese Nachricht erreicht euch wohl und ihr verbringt ein schönes Wochenende mit eurer Familie. Wir haben kürzlich die Version 31.0.8 des WordPress Tooltips Pro Plus Plugins veröffentlicht, als Antwort auf das Feedback der Benutzer. Ein Benutzer hatte sich ursprünglich um Hilfe beim Einrichten seiner Glossarseite gewendet und Schwierigkeiten geäußert, diese wie gewünscht zu gestalten. Unser Support-Team hat ihn mit Schritten zur Erstellung einer neuen Seite und dem Einfügen eines Shortcodes unterstützt. Nach einigem Hin und Her hat der Benutzer erfolgreich sein Glossar-Index eingerichtet, möchte jedoch die Links zu den Glossarkategorien in den Breadcrumbs durch Links zu einer anderen SEO-Seite ersetzen.

Um diesem Anliegen Rechnung zu tragen, informierte unser Support-Team den Benutzer, dass wir an einem Update arbeiten, um die Anpassung von Breadcrumb-Links zu ermöglichen. Infolgedessen haben wir die neue Version entwickelt, um dieses vom Benutzer gewünschte Feature zu implementieren.
Diese Version soll das Benutzererlebnis verbessern und die spezifischen Anfragen während der Support-Interaktion lösen. Vielen Dank an unsere Benutzer für ihr wertvolles Feedback!

Unser Entwickler des WordPress Tooltip Plugins hat außerdem gesagt, dass es eine großartige Idee ist, die Anpassung des Glossar-Links in den Breadcrumbs zu unterstützen, damit er zu einer anderen Seite führt. Daher haben wir die Version 31.2.8 des WordPress Tooltips Pro Plus Plugins entwickelt, um diese Idee für die Benutzer des WordPress Tooltips zu verwirklichen.

Wie ersetzt man den „Glossar“-Link in den Glossar-Breadcrumbs im WordPress Tooltips Plugin?

– Für bestehende Benutzer: Um die neueste Version des WordPress Tooltip Pro Plus Plugins herunterzuladen, klicken Sie auf den Link mit der Bezeichnung „WordPress Tooltip herunterladen“. Stellen Sie sicher, dass die Versionsnummer 31.0.8 oder höher ist. Neue Benutzer müssen eine Lizenz für das WordPress Tooltip Pro Plus Plugin erwerben, bevor sie fortfahren können.
– Admin-Zugang: Melden Sie sich mit Administratorrechten auf Ihrer WordPress-Seite an.
– Plugin-Verwaltung: Suchen Sie im Dashboard Ihrer Seite den Bereich „Plugins“.
– Alte Version entfernen: Deaktivieren und löschen Sie alle vorherigen Versionen des WordPress Tooltip Plugins aus der Plugin-Liste.
– Neue Version hochladen: Um das aktualisierte Plugin zu installieren, klicken Sie auf die Schaltfläche „Neu hinzufügen“ und wählen Sie die ZIP-Datei des neuen WordPress Tooltip Plugins aus.
– Plugin aktivieren: Nach dem Hochladen aktivieren Sie das Plugin über das Plugin-Panel, um auf dessen Funktionen zuzugreifen.
– Für Erstbenutzer: Neu im WordPress Tooltip Plugin? Schauen Sie sich unser Video-Tutorial zur Installation an: WordPress Tooltips Video Tutorial 3: So laden Sie das WordPress Tooltips Pro Plugin hoch und aktivieren es.
– Einstellungen aufrufen: Navigieren Sie in Ihrem WordPress-Dashboard zum Menü „Tooltips“ und klicken Sie auf die Option „Glossar-Einstellungen“. Das Menü sollte folgendermassen angezeigt werden:


  • tooltips menu in wordpress tooltips pro plus 27.5.8

– Breadcrumb-Links anpassen: Im Einstellungsbereich des Glossars suchen Sie die Option mit der Bezeichnung „Glossar-Link in den Glossar-Breadcrumbs anpassen“. So sieht es aus:


Am Ende des Einstellungsbereichs finden Sie ein Dropdown-Menü, in dem Sie aus verschiedenen WordPress-Seiten auswählen können. Wählen Sie einfach eine andere Seite aus, um den bestehenden Glossarkategorielink in den Breadcrumbs zu ersetzen.

– Wichtiger Hinweis: Wenn Sie den Glossar-Link in den Breadcrumbs nicht ändern möchten, wählen Sie einfach „Keine“ aus dem Dropdown-Menü.

Im WordPress-Glossar-Einstellungsbereich finden Sie die Option „Glossar-Link in den Glossar-Breadcrumbs anpassen“, sie sieht so aus:
Wie Sie am Ende des WordPress-Glossar-Einstellungsbereichs sehen können, haben wir eine neue Option mit dem Namen „Glossar-Link in den Glossar-Breadcrumbs anpassen“ hinzugefügt. In dieser Option gibt es ein Dropdown-Feld, das alle WordPress-Seiten auflistet. Sie können einfach eine andere Seite aus diesem Dropdown auswählen, um den Glossarkategorielink in den Breadcrumbs zu ersetzen.
Bitte beachten Sie:

Wenn Sie den Glossar-Link in den Glossar-Breadcrumbs nicht ersetzen möchten, wählen Sie einfach den Eintrag „Keine“ im Dropdown-Feld aus.
Wir schätzen Ihren fantastischen Vorschlag! Sollten Sie weitere Ideen für Funktionen haben, zögern Sie bitte nicht, uns zu kontaktieren. Wir freuen uns darauf, Ihre Vision Wirklichkeit werden zu lassen!
Wir wünschen Ihnen einen wunderbaren Tag voller Freude mit Ihren Lieben!
Herzliche Grüße,
Das Support-Team des WordPress Tooltip Plugins

Tagged with: , , ,

How to Replace the “Glossary” Link in the Glossary Breadcrumbs in the WordPress Tooltips Plugin? WordPress Tooltips Pro Plus version 31.2.8 has been released

Hi, dear  WordPress Tooltip plugin users,I hope this message find you are doing well and having happy weekend with your family.   We recently released version 31.0.8 of the WordPress Tooltips Pro Plus plugin in response to user feedback.  A user initially reached out for help with setting up their glossary page, expressing difficulty in getting it to look as desired. Our support team guided them with steps to create a new page and insert a shortcode. After some back and forth, the user successfully set up their glossary index, but they want to replace the glossary category links in the breadcrumb with links to another SEO page.

To address this, our support team informed the user that we are working on an update to allow customization of breadcrumb links. As a result, we developed the new version to implement this feature requested by the user.

This release aims to enhance user experience and resolve the specific requests made during the support interaction. Thank you to our users for their valuable input!

Also, our WordPress tooltip plugin developer said that it’s a great idea to support customizing the glossary link in the breadcrumb, allowing it to lead to another page. So we developed WordPress Tooltips Pro Plus version 31.2.8 to bring the idea to life for wordpress tooltip users. 🙂

How to Replace the “Glossary” Link in the Glossary Breadcrumbs in the WordPress Tooltips Plugin?

  • For Existing Users: To download the latest version of the WordPress Tooltip Pro Plus plugin, click the link labeled “download wordpress tooltip” Ensure that the version number is 31.0.8 or higher. New users will need to obtain a license for WordPress Tooltip Pro Plus plugin before proceeding.
  • Admin Access: Log into your WordPress site with administrator privileges.
  • Plugin Management: In your site’s dashboard, locate the “Plugins” section.
  • Remove Old Version: Deactivate and completely delete any previous versions of the WordPress Tooltip plugin from the plugins list.
  • Upload New Version: To install the updated plugin, click the “Add New” button and select the zip file of the new WordPress Tooltip plugin.
  • Activate the Plugin: After uploading, ensure you activate the plugin from the plugins panel to access its features.
  • For First-Time Users: New to the WordPress Tooltip plugin? Check out our video tutorial on installation: WordPress Tooltips Video Tutorial 3: How to Upload and Activate WordPress Tooltips Pro Plugin.
  • Access Settings: In your WordPress dashboard, navigate to the “Tooltips” menu and click on the “Glossary Settings” option. The menu should display as follows:
  • tooltips menu in wordpress tooltips pro plus 27.5.8
  • Customize Breadcrumb Links: Within the glossary settings panel, look for the option labeled “Customize Glossary Link in Glossary Breadcrumbs.” Here’s how it appears:

    At the bottom of the settings panel, you will find a dropdown menu where you can choose from various WordPress pages. Simply select a different page to replace the existing glossary category link in the breadcrumbs.

  • Important Note:
    If you prefer not to change the glossary link in the breadcrumbs, simply select “None” from the dropdown menu.


tooltips menu in wordpress tooltips pro plus 27.5.8

9: Within the WordPress glossary settings panel, you will find the “Customize Glossary Link in Glossary Bread Crumbs” option, it looks like this:

As you can see at the bottom of the WordPress Glossary Settings panel, we have added a new option called ‘Customize Glossary Link in Glossary Bread Crumbs’ In this option, there is a dropdown box listing all WordPress pages. You can simply select a different page from this dropdown to replace the glossary category link in the breadcrumbs.

Please note:

If you do not want to replace the glossary link in Glossary Bread Crumbs, simply select the item “None” in the dropdown box

We truly appreciate your fantastic suggestion! Should you have any additional feature ideas, please feel free to reach out to us. We’re excited to assist in bringing your vision to life!

Wishing you a wonderful day filled with joy alongside your loved ones!

Warm regards,
The Support Team at WordPress Tooltip Plugin

Tagged with: , , ,

How to Replace the Glossary Category Link in the Glossary Breadcrumbs in the WordPress Tooltips Plugin? WordPress Tooltips Pro Plus version 31.0.8 has been released

Hi, dear users of  WordPress Tooltip plugin,I truly wish that this message reaches you in high spirits, surrounded by the joy and comfort of your dear family. 🙂 We just released the version 31.0.8 of wordpress tooltips pro plus, the reason for developing this version is that a few days before, we received a few support tickets from an amazing wordpress tooltip user:


Subject:
Help with the setup

Message:
Hello dear support team, I can’t quite  get to grips with the operation. I would like it to look
like this page (https://demo/lexikon). It looks like  this for me: (https://demo/lexiko
n) The pictures are not displayed and it doesn’t look nice. Can you help me?

Thank you
Regards


Our wordpress tooltip support replied:

Hi,
Hope this message find you are doing well and having happy weekend with
your family 🙂

Sir, it is greate to know you are SEO expert! 🙂

Sir, let’s solve the problem step by step:
1: Would you please create a new page in wordpress dashboard
2: In this new page, please insert glossary shortcode: [ glossary ]
3: Then in front end, the glossary page looks like this: https ://tooltips.org/glossary-demo/  🙂

Sir, we checked pages, the page https ://demo/lexikon is glossary index page which display all
glossary terms(with links) in one  page to improve SEO rank, it is a wordpress standard category archive page, in this page, we found your theme mentioned you need check theme panel and enable some functions in block…etc,  this page is designed by wordpress theme, so please just follow the top to check your theme  panel and enable image in backend, I
guess then you will find images display in this archive page 🙂

If you have any more question, please don’t hesitate to tell us, we are very happy to help you solve the problem asap we can

Thanks, have a blessed weekend with your loved ones 🙂
Best Regards,
Wordpress Tooltips Plugin Support ——————————————————————————————————–

The user replied:

Hello Support Team,
Thank you very much for your help! I have created a new page and inserted
the shortcode [ glossary ]  “https://demo/lexikon-glossary”. Now it looks exactly like  your glossary demo page. After I set the “Glossary Index Page:” in the “Glossary Settings”, I had  the archive page again. If I simply selected another page, the links were not correct. Unfortunately I can’t get to grips with the many functions, is it  possible that you can set this correctly for me? I would like to have it just like on your site:  https://tooltips.org/glossary-demo/
Many thanks and have a good start to the week.
Greetings
———————————————————————————————————–

Our wordpress tooltip plugin support team replied:

Hi,
Thanks for the reply 🙂

It is great to know you have created new page and insert the shortcode and it works well 🙂

Sorry for heard issues of

#1: After I set the “Glossary Index Page:” in the “Glossary Settings”, I had the archive page again.

#2: If I simply selected another page, the links were not correct. We ensure 100% we can solve  the problem for you 🙂

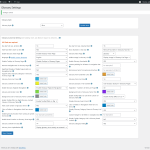
Sir, would you please give us a screenshot of glossary settings page, If you are using Firefox, you can find the screenshot tool by going to “More Tools” –“Customize  Firefox” and then you
can easily take screenshots:)

Also would you please tell us the page URLs in:
#1: After I set the “Glossary Index Page:” in the”Glossary Settings”, I had the archive page  again.

and #2: If I simply selected another page, the links were not correct.

So we can understand it better and help you solve the problem 🙂

Please note, in general, when you set up the option “glossary index page”, please do not select  the page https://demo/lexikon-glossary , because https://demo/lexikon-glossary is a glossary table page which created by the shortcode [ glossary ], and glossary index page is a category  archive page, you can use select another page in the option “glossary index page” 🙂

Thanks, have a blessed day with your loved ones 🙂

Best Regards,
Support

———————————————————————————————————–

And we checked settings for the amazing tooltip user, we reported to the user:

Hi,

Hope you are doing well and having happy days with your family 🙂

Sir, we have resolved the problem for you 🙂

We found you have two page  which inserted the the shortcode [ glossary ]:
1: Glossary & Lexikon the URL is: http://127.0.0.1/glossary-lexikon

2: Lexikon/Glossary http://127.0.0.1/lexikon-glossary

And you set up one of them as glossary index in glossary settings panel 🙂

Okay, A simple & fast way to resolve the problem is:
1 login wordpress

2 in wordpress dashbpoard, click wordpress “pages” menu item

3 please click “add new page” to create a new page, please just enter something like: “glossary index” as page title, you do not need to enter any content in the page, then just publish the
page 🙂

4 in wordpress dashboard, please click “tooltips” menu item, then click “Glossary Settings” sub-menu item

5 you will open Glossary Settings panel, in the option “Glossary Index Page”, please select the  new page “glossary index”, then click “save changes” in Glossary Settings panel

6 now when you open the page http://127.0.0.1/glossary-index, you will find the page is a glossary index page that like our glossary index page demo: https://tooltips.org/glossary/

7 then when you open http://127.0.0.1/lexikon-glossary or http://127.0.0.1/glossary-lexikon,
You will find it is a glossary page that that like our glossary page demo: https://tooltips.org/glossary-demo/

Would you please follow our guide to do a test? Any more question is welcome 🙂

Sorry for the delayed response again, our developer have added a wordpress FAQ pro plugin license in your account as a Sorry,  WordPress FAQ plugin is a powerful & fast jQuery FAQ
solution to help wordpress blodder create / manage / edit FAQs easily, select default pretty FAQ template and custom FAQ style in back-end via a few clicks. With wordpress faq plugin, it is very easy to create and show accordion FAQs, display FAQs grouped by category…etc, easy to use, select pretty FAQ templates from pre-designed template, custom FAQ style in
back-end via a few clicks, Support use OpenAI ChatGPT to generate high-quality content for WordPress F.A.Q and wordpress post automatically, support WooCommerce Product FAQ, Responsive FAQ, Multiple FAQ Templates, FAQs grouped by category, specified number of  FAQ items for each FAQ… and more and more, you can find more details at:

WordPress FAQ Pro Plugin With WordPress Tooltips (version 4.6.6)

Thanks, have a blessed day with your loved ones 🙂

Best Regards,
Support Team


Am 28.06.2024 um 21:38 schrieb
happysupport:

Hi ,

Hope you are doing well and having happy days with your family 🙂

Thanks for the message 🙂

We are very happy to help you 🙂

I am assign our developer to check it, we will reply you again 🙂

Thanks, have a blessed day with your family 🙂

Best Regards,
Wordpress Tooltips Plugin Support Team


Then the wordpress tooltip user replied:

Hi Support Team,

thank you very much for your commitment and efforts. It worked. I still have one small point.
When I click on Lexicon, I get to the following page: https://demo/lexikon-glossary That is also OK. If I now click on the first post: https://demo/glossary/302-weiterleitung Also OK.
In the post comes:

Home / Glossary Index Page / 302 Forwarding with the link (Glossary Index Page): https://demo/glossary

And this page should not be displayed, I would like to have the index again:
https://demo/lexikon-glossary

Is that possible?

Best Regards,
—————————————————————————————————————–

Then our wordpress tooltip support replied:

Hi,

Thanks for the reply 🙂

It is great to know it works 🙂

Thanks for the new report, our developer checked your page and checked our code, in the current time:

1: in glossary settings panel, we have option “enable bread crumbs on glossary term”, you can disable / enable these links in this option

2: currently, we have no function to change the link in bread crumbs, but our developer said he is start to add a new option to allow admin to select another page as this link in breadcrumbs, once we finished this new function, we will reply you again 🙂

Thanks, have a blessed day with your family 🙂

Best Regards,
Wordpress Tooltip Plugin Support


That’s why we need develop a new version of wordpress tooltip plugin to implement the feature request from the amazing wordpress tooltip user, Our wordpress tooltips plugin developer have released a new wordpress tooltips pro plus version 31.0.8 to resolve it for the user 🙂


How to Replace the Glossary Category Link in the Glossary Breadcrumbs in the WordPress Tooltips Plugin?

1:If you are a user of the WordPress Tooltip Pro Plus plugin, please click on the “download wordpress tooltip” link to get the latest version of the tooltips plus plugin. Make sure the version number is equal to or greater than 31.0.8. If you are a new user, you will need to purchase a license for the WordPress Tooltip Pro Plus plugin.

2: Log in to your WordPress site as an administrator.

3: Navigate to the “Plugins” menu in the dashboard.

4: Deactivate and delete the existing version of the WordPress Tooltip plugin from the plugins panel.

5: Next, upload the new version of the WordPress Tooltip plugin by selecting the “Add New” button and choosing the plugin’s zip file.

6: Once the file is uploaded, activate the plugin from the plugins panel to enable its features.

7: If you are new user of wordpress tooltip plugin, please check our  video of how to install wordpress tooltip at:  WordPress Tooltips Video Tutorial 3: How to upload and activate wordpress tooltips pro plugin

8: In the WordPress dashboard, go to the “Tooltips” menu. Then, click on the “Glossary Settings” sub-menu item. The WordPress Tooltip menu appears as follows:

tooltips menu in wordpress tooltips pro plus 27.5.8

tooltips menu in wordpress tooltips pro plus 27.5.8

9: Within the WordPress glossary settings panel, you will find the “Replace Tooltip Category Link in Glossary Bread Crumbs” option, it looks like this:

As you can see at the bottom of the WordPress Glossary Settings panel, we have added a new option called ‘Replace Tooltip Category Link in Glossary Breadcrumbs’ In this option, there is a dropdown box listing all WordPress pages. You can simply select a different page from this dropdown to replace the glossary category link in the breadcrumbs. 🙂

Please note:

1: If you do not want to replace the glossary category link in Glossary Bread Crumbs, just select the item “None” in the dropdown box

2: If you selected a wordpress page from the dropdown box, even if the glossary item does not belong a  glossary category, we will still display the selected wordpress page as the glossary category, if you do not want to replace the glossary category link in the glossary breadcrumbs, please simply select the item “None” from the dropdown box

Also, we are adding new option to allow wordpress tooltip editor to replace other links in the Glossary Bread Crumbs

Thanks for the great feature request, if you have any more feature request, please don’t hesitate to contact us, we are very happy to implement it for you 🙂

Thanks, have a blessed day with your family 🙂

Best Regards,

WordPress tooltip plugin support

Tagged with: , , ,

Understanding Glossaries: Their History, Importance, and the Relevance of WordPress Glossaries

What is a Glossary?

A glossary is a specialized list of terms along with their definitions, typically related to a specific subject or field. It acts as a reference tool that helps clarify jargon and technical language, making complex concepts more accessible to readers. Glossaries are found in various areas, including education, technical writing, medicine, and law, serving to enhance understanding and facilitate effective communication.

The Purpose of a Glossary

Glossaries serve several important functions:

  1. Clarification of Jargon: Many fields of study involve specialized terminology. A glossary provides clear definitions, helping newcomers understand complex language.
  2. Enhanced Learning: For educational contexts, glossaries aid students in mastering the vocabulary specific to a subject, which promotes better comprehension and retention.
  3. Improved Communication: In professional and casual settings, glossaries ensure that all parties have a shared understanding of critical terms.
  4. Localization: For global audiences, glossaries help maintain the intended meaning of terms when translated.

The Historical Context of Glossaries

The concept of glossaries dates back to ancient civilizations. Scholars in ancient Greece and Rome compiled lexicons and glossaries to preserve knowledge and assist readers in understanding complex language. Some of the earliest glossaries, dating back to the first century AD, contributed to academic work across various disciplines. As education systems developed, particularly during the Middle Ages, glossaries became integral to university curricula. The advent of the printing press in the 15th century facilitated the production and distribution of glossaries, allowing them to reach broader audiences. In the modern era, glossaries continue to find relevance in academic, technical, and digital content, emphasizing the necessity of clear communication in specialized domains.

What is a WordPress Glossary?

A WordPress glossary adapts traditional glossary concepts to the WordPress platform. It provides a dedicated section or feature where users can find definitions of terms relevant to the site’s content. This enhances user experience by allowing visitors to grasp key concepts quickly and efficiently. It looks like this:

For security reason, we have disabled attachment upload functionality in support ticket, you are welcome to share screenshots with us via https://screenshot.net/ to share your screenshots with us, it is very easy to use, just 3 seconds, you can upload images and get a screenshot URL, please just share this screenshot URL with us, it Read More
This is button tooltip demo, you can add tooltip effect in any buttons
Our wordpress tooltips plugin support multi-method to insert video tooltips, wordpress tooltips support insert youtube video in tooltips automatically, also you can add videos via html5 code, and if you like, you can just add video tooltips via shortcodes
What is sweet tooltip? That means each tooltip term have ability to custom a different / unique pretty style, so all tooltip term will not looks just like "inflexible", you can build a colorful and varied tooltip sites for users.
We will develop and cultivate the liberation of mind by lovingkindness, make it our vehicle, make it our basis, stabilize it, exercise ourselves in it, and fully perfect it.
The three great essentials to achieve anything worthwhile are: Hard work, Stick-to-itiveness, and Common sense.
wordpress tooltip customize demo
Hi, we will never share your email with any guy, please don't spam, thank you 🙂

Features of a WordPress Glossary

  1. Definitions and Explanations: Lists terms alongside their definitions, allowing users quick reference to jargon or technical language.
  2. Enhanced Navigation: It organizes terminology for easy access, helping users find terms while exploring related content.
  3. Search Functionality: Users can type a term and quickly find its definition, improving usability.
  4. Alphabetical Listings: Well-structured glossaries enable users to navigate terms easily.
  5. Tooltips: Some glossaries display definitions when hovering over specific terms, facilitating seamless access to information.

Why Include a Glossary on Your WordPress Site?

  1. Improved User Experience: Glossaries help visitors who encounter unfamiliar terms, allowing for greater engagement with the material.
  2. Increased Engagement: Quick access to definitions encourages users to spend more time on your site, exploring additional content.
  3. Search Engine Optimization (SEO): Glossaries create extra content that improves search visibility, potentially drawing more visitors to your site.
  4. Establishing Authority: By providing well-researched definitions, a glossary positions your site as a trusted information source.
  5. Facilitating Learning: For educational websites, glossaries are vital in helping learners navigate complex subject matter.

Why Should WordPress Webmasters Use a WordPress Glossary Plugin?

Using a WordPress glossary plugin can greatly simplify the creation and management of a glossary:

1. Simplicity and Ease of Use

These plugins are user-friendly, allowing webmasters to create and manage glossaries without extensive technical skills. Most provide intuitive interfaces for adding and editing terms.

2. Customization Options

Many plugins offer customization features, allowing you to tailor the appearance and functionality of the glossary to match your site’s design.

3. Search Functionality

Built-in search features let users locate terms quickly, enhancing the overall user experience.

4. Tooltip Capabilities

Plugins often include tooltips, providing definitions when users hover over terms, thus improving accessibility.

5. Automatic Linking

Some plugins can automatically link defined terms throughout your website, ensuring consistent presentations and easier access to definitions.

6. Responsive Design

Most plugins are designed to work seamlessly across devices and screen sizes, ensuring accessibility for all users, whether on a smartphone, tablet, or desktop.

7. SEO Optimization

Glossary plugins allow for SEO-friendly URLs and metadata for better search visibility, positively impacting your site’s ranking.

8. Time Efficiency

Glossary plugins automate many processes, allowing webmasters to save time and redirect focus to other essential site aspects.

9. Support and Updates

Popular glossary plugins typically offer dedicated support and regular updates, ensuring functionality with the latest WordPress versions.

10. Comprehensive User Documentation

Good plugins come equipped with extensive documentation, helping users maximize their potential through installation guidelines and customization tips.

More details please check WordPress glossary features

Implementing a Glossary on Your WordPress Site

Creating a WordPress glossary involves several straightforward steps:

Step 1: Choose the Right Glossary Plugin

Explore various glossary plugins available in the WordPress Plugin Directory. Popular options include:

  • WordPress Tooltips Plugin: Features tooltips, an easy-to-navigate glossary page, and automatic linking of terms.  (pro version download URL: https://tooltips.org)
  • WP Glossary: A simple solution for creating a glossary section on your site.
  • Glossary by Tips and Tricks HQ: Offers customization options suitable for any site.

Step 2: Install and Activate the Plugin

After choosing a plugin, install and activate it through your WordPress admin dashboard. Navigate to “Plugins” > “Add New,” search for your chosen plugin, click “Install Now,” and then “Activate.”

Step 3: Configure Plugin Settings

Navigate to the plugin’s settings page to customize options like glossary appearance, tooltip behaviors, and search features.

Step 4: Add Terms and Definitions

Begin building your glossary by adding terms and their definitions using the plugin interface.

Step 5: Organize the Glossary

Consider grouping terms by topics or using an alphabetical listing to enhance usability.

Step 6: Embed the Glossary on Your Site

Decide where to make your glossary accessible; creating a dedicated page, linking it in your navigation menu, or embedding it in related articles are effective options.

Step 7: Keep the Glossary Updated

Regularly update the glossary as your website evolves, ensuring you include relevant new terms and remove outdated ones.

Conclusion

Glossaries play a critical role in enhancing understanding and navigation within specialized fields. As they have evolved over time, their relevance has only increased, especially with the rise of digital content. A WordPress glossary offers tailored solutions to improve user experience, engagement, and SEO performance. By utilizing a WordPress glossary plugin, webmasters can create an engaging resource that enriches their site and positions it as an authoritative source of information in its niche. Implementing a glossary on your WordPress site not only empowers your audience with valuable knowledge but also enhances your site’s overall effectiveness in conveying information.

Tagged with: , ,

What is WordPress Glossary?

Unlock the power of knowledge with our WordPress Tooltips Pro Plus plugin! Easily build stunning glossaries, lists, and directories that enhance user understanding and engagement.

A glossary is more than just a list of terms; it’s a valuable educational tool that dates back to ancient lexicons. By integrating glossaries into your WordPress site, you offer your visitors immediate access to complex terminology, making their experience smoother and more enjoyable.

You can create a versatile knowledge base, including glossaries, WooCommerce product lists, member directories, and much more. Customize your formats to match your brand’s style, and seamlessly integrate third-party data sources—turning your site into a powerful knowledge hub!

Tagged with: , ,

Support for ‘Display glossary term exactly as entered in the title column of the glossary’ in WordPress Tooltips Free Plugin 9.8.9

Hello, valued users of the WordPress Tooltip plugin! I trust you are having a wonderful weekend with your loved ones. We recently received an inquiry from a user regarding the WordPress Tooltip plugin, specifically asking how to resolve the “upper and lower case” concern on the glossary page. The user stated:”

hello,
as I reported on wordpress.org I noticed that if I enter a tooltip
with a capital letter, for example: “Open source” he replaces all
the words in my paragraph from open source to Open source.

Is it possible to make it keep the upper and lower case of the
paragraph and not be replaced by the tooltip title?

Thanks!

Our wordpress tooltip support team replied:


Hi,

Hope you are doing well and having happy days with your family

Thanks for the message

We are very happy to help you

Because we have many plugin versions with different functions, Would you please tell us:
1 the plugin version you are using
2 the URL related with the problem
3 a little more details to tell us how to find the problem in the URL

I will assign our developer to check it and solve it for you?

Thank you so much for the bug report, we’d like give you a gift as a THANKS, would you please make a $0 fake order at our demo:
https://tooltips.org/product/show-tooltips-in-woocommerce-products/
And then we can add one of our pro plugin license in your account as a THANKS?

Thanks, have a blessed day with your family

Best Regards,
Wordpress Tooltips Plugin Support Team

The amazing user replied:

Hello,

1. i am using version 9.6.9
2. my URL is: (removed)
3. As you can see all tooltips are with a capital initial letter but
within the article I wrote them with a lower case letter. For example
browser became Browser or even fork became Fork. I think it’s because
the tooltips were recorded with a capital letter but I think it’s not
correct that in the text they display capital letters without much
meaning.

What I expect is for the text to stay true to what I wrote in the
article.

Thank you.

Our wordpress tooltip support team replied:

Hi,

Thanks for the reply

I am assign our developer to check it and we will reply you again

Thanks, have a happy day with your loved ones

Best Regards,
Wordpress Tooltip Support

Then, our WordPress Tooltips plugin developer examined the user’s page, and we understood what the problem was. A few years ago, another amazing user of the WordPress glossary requested that glossary terms be displayed in uppercase to create a more dignified appearance. Now, we have developed a new version of the WordPress Tooltips plugin, version 9.8.9, to address this issue for WordPress Tooltip users. They can choose their preferred style for glossary terms.

How to Set Up Glossary Term Capitalization in the WordPress Tooltips Plugin?

1. Update to the most recent version of the WordPress Tooltips available through the WordPress Tooltips Free Plugin on WordPress, or easily obtain it at no cost from our official WordPress Tooltips download link.”

2. Within the WordPress admin panel, select the ‘Tooltips’ option from the menu. Then, from the list that appears, click on ‘Glossary Settings.’. This action will display the ‘Glossary Settings’ section, as depicted in the screenshot provided below:”

3. As you can see, at the bottom of the glossary settings panel, there is a new option: “Glossary Term Capitalization”. In the “Glossary Term Capitalization”, there are 2 options:

a: Display glossary term exactly as entered in the title column of the glossary

b: Uppercase letters display for glossary term in the title column of the glossary


with wordpress tooltips pro plus version, we added two more options:

c: Lowercase letters display for glossary term in the title column of the glossary

d: Initial Capitalization of glossary terms in the glossary title column

It looks like this:

In the case of what the user is requesting, you can simply select the option: “Display glossary term exactly as entered in the title column of the glossary” from the “Glossary Term Capitalization” dropdown box, then in the glossary page, you will find we have fulfilled your requirement:  “What I expect is for the text to stay true to what I wrote in the article”

You can select options based on your needs

We got a question from a new user of wordpress tooltip user, he asked us what is glossary, okay, a glossary looks like this:

For security reason, we have disabled attachment upload functionality in support ticket, you are welcome to share screenshots with us via https://screenshot.net/ to share your screenshots with us, it is very easy to use, just 3 seconds, you can upload images and get a screenshot URL, please just share this screenshot URL with us, it Read More
This is button tooltip demo, you can add tooltip effect in any buttons
Our wordpress tooltips plugin support multi-method to insert video tooltips, wordpress tooltips support insert youtube video in tooltips automatically, also you can add videos via html5 code, and if you like, you can just add video tooltips via shortcodes
What is sweet tooltip? That means each tooltip term have ability to custom a different / unique pretty style, so all tooltip term will not looks just like "inflexible", you can build a colorful and varied tooltip sites for users.
We will develop and cultivate the liberation of mind by lovingkindness, make it our vehicle, make it our basis, stabilize it, exercise ourselves in it, and fully perfect it.
The three great essentials to achieve anything worthwhile are: Hard work, Stick-to-itiveness, and Common sense.
wordpress tooltip customize demo
Hi, we will never share your email with any guy, please don't spam, thank you 🙂

The Historical Context of Glossaries

The history of glossaries can be traced back to ancient civilizations, where scholars documented specialized vocabulary to preserve knowledge and facilitate understanding. For example, in ancient Greece and Rome, lexicons served a similar purpose, providing definitions and usage notes for complex language. Some of the earliest known glossaries date back to the first century AD, when scholars began compiling lists of terms for various fields of study. As languages evolved, the need for glossaries continued. During the Middle Ages, the rise of universities produced scholarly works that often included glossaries to aid students in comprehending new ideas. The advent of the printing press in the 15th century made it easier to produce and disseminate glossaries, thus expanding their reach and influence. In the modern era, glossaries have found a permanent place in educational materials, academic papers, and digital content, further reflecting the necessity of clear communication in an increasingly specialized world.

Understanding Glossary and WordPress Glossary

A glossary is a list of terms in a specific domain of knowledge, accompanied by definitions. It serves as a reference tool to help users understand jargon, technical language, or specialized terminology that may not be immediately clear. Glossaries are commonly found in books, articles, websites, and various forms of media, providing clarity and enhancing comprehension for the audience. In many fields, having a glossary is essential, as it can help bridge the gap between experts and novices. For instance, in technical or academic writing, the inclusion of a glossary allows readers to grasp complex ideas without getting lost in unfamiliar vocabulary. Businesses, educators, and organizations often create glossaries tailored to their specific contexts to ensure effective communication. In the digital realm, a WordPress glossary is a similar concept adapted for websites built on the WordPress platform. It offers a dedicated section where visitors can find definitions of terms relevant to the content of the website. A WordPress glossary enhances user experience, making it easier for visitors to understand key concepts and terminologies used throughout the site.

Why Use a WordPress Glossary?

  1. Improved User Experience: A well-structured glossary provides quick access to definitions, making it easier for users to follow along with your content. This is especially beneficial for websites that use technical terms or industry-specific jargon. By having a glossary, you reduce the likelihood of visitors leaving the site due to confusion or frustration.
  2. Increased Engagement: When users can easily find explanations for terms they encounter, they are more likely to stay on your site longer. An engaging experience can lead to increased page views, longer session durations, and higher user satisfaction.
  3. SEO Benefits: Search engines appreciate content that is clear and valuable to users. By including a glossary, you can create additional content optimized for relevant keywords, potentially improving your site’s visibility in search engine rankings. Additionally, when users share your glossary on social media or link to it from their own websites, you gain backlinks that can further enhance your SEO efforts.
  4. Establishing Authority: A glossary showcases your expertise in your field. By providing clear definitions and information, you can position your website as a reliable resource for visitors seeking knowledge in your area of specialization. This can help build trust and credibility with your audience.

Implementing a WordPress Glossary

Creating a glossary on your WordPress site can be simple. Many plugins are available that facilitate the inclusion of a glossary feature with minimal effort. These plugins often allow you to input terms and definitions, generate additional pages for each entry, and even apply tooltips that display definitions when users hover over terms in your content. For those who prefer a more customized approach, you can create a dedicated page or section for your glossary, manually inputting terms and descriptions. Organizing the glossary alphabetically or categorically can enhance its usability, allowing users to quickly find the information they seek.

Conclusion

In conclusion, a glossary plays a vital role in enhancing understanding and communication, making it an essential tool for various forms of content, especially in specialized fields. A WordPress glossary not only aids users in navigating complex terminology but also contributes to improved SEO, increased engagement, and the establishment of your website’s authority. By integrating a glossary into your WordPress site, you provide valuable resources for your audience while simultaneously enhancing their overall experience.

If you have any more question, please don’t hesitate to contact us, we are very happy to implement your feature request to build a better and better wordpress glossary plugin

Thanks, have a blessed weekend with your family

Best Regards,

WordPress tooltips plugin support team


Tagged with: , , , ,
Top