
How to Customize Tooltip Style For Tooltip ShortCode?
What is WordPress Tooltip Plugin?
How Can I Customize WordPress Tooltip Style For Tooltip ShortCode?
1: If you didn’t installed wordpress tooltip, please login your account at wordpress glossary tooltip plugin site, if you have installed wordpress tooltip plugin, please jump to step #10 directly 🙂
2: Download wordpress glossary tooltip plugin at “My account” page
3: Login wordpress admin area
4: Click “Plugins” menu item
5: Deactivated old tooltips version
6: Delete the old wordpress tooltip plugin
7: In “Plugins” menu item, click add new at the top of the plugins panel
8: Upload the tooltips plugin zip file which you downloaded from wordpress glossary plugin site
9: Activate latest version of wordpress tooltip glossary plugin
10: Click “Tooltips” menu item
11: Click “Tooltip Style” sub menu item, you will open “Tooltip Style” panel, it looks like this:

wordpress tooltip style settings panel 14.1.6
In the screenshot, you can find tooltip title font color, title font size, tooltip title background color… etc. Basically, you can customize every single property of the wordpress tooltip 🙂
12: If you want to customize a unique, beautiful tooltip template for each wordpress tooltip term, that’s easy too
12.1 Click “Add New” sub menu item under the Tooltip menu item
12.2 You will find you can custom unique style for each tootip, via “custom unique style for this tooltip” metabox which at the bottom of the tooltip editor,it looks like this:

unique pretty style for each tooltip term
13: After customized tooltip style for the tooltip term, then use the shortcod tooltip_by_id to display it in front end.
By this way, you can customize unique style for each tooltip shortcode, not only wordpress tooltip title, but also wordpress Tooltip Box Width, Tooltip Font Color, Tooltip Background, Tooltip Padding, Tooltip Position, Tooltip Radius, Tooltip Border, Tooltips Popup Animation … etc 🙂
For example:
[tooltip_by_id shortcode [tooltip_by_id tooltip_id='3107']
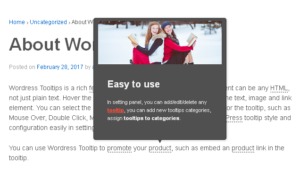
The result looks like this:
Tooltip For Forms Demo - Message Field



Leave a Reply