
Dear Users of WordPress Tooltips Plugin, We’re excited to share some great news with you 😊
A brand-new version of the WordPress Tooltips plugin is now available — and it comes with native Elementor tooltip support — WordPress Tooltips Pro Plus 36.3.8 and WordPress Tooltips Free 10.9.3
This update makes it easier than ever to create beautiful, helpful tooltips using Elementor’s visual editor — no shortcode knowledge required.
🚀 What’s New in This Version?
WordPress Tooltips Pro Plus Plugin 36.3.8, in this release, we introduced a new Elementor Tooltip widget that works seamlessly with the Elementor Free editor.
With the new widget, you can:
Add tooltips using drag & drop
Edit tooltip text visually
Create clean, user-friendly explanations
Build tooltips faster than ever before
Everything works directly inside Elementor — just like any other widget.
💡 Why We Built Elementor Tooltip Support
Many of our users told us:
“I love tooltips, but I want to build pages visually.”
“I use Elementor for everything.”
“Shortcodes work, but I prefer drag & drop.”
So we listened.
This update was designed to:
Reduce learning time for new WordPress users
Make tooltips easier to discover and use
Fit naturally into modern Elementor workflows
If you already use Elementor, this update will feel familiar and comfortable from the first click.
🧩 What Is the Elementor Tooltip Widget?
The new Elementor Tooltip widget allows you to:
Define trigger text (the text users hover over)
Add tooltip content (the message shown on hover)
Preview tooltips instantly inside the editor
Typical use cases include:
Explaining pricing table features
Adding help text to forms
Clarifying technical terms
Showing extra information without clutter
All without writing code.
🖱 How It Works (In Simple Terms)
Open a page with Edit with Elementor
Search for Tooltip in the widget panel
Drag the Tooltip widget onto your page
Enter your trigger text and tooltip content
Hover to preview — done 🎉
That’s it.
🆕 Still Supports Shortcodes (Nothing Breaks)
If you already use tooltips with shortcodes — don’t worry.
✔ Existing shortcodes continue to work
✔ No content changes required
✔ Elementor support is an additional option, not a replacement
You can now choose the method that fits your workflow best.
🌟 Designed for New WordPress Users
This update is especially helpful if you:
Are new to WordPress
Are learning Elementor
Prefer visual editing over shortcodes
Want cleaner, more readable pages
Our goal was simple:
Help you succeed with your first tooltip — fast.
📦 Elementor Free Compatible
Good news:
The Elementor Tooltip widget works with Elementor Free
No Pro version required
No extra extensions needed
Just update the plugin and start using it.
🔮 What’s Coming Next?
This Elementor integration opens the door for future improvements, such as:
More tooltip styles
Media tooltips (image, audio, video)
Better styling controls
More demo templates
We’ll continue improving based on your feedback.
🙏 Thank You for Your Support
Thank you for using WordPress Tooltips and for being part of our community.
We hope this new Elementor support makes your workflow smoother and your pages clearer.
If you haven’t tried it yet, update the plugin and create your first Elementor tooltip today 😊
Get the plugin today: Elementor Tooltip Plugin
How to Create Your First Pretty Tooltip in Elementor (Beginner’s Guide)
A simple, friendly guide for new WordPress users
If you are new to WordPress or Elementor, tooltips may sound technical — but they are actually one of the easiest and most useful features you can add to your website.
In this guide, you will learn:
What an Elementor tooltip is
Why tooltips make your website better
How to create your first beautiful tooltip step by step
Best practices for clean, user-friendly tooltips
No coding required. No experience needed.
1. What Is a Tooltip?
A tooltip is a small message that appears when a visitor:
Hovers over text
Moves the mouse over an icon
Focuses on a highlighted word
Instead of showing everything at once, a tooltip:
Keeps your page clean
Shows extra information only when needed
Helps visitors understand your content faster
Common examples:
Explaining a feature in a pricing table
Giving help text in a form
Clarifying technical words
Adding notes without clutter
2. Why Use Tooltips in Elementor?
Tooltips are especially useful when building pages with Elementor because they:
✅ Reduce visual clutter
✅ Improve readability
✅ Help beginners understand content
✅ Increase engagement
✅ Look professional and modern
Instead of long paragraphs, you let users discover information naturally.
3. What You Need Before Starting
Before creating your first tooltip, make sure:
✔ WordPress is installed
✔ Elementor (Free version) is installed and activated
✔ Your Tooltip widget or plugin is enabled
That’s it — no extra tools required.
4. Open Elementor Editor
Go to WordPress Admin
Open Pages → Add New (or edit an existing page)
Click Edit with Elementor
You will now see:
Left panel: Elementor widgets
Right side: Your page preview
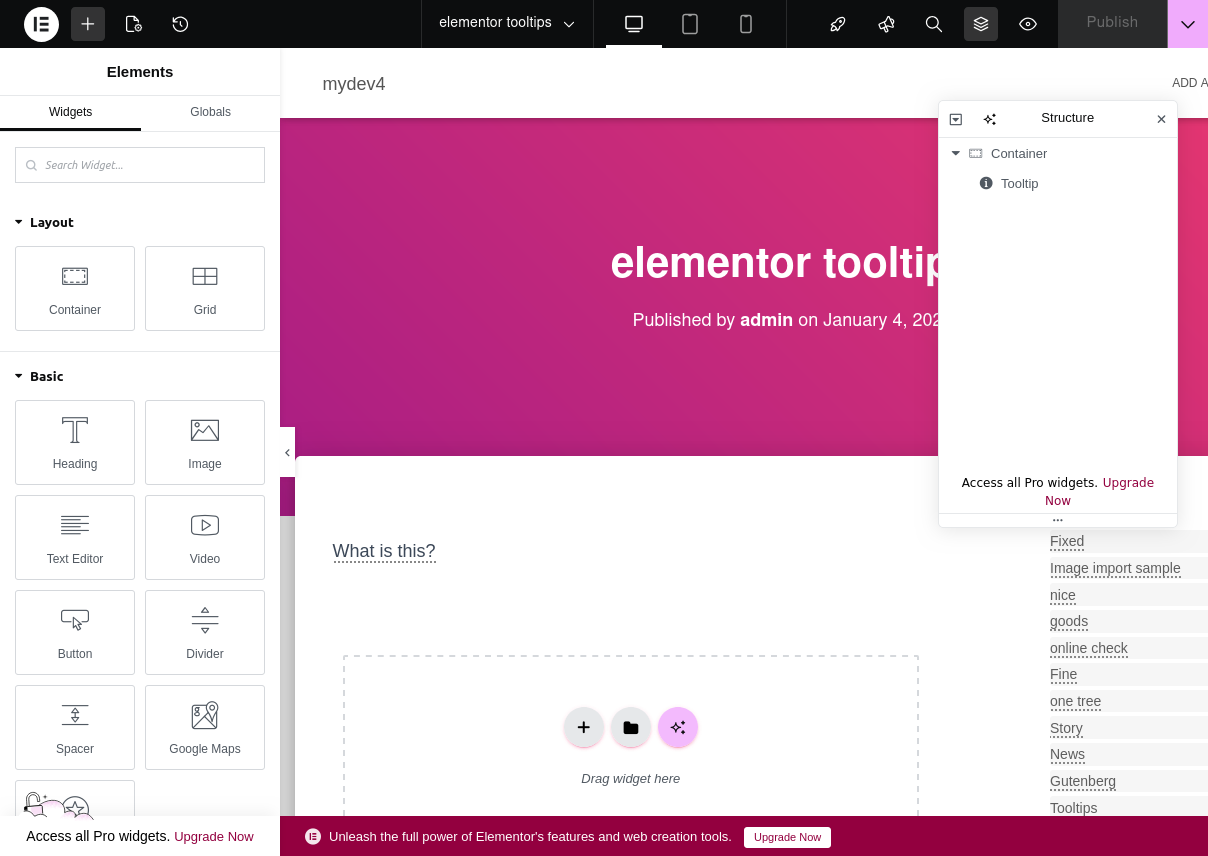
5. Add the Tooltip Widget to Your Page
In the Elementor widget panel (left side)
Search for “Tooltip”
Drag the Tooltip widget onto your page
You now have your first tooltip element 🎉

elementor tooltips widget in Elementor
As you can see, in the Elementor widgets panel, we added a new “Tooltip” Widget for wordpress tooltip users 🙂
6. Create Your First Tooltip (Step by Step)
Step 1: Set the Trigger Text
Trigger text is the text users hover over.
Example:
What is this?
This text will appear directly on your page.
Step 2: Add Tooltip Content
Tooltip content is the message shown on hover.
Example:
This tooltip provides extra information without cluttering the page.
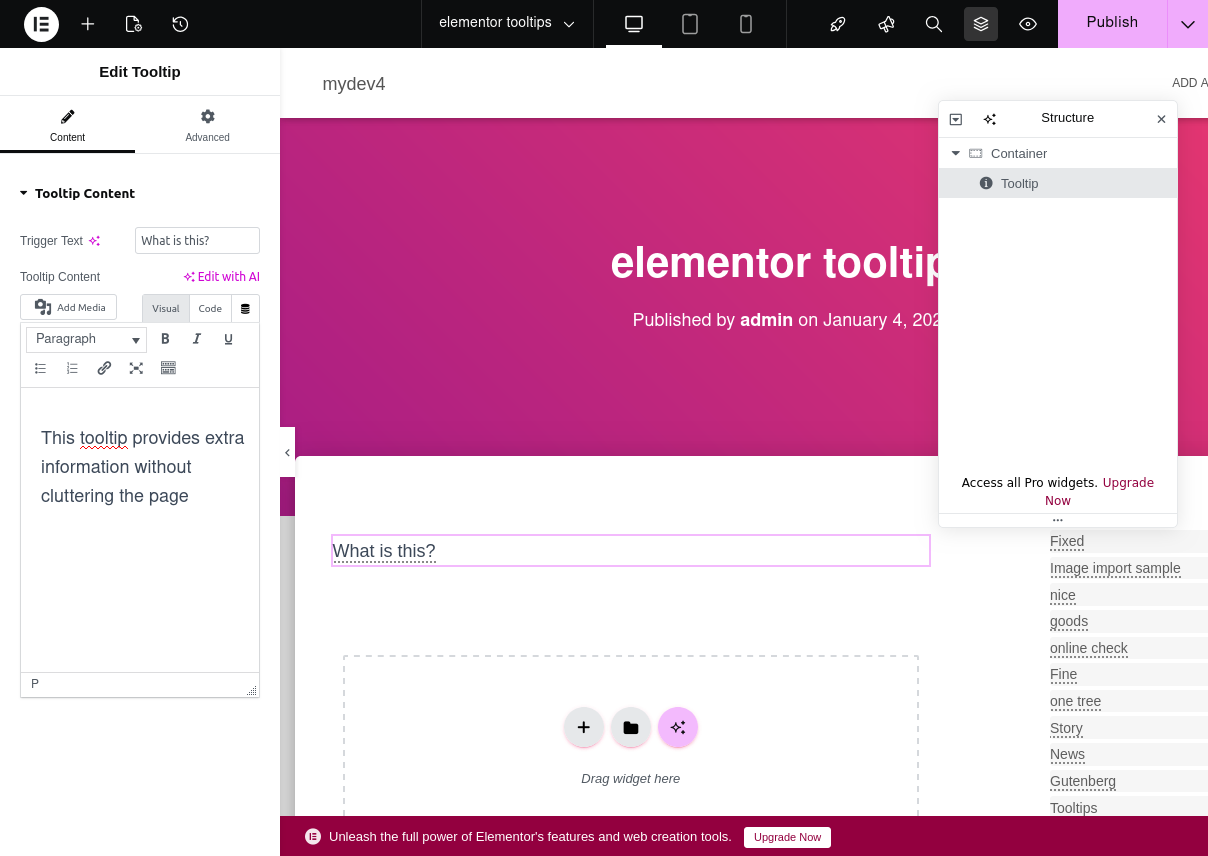
edit tooltips keyword and content in elementor widget in Elementor page builder
You can use it to explain features, clarify terms, or guide visitors.
Perfect for pricing tables, forms, and product descriptions.
Keep it:
Short
Friendly
Easy to read
added elementor tooltips widget in Elementor page builder
Step 3: Choose an Icon (Optional)
If your widget supports icons, a good beginner choice is:
Help icon
Info icon
These icons visually tell users:
“Hover here for more information”
7. Preview Your Tooltip
Hover your mouse over the trigger text
The tooltip appears instantly
Move the mouse away — the tooltip disappears
This is exactly how visitors will experience it.

elementor tooltips in front-end
8. Tips for Creating Pretty Tooltips
✔ Keep text short
Tooltips work best with 2–4 lines of text.
✔ Use friendly language
Avoid technical terms when possible.
✔ Don’t overload information
If content is long, use a normal section instead.
✔ Use tooltips only where helpful
Good places:
Pricing tables
Forms
Feature explanations
Documentation pages
9. Example Tooltip for Beginners (Recommended)
Trigger Text
What is this?
Tooltip Content
This tooltip provides extra information without cluttering the page.
You can use it to explain features, clarify terms, or guide visitors.
Perfect for pricing tables, forms, and product descriptions.
This example is:
Clear
Friendly
Suitable for any website
Great for demos and screenshots
10. Common Beginner Mistakes (Avoid These)
❌ Using very long paragraphs
❌ Explaining everything in one tooltip
❌ Hiding critical information inside tooltips
❌ Using too many tooltips on one page
Tooltips should help, not distract.
11. When Should You Use Tooltips?
Tooltips are perfect when:
You want to explain something optional
Not all users need the information
You want a cleaner design
If the information is essential for everyone, show it directly on the page.
12. You’re Done 🎉
You have successfully:
Created your first Elementor tooltip
Improved your page clarity
Made your content more user-friendly
Once you are comfortable, you can explore:
Media tooltips (image, audio, video)
Tooltips inside pricing tables
Tooltips for forms and documentation
Custom styles and animations
Final Tip for New WordPress Users
Start simple.
One good tooltip is better than ten confusing ones.
If visitors understand your page faster — you’re doing it right 😊


Leave a Reply